This article covers all methods for managing language packs in Microsoft Office, including manual and automated installation, as well as setting the default language. We will address Office 2019, 2016, and Microsoft 365 Apps for Business (formerly Office 365).
Configuring Language Settings in Microsoft Office
In Microsoft Office, you can configure language settings for the following components, each set independently:
– Editing Language
– Display Language
– Help Language
– Proofing Tools
Manually Installing and Setting the Microsoft Office Display Language
If Microsoft Office is already installed, you can manually download a language pack and set the preferred language.
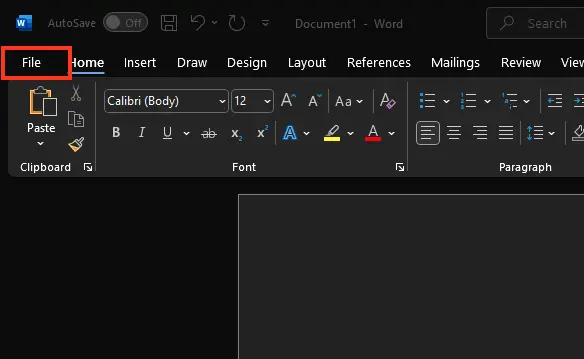
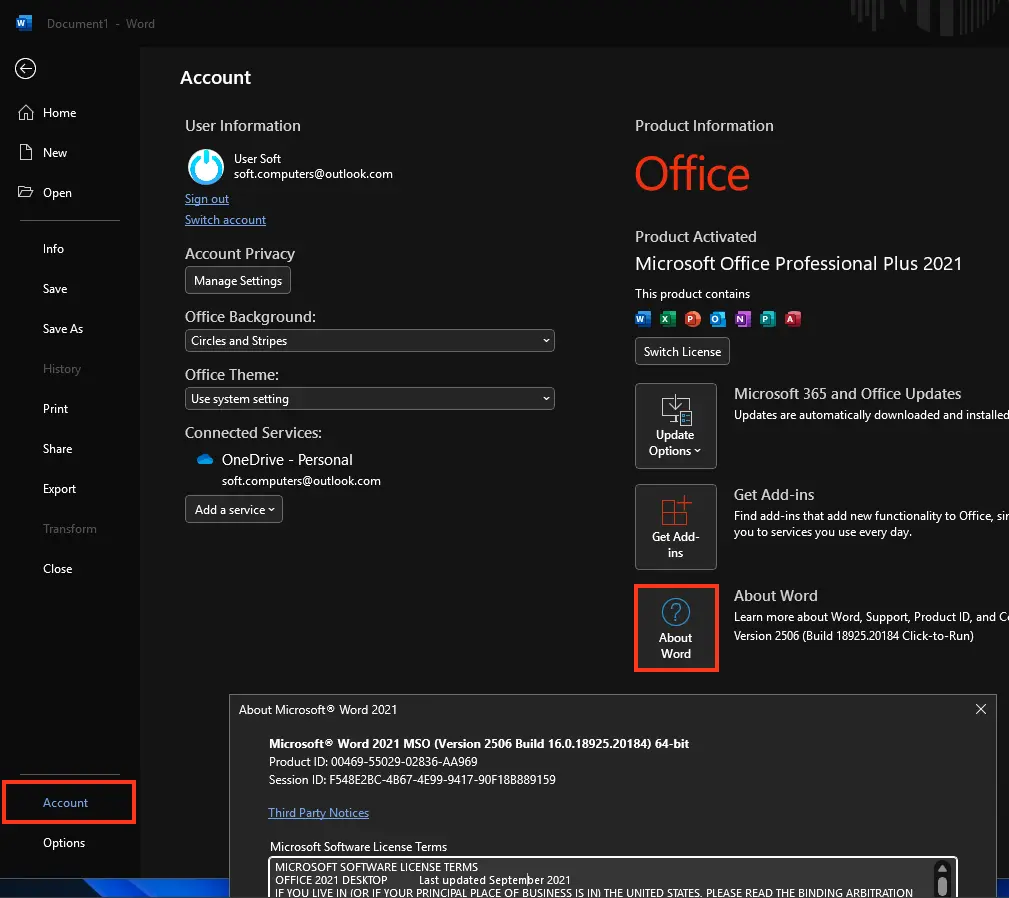
1. Open an Office application, such as Word, and check the version and bitness of your Office edition (File > Account > About).
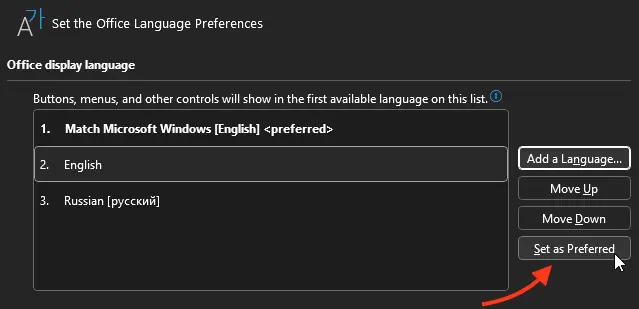
2. To install an additional language, go to File > Options.

3. Navigate to the Language section, select the desired language from the Add a languages list, and click Add.

4. Visit our article on language packs, select your Office version and the language to add, then download the appropriate language pack (32-bit or 64-bit).
5. Run the downloaded OfficeSetup.exe file. The installation runs in the background, downloading necessary files from Microsoft’s CDN.
6. After installation, set the language pack as the default in your Office application settings.
7. Restart Word and verify that the interface language has changed.
Installing Language Packs Using Office Deployment Tool
For modern versions of Microsoft Office 2021/2019/2016 and Microsoft 365 distributed via Click-to-Run (C2R) packages, you can use the Office Deployment Tool (ODT) to automate language pack installation.
For more details on the Office Deployment Tool (ODT), see our other article.
1. Download ODT and extract it to a local drive.
2. Create an add-language.xml file or download a pre-configured one from our server with the following settings:
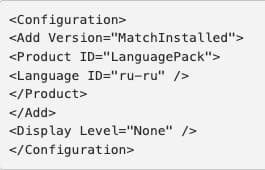
– Add Version="MatchInstalled" — Specifies that changes apply to the installed Office package.
– Language ID="ru-ru" — The language to install. Multiple languages can be specified.
3. Navigate to the ODT directory and run:
Setup.exe /configure add-language.xml
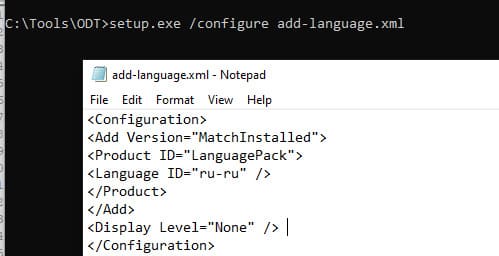
ODT will download and install the specified language pack for your version of Microsoft Office.
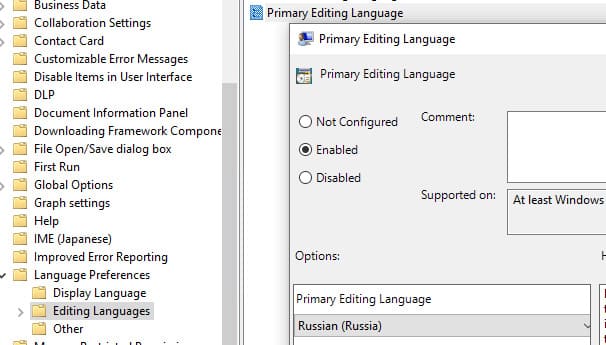
Configuring Microsoft Office Language Settings via GPO
You can also manage Microsoft Office language settings using Group Policy (GPO).
1. In an Active Directory domain, download the ADMX templates for Microsoft Office and copy them to the Central Store for GPO.
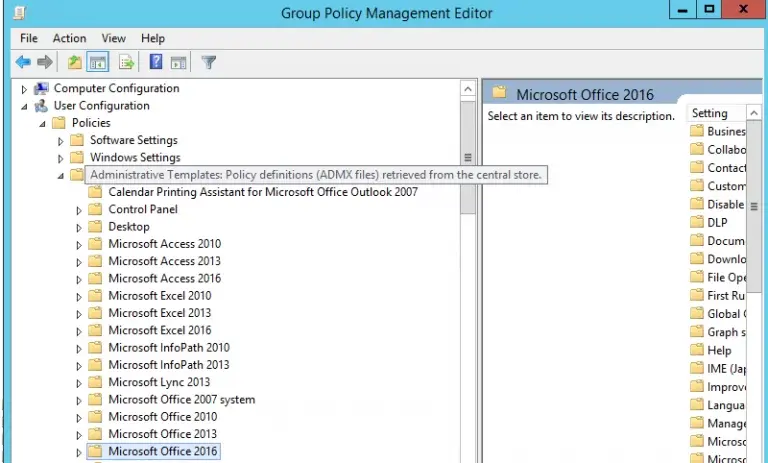
2. Using the Group Policy Management Console (gpmc.msc), create a GPO and link it to the target Organizational Unit (OU) containing users.
3. Navigate to User Configuration > Administrative Templates > Microsoft Office 2016 > Language Settings.
4. In the Display Language section, set the default language in the Display menus and dialog boxes in policy.
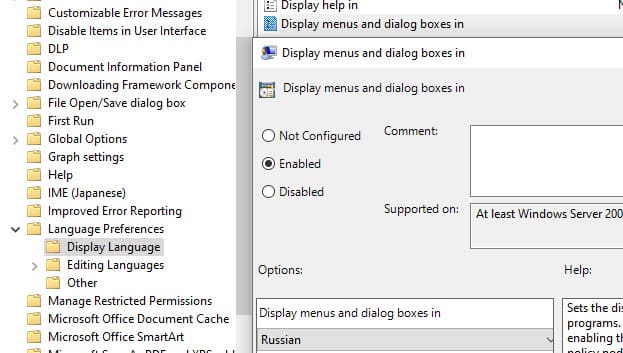
5. In the Editing Language section, set the primary editing language in the Primary Editing Language policy.
After updating GPO settings on client computers, verify that the Microsoft Office interface uses the assigned default language.
Managing language settings in Microsoft Office can be done manually or through automated tools like the Office Deployment Tool and GPO. These methods provide flexible configuration and management of language settings for individual computers and corporate environments.