In this article, we will discuss the RDP Wrapper application, which is an alternative to the Remote Desktop Services in Windows. It will help bypass the limitations set by Microsoft and implement a full-fledged remote desktop server in any version of Windows, including home editions. We will look at how to install and configure RDP Wrapper, as well as how to add users for access to the remote desktop.
Features of RDP Wrapper:
– Full-fledged RDP server (absent in home editions of Windows);
– Ability for multiple users to work simultaneously via remote desktop;
– Support for multi-monitor setups.
Legality of Using the Application
Using this application is controversial from a legality standpoint, so use it at your own risk.
You can download the application from the official GitHub repository. Both MSI installer and zip archive are available.
You can directly download the MSI installer from our server.
Installation and Configuration
An MSI file and a zip archive are available for installation. We will cover the installation of the application from the zip archive.
1. Download and Extract the Archive. After extraction, the following files should appear:
– install.bat — installation of RDP Wrapper;
– RDPCheck.exe — checking the functionality of the remote desktop server;
– RDPConf.exe — configuring RDP Wrapper;
– RDPWInst.exe — installation of RDP Wrapper;
– uninstall.bat — removal of RDP Wrapper;
– update.bat — updating RDP Wrapper from the internet.
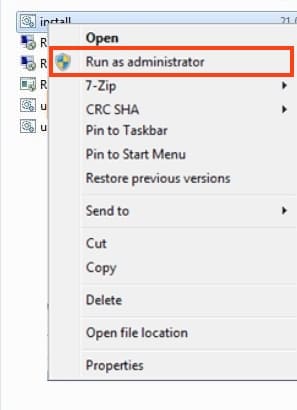
2. Run the install.bat File with administrator privileges.
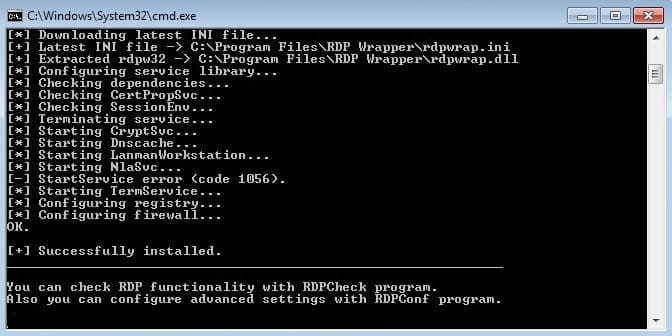
A black command prompt window will appear, and upon successful installation, there will be a message Successfully installed. To close the window, press any key.
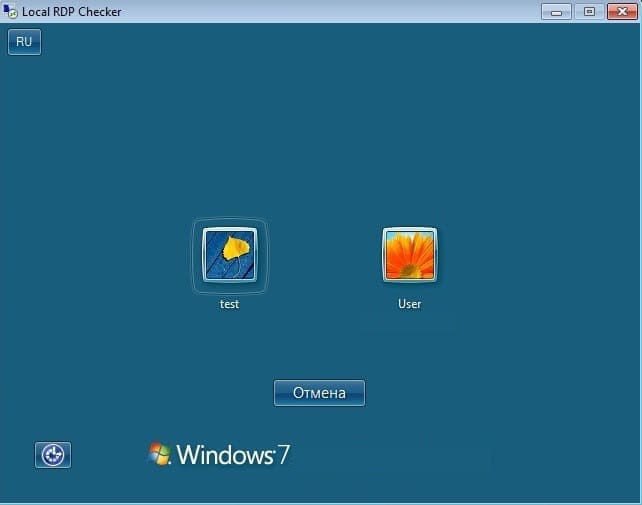
3. Check Remote Desktop Functionality. Launch the utility RDPCheck.exe to verify the connection to the local remote desktop server.
Configuring Users for Remote Desktop Access
By default, only users who are members of the “Administrators” group have access to the remote desktop. To allow a user without administrative rights to access the remote desktop, you need to add them to the “Remote Desktop Users” group.

However, in home editions of Windows, this group does not exist, but you can fix this by using the registry editor with system privileges.
1. Download the PsTools utility, available from the Microsoft website. You can also directly download PsTools from our server.
2. Download the archive with the required reg file.
3. Extract the PsTools archive and use the PsExec.exe file to launch the registry editor as the system.
4. Open the command prompt with administrator privileges and enter the command to launch the registry editor:
C:\Users\User\Desktop\PsExec.exe -s -i regedit
5. Import the reg file. In the opened registry editor, go to the “File” menu — “Import”, and select the downloaded registry file. A message will appear stating that the values have been successfully added to the registry.
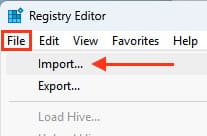
If everything went well, a corresponding message will appear – The sections and values contained in RemoteDesktopUsersGroup have been successfully added to the registry.

6. Add the User to the Remote Desktop Users Group:
Execute the following command in the command prompt (with administrator privileges):
net localgroup "Remote Desktop Users" [USER] /add
where [USER] is the name of the user in the system.
After performing these steps, the user will be able to connect to the remote desktop.


