This article provides a detailed guide on installing and binding a free TLS/SSL certificate from Let’s Encrypt on an IIS web server running on Windows Server 2019/2016/2012 R2. We will also cover the use of Let’s Encrypt for Remote Desktop Services (RDS). The article outlines the steps for installation, certificate configuration, and automation of certificate renewals. Screenshots accompany the text for clarity.
You can purchase original product keys from our catalog:
Windows Server 2019 – from 16.90 €
Windows Server 2016 – from 11.50 €
Windows Server 2012 R2 – from 11.90 €
Let’s Encrypt and ACME Clients for Windows
A TLS/SSL certificate secures user data transmitted over the network, preventing man-in-the-middle attacks and ensuring data integrity. Let’s Encrypt is a non-profit certificate authority that issues free TLS X.509 certificates via an API for HTTPS connection encryption. Certificates are issued only for domain validation and are valid for 90 days (with a limit of 50 certificates per domain per week). However, certificates can be automatically renewed on a schedule.
For automated certificate issuance, the Automated Certificate Management Environment (ACME) API is used. The three most popular ACME clients for Windows are:
Windows ACME Simple (WACS) — a console utility for issuing certificates and binding them to an IIS site;
Powershell ACMESharp — a library for interacting with the ACME API via PowerShell commands;
Certify — a graphical interface for managing certificates through the ACME API.
Using the WACS Client to Install a Let’s Encrypt TLS Certificate in IIS on Windows Server
The easiest way to obtain a Let’s Encrypt certificate is by using the Windows ACME Simple (WACS) utility. This tool provides a step-by-step wizard that allows you to select an IIS site and automatically issue an SSL certificate for it.
Installation Steps:
1. Assume you already have an IIS site running on Windows Server 2016. Your goal is to switch the site to HTTPS by installing a Let’s Encrypt certificate.
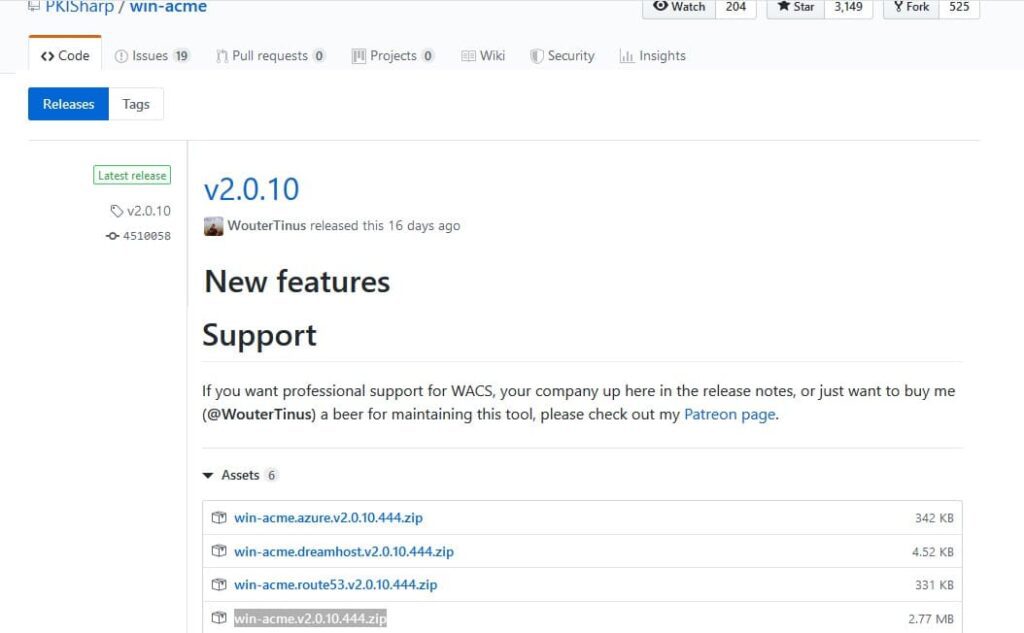
2. Download the latest version of WACS from GitHub (e.g., win-acme.v2.0.10.444.zip).
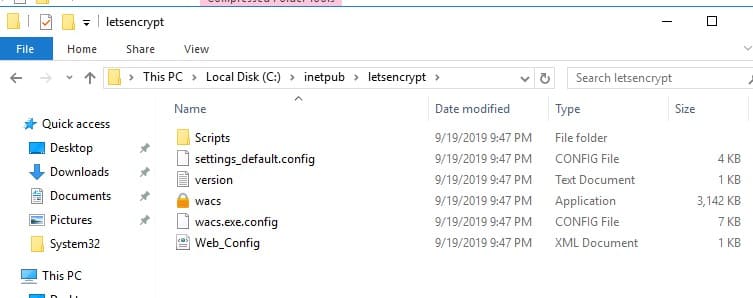
3. Extract the archive to a folder on the server, e.g., c:\inetpub\letsencrypt.
4. Ensure that .NET Framework version 4.7.2 or higher is installed on the server.
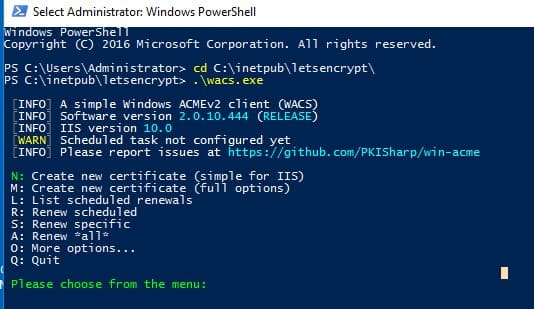
5. Open a command prompt with administrative privileges, navigate to the c:\inetpub\letsencrypt folder, and run wacs.exe.
The certificate generation wizard will start. To quickly create a new certificate, select N: — Create new certificates (simple for IIS).
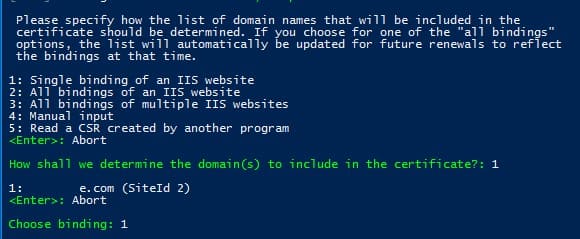
Select 1. Single binding of an IIS site if you don’t need a certificate with aliases (SAN). For a Wildcard certificate, choose option 3.
The utility will display a list of sites running on the IIS server and prompt you to select the site for which to create and bind a new SSL certificate.
Enter your email address to receive notifications about certificate renewal issues and other updates (you can specify multiple emails separated by commas). Next, agree to the terms of use, and Windows ACME Simple will connect to Let’s Encrypt servers and attempt to automatically generate a new SSL certificate for your site.

The process of generating and installing the Let’s Encrypt SSL certificate for IIS is fully automated.
By default, domain validation is performed using http-01 validation (SelfHosting). For this, your domain must have a DNS record pointing to your web server. When running WACS in manual mode, you can select validation type — 4 [http-01] Create temporary application in IIS (recommended). In this case, a small application will be created on the IIS web server through which Let’s Encrypt servers can perform validation.
Note: For TLS/HTTP validation, your site must be externally accessible by its full DNS name via HTTP (80/TCP) and HTTPS (443/TCP) protocols.
The WACS utility saves the certificate’s private key (*.pem), the certificate itself, and other files in the directory C:\Users\%username%\AppData\Roaming\letsencrypt-win-simple. It then installs the generated Let’s Encrypt SSL certificate in the background and binds it to your IIS site. If an existing SSL certificate (e.g., self-signed) is already installed on the site, it will be replaced with the new one.
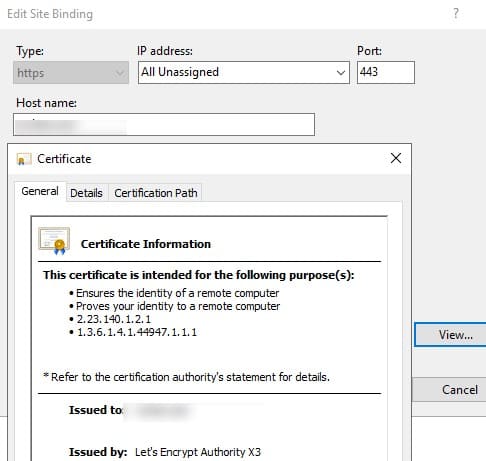
In IIS Manager, open the Site Binding menu for your site and verify that it uses a certificate issued by Let’s Encrypt Authority X3.
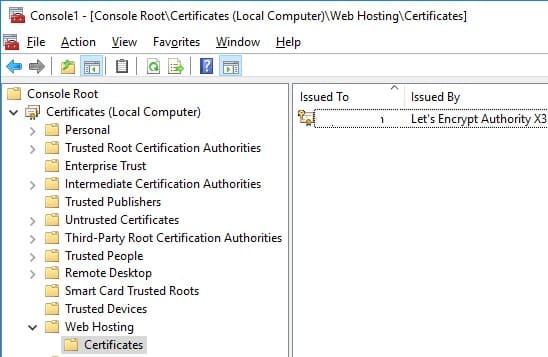
In the computer’s certificate store, you can find the Let’s Encrypt certificate for IIS in the Web Hosting -> Certificates section.
Automating Certificate Renewal and Configuring Redirects
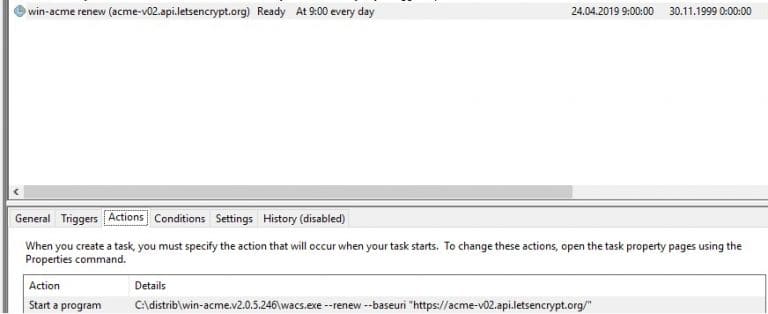
After installing the certificate, a task will appear in the Windows Task Scheduler to automatically renew the certificate every 60 days. The command to manually renew the certificate is:
C:\inetpub\letsencrypt\wacs.exe --renew --baseuri "https://acme-v02.api.letsencrypt.org"

To configure HTTP traffic redirection to HTTPS, install the Microsoft URL Rewrite Module. Then, add the following code to the web.config file:
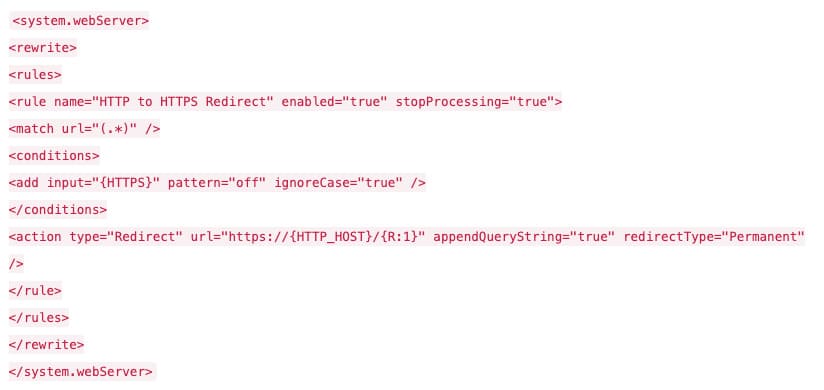
Download this code separately.
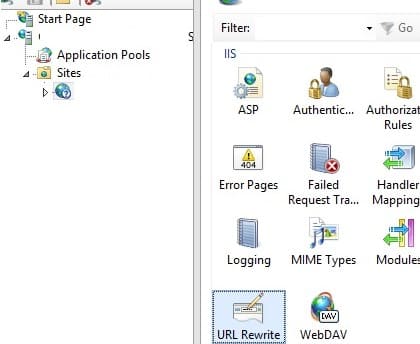
You can also configure traffic redirection using the URL Rewrite module through the IIS Manager graphical interface. Select Sites -> yoursitename -> URL Rewrite.
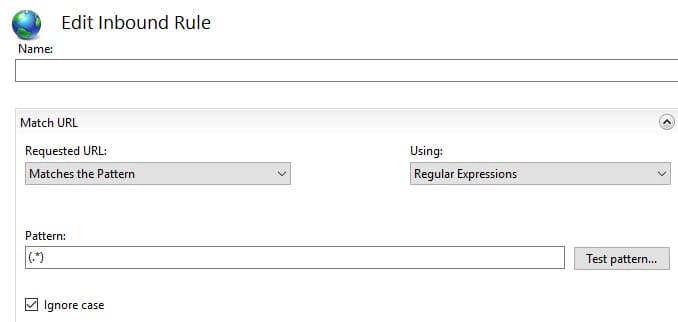
Create a new rule: Add Rule => Blank rule.
Specify the rule name and modify the parameter values:
– Requested URL => Matches the Pattern
– Using => Regular Expressions
– Pattern => (.*)
In the Conditions block, set Logical Grouping -> Match All and click Add. Specify:
– Condition input => {HTTPS}
– Check if input string => Matches the Pattern
– Pattern => ^OFF$
In the Action block, select:
– Action Type => Redirect
– Redirect URL => https://{HTTP_HOST}/{R:1}
– Redirect type => Permanent (301)
Open a browser and try accessing your site via an HTTP address; you should be automatically redirected to the HTTPS URL.
Using Let’s Encrypt Certificates for Remote Desktop Services
To configure Let’s Encrypt SSL certificates for Remote Desktop Services (RDS), follow steps similar to those for IIS. Using WACS, you can issue a certificate and bind it to the RDS Gateway. For automating the certificate binding process, use the PowerShell script ImportRDGateway.ps1 (the main drawback of this script is that you must manually specify the thumbprint of the new certificate), or its modified version ImportRDGateway_Cert_From_IIS.ps1, which automatically updates the certificate after renewal.
To automate certificate binding, download the script ImportRDGateway_Cert_From_IIS.ps1 and run it:
powershell -File ImportRDGateway_Cert_From_IIS.ps1
If your RDS Gateway is hosted on the default IIS site “Default Web Site” with index 0, you can use the script without modifications.
To obtain the IIS site ID, open a PowerShell console and run:
Import-Module WebAdministration
Get-ChildItem IIS:Sites
You will get a list like this:
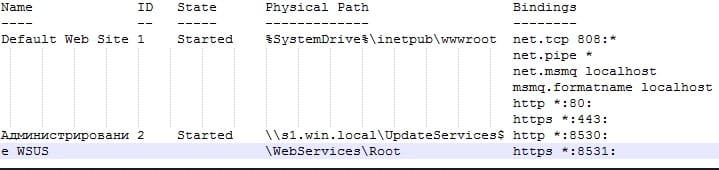
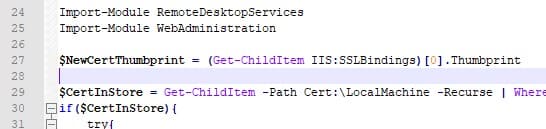
The ID column shows the index of your site; subtract 1 from it. Use the resulting index in place of 0 in line 27 of the PowerShell script:
$NewCertThumbprint = (Get-ChildItem IIS:SSLBindings)[0].Thumbprint
Now, open the win-acme-renew (acme-v02.api.letsencrypt.org) task in Task Scheduler and, on the Action tab, add a new task to run the ImportRDGateway_Cert_From_IIS.ps1 script after certificate renewal.
To avoid modifying PowerShell script execution permissions, you can run the script with the command:
The SSL certificate binding script for RDS will now run immediately after the Let’s Encrypt certificate renewal. It also automatically restarts the RD Gateway service with the command:
Restart-Service TSGateway
Restarting the TSGateway service disconnects all current user sessions, so it’s advisable to set the certificate renewal task to run once every 60 days.
You can also use free Let’s Encrypt certificates on Linux for websites on Nginx or Apache. Let’s Encrypt certificates are widely used on major companies’ websites and are trusted by all browsers. Your site or RDS service is now secured with a valid Let’s Encrypt certificate.