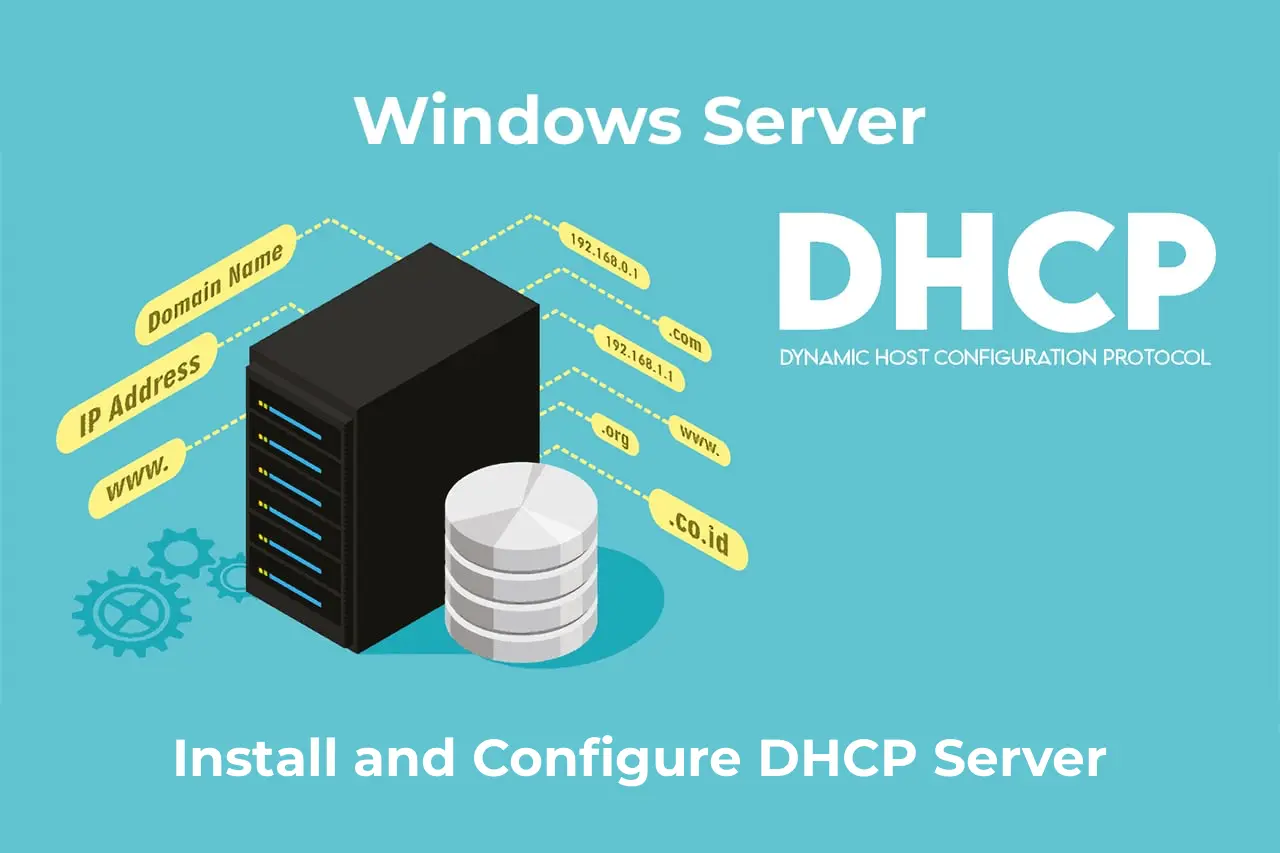
This article provides a comprehensive guide on installing and configuring a DHCP server on Windows Server 2019. We’ll cover the detailed process of installing the DHCP role, creating and configuring scopes, and reserving static IP addresses. The setup will be demonstrated using both the graphical console and PowerShell. The DHCP (Dynamic Host Configuration Protocol) is used to automatically assign network parameters such as IP addresses, subnet masks, gateways, and DNS servers. DHCP enables centralized management of network device settings and prevents IP address conflicts.
This guide is applicable to Windows Server 2012 R2, Windows Server 2016, Windows Server 2019, and Windows Server 2022.
Purchase Windows Server from our store starting at 10.80 €.
Download original Windows Server installers from our catalog.
First, let’s install the DHCP role on a Windows Server 2019 instance. In this example, the server will have a static IP address of 192.168.13.4. It’s critical to use a static IP for a DHCP server to avoid issues when assigning addresses to clients.
The installation can be performed via the graphical console or PowerShell. The server must have a static IP address prior to installing the DHCP role, or you’ll encounter this warning:
WARNING: The following recommended condition is not met for DHCP: No static IP addresses were found on this computer.
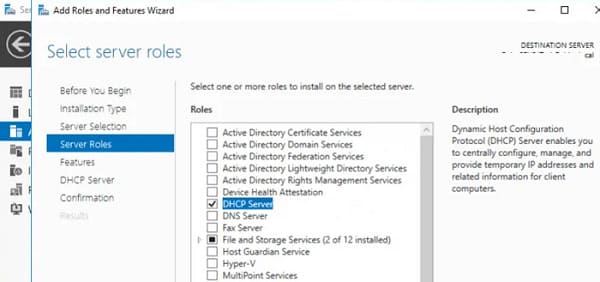
1. Open Server Manager, navigate to Add Roles and Features, and select DHCP Server from the list of roles.
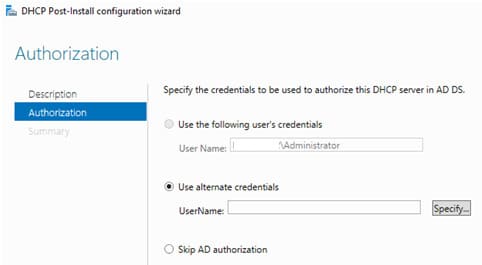
2. After installation, complete the Post-Deployment Configuration—click the notification and select Complete DHCP configuration.

3. On the authorization screen, grant permissions to an account to authorize the server in Active Directory.
If you lack permissions to authorize DHCP in AD, you can configure the DHCP server to start without domain authorization checks:
Set-ItemProperty -Path "HKLM:\SYSTEM\CurrentControlSet\Services\DHCPServer\Parameters" -Name DisableRogueDetection -Value 1 -Force
4. Install the role via PowerShell with:
Install-WindowsFeature DHCP –IncludeManagementTools
5. Verify the role is installed correctly:
Get-WindowsFeature -Name *DHCP* | Where Installed

6. Authorize the DHCP server in Active Directory (specify the server’s DNS name and IP address for DHCP clients):
Add-DhcpServerInDC -DnsName hq-dc01.contoso.com -IPAddress 192.168.13.4
7. Create local DHCP security groups:
Add-DhcpServerSecurityGroup
8. Finalize the role configuration with:
Set-ItemProperty -Path HKLM:\SOFTWARE\Microsoft\ServerManager\Roles\12 -Name ConfigurationState -Value 2
9. Restart the DHCP service:
Restart-Service -Name DHCPServer -Force
The DHCP server database and logs are stored by default in %systemroot%\system32\dhcp. Key files include:
– dhcp.mdb — DHCP database file;
– j50.log — Transaction log;
– j50.chk — Checkpoint file;
– tmp.edb — Temporary working file.
After installing the DHCP role, you need to create one or more scopes. A scope defines the range of IP addresses the server will assign to clients, along with other network settings.
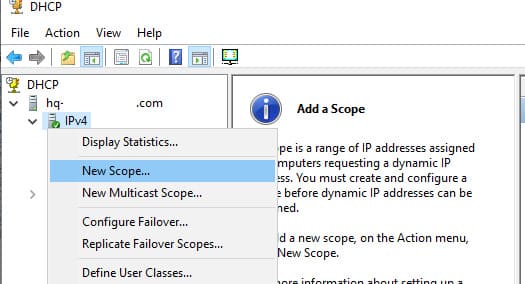
1. Open the dhcpmgmt.msc console, expand the server, and select IPv4.
2. Right-click and choose New Scope.
3. Specify a scope name, e.g., CentralOffice.
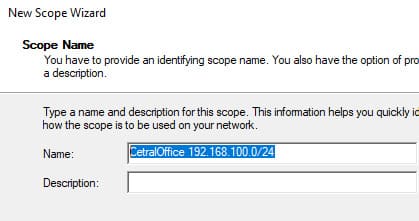
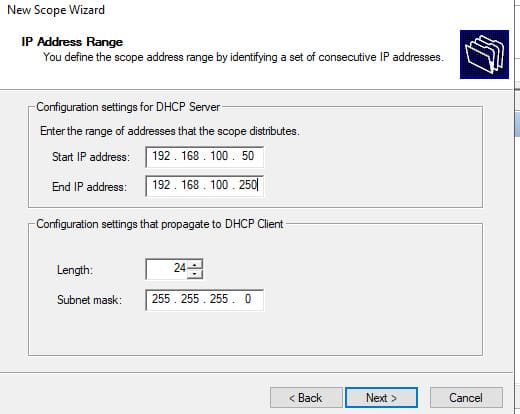
4. Set the IP address range. For example, for the 192.168.100.0/24 network, specify 192.168.100.50 – 192.168.100.250.
5. Define exclusions if needed, e.g., exclude 192.168.100.1 – 192.168.100.10 to prevent assignment.
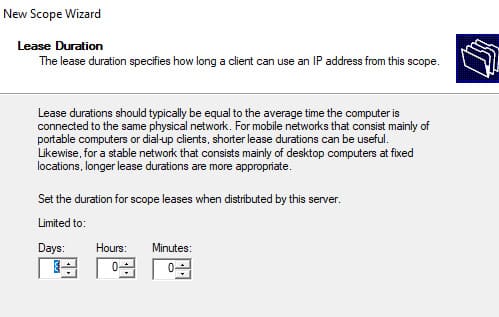
6. Set the IP address lease duration (default is 8 days).
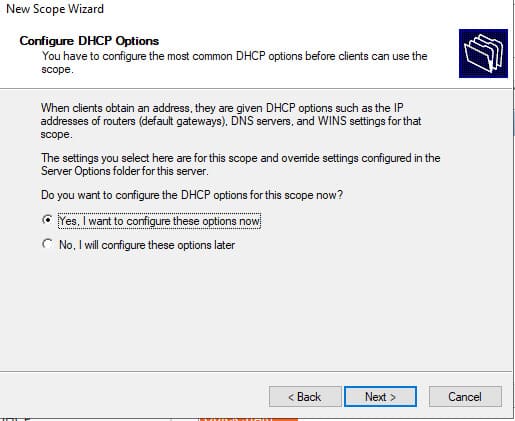
7. Indicate that you want to configure additional DHCP scope options.
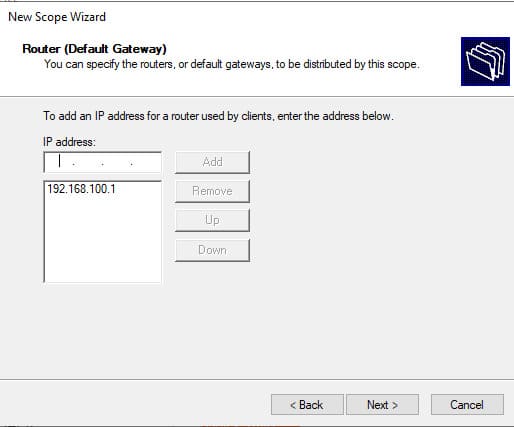
8. Specify the gateway IP address for clients (e.g., 192.168.100.1).
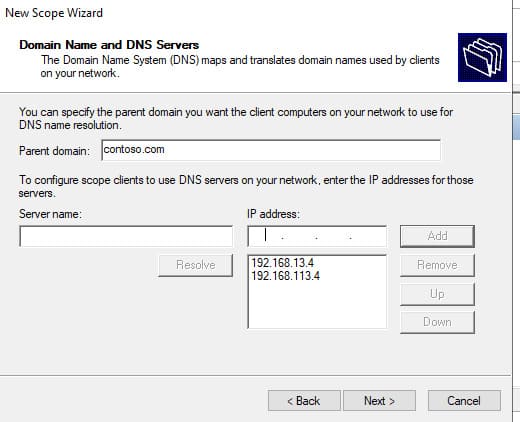
9. Define the domain name and DNS server addresses for DHCP clients.
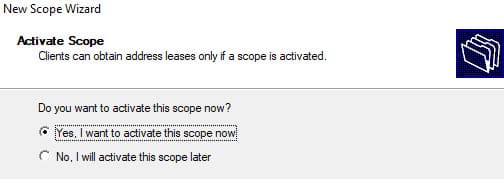
10. Activate the scope upon completion.
The DHCP server can assign various options, such as:
– 003 Router — Gateway;
– 006 DNS Server — DNS servers;
– 015 DNS Domain Name — Domain.
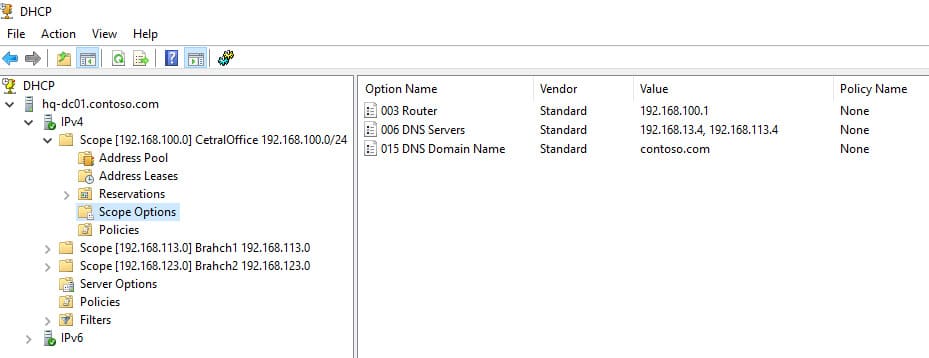
These options can be configured per scope (Scope Options) or globally for the server (Server Options). Global settings apply to all scopes but can be overridden individually.
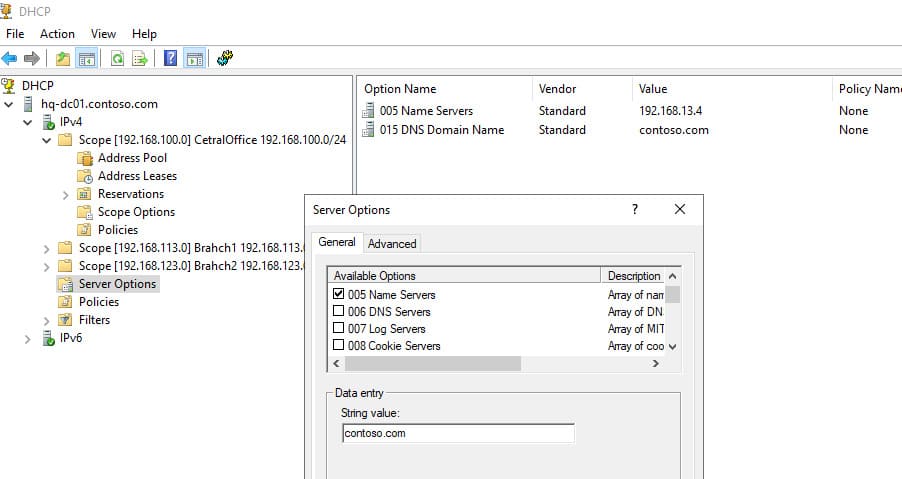
By default, the DHCP server assigns dynamic addresses, but you can reserve static IPs for specific devices, such as network printers requiring consistent addresses.
1. Open the DHCP console and navigate to Reservations.
2. Select New Reservation.
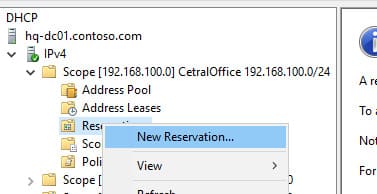
3. Enter the IP address, MAC address, and device name.
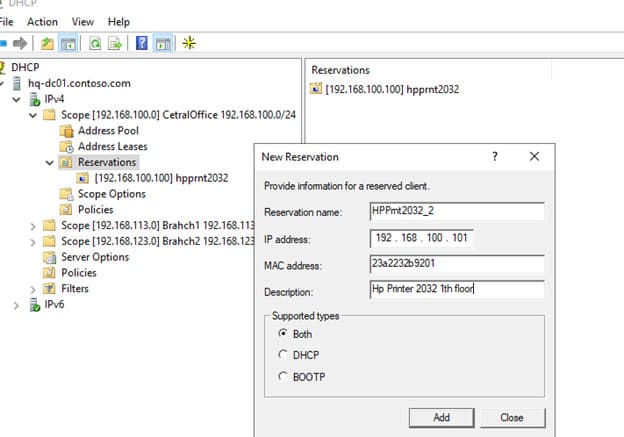
Find a device’s MAC address using:
ipconfig /all
Or via PowerShell:
Get-NetAdapter | Select-Object Name, MacAddress
4. To reserve an existing dynamic address, locate it in Address Leases and select Add to Reservation.
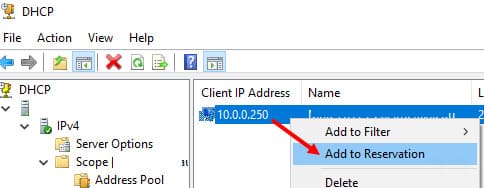
All DHCP server settings can be managed through PowerShell using the DHCPServer module. First, import the module:
Import-Module DHCPServer
1. List available commands:
Get-Command -Module DHCPServer

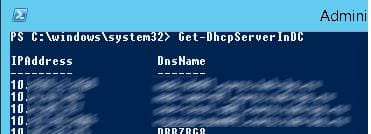
– List authorized DHCP servers in Active Directory:
Get-DhcpServerInDC
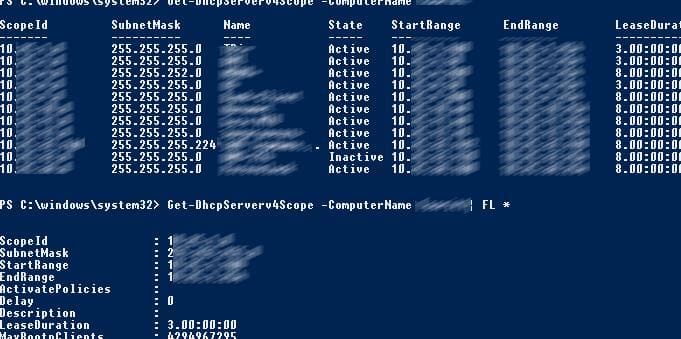
– Display DHCP scopes on a specified server:
Get-DhcpServerv4Scope –ComputerName msk-dhcp1– Show all scope details (Delay, Description, Name, etc.):
Get-DhcpServerv4Scope –ComputerName msk-dhcp1 | FL *
– Retrieve IPv6 scope data:
Get-DHCPServerv6Scope– Get settings for a specific scope:
Get-DhcpServerv4Scope –ComputerName msk-dhcp1 –ScopeID 10.10.1.0
2. Create a new scope:
Add-DhcpServerv4Scope -Name “Branch1 192.168.113.0” -StartRange 192.168.113.50 -EndRange 192.168.113.250 -SubnetMask 255.255.255.0 -State InActive
3. Configure DHCP server options (DNS server, domain, and default gateway):
Set-DhcpServerv4OptionValue -ScopeID 192.168.113.0 -DnsDomain contoso.com -DnsServer 192.168.13.4 -Router 192.168.113.1
4. Add exclusions:
Add-DhcpServerv4ExclusionRange -ScopeID 192.168.113.0 -StartRange 192.168.113.90 -EndRange 192.168.113.100
5. Activate the scope:
Set-DhcpServerv4Scope -ScopeID 192.168.113.0 -State Active

For convenience, use a hash table for arguments:
$HashArgs = @{

'Name' = 'EKB Office Scope';

'Description' = 'workstations';

'StartRange' = '192.168.140.10';

'EndRange' = '192.168.140.200';

'SubnetMask' = '255.255.255.0';

'State' = 'Active';

'LeaseDuration' = '1.00:00:00';

}

Add-DhcpServerv4Scope @HashArgs
Add DHCP server options (e.g., WPAD):
Add-DhcpServerv4OptionDefinition -ComputerName msk-dhcp1 -Name WPAD -OptionId 252 -Type StringList configured DHCP server options:
Get-DHCPServerv4OptionValue -ComputerName msk-dhcp1 | Format-ListList scope-specific options:
Get-DHCPServerv4OptionValue -ComputerName msk-dhcp1 -ScopeId 10.10.1.0 | Format-ListDisplay current leased addresses for scope 10.10.1.0:
Get-DHCPServerv4Lease -ScopeId 10.10.1.0 -ComputerName msk-dhcp1
Create a DHCP reservation for a client with dynamic IP 10.10.1.88 (convert to reserved):
Get-DhcpServerv4Lease -ComputerName msk-dhcp1 -IPAddress 10.10.1.88 | Add-DhcpServerv4Reservation -ComputerName msk-dhcp1Bulk reserve IP addresses from a CSV file. Create a file in this format:
ScopeId,IPAddress,Name,ClientId,Description

10.10.1.0,10.10.1.88,Client1,ba-ab-5c-3d-4e-6f,Reservation PC-msk-s1

10.10.1.0,10.10.1.89,Client2,ba-ab-5c-5d-2e-3f,Reservation PC-msk-s2
Save it as c:\dhcp\DHCPReservations.csv and run:
Import-Csv –Path c:\dhcp\DHCPReservations.csv | Add-DhcpServerv4Reservation -ComputerName msk-dhcp1Disable a scope:
Set-DhcpServerv4Scope -ComputerName msk-dhcp1 -ScopeId 10.10.1.0 -State InActiveDelete a scope:
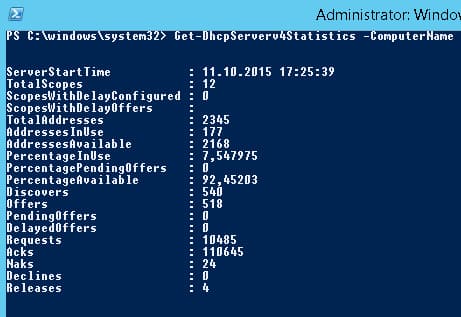
Remove-DHCPServerv4Scope -ComputerName msk-dhcp1 -ScopeId 10.10.1.0 -ForceRetrieve DHCP server statistics (scopes, reservations, address usage, etc.):
Get-DhcpServerv4Statistics -ComputerName msk-dhcp1
To back up the DHCP configuration to an XML file, use:
Export-DhcpServer -ComputerName msk-dhcp1 -File C:\dhcp\dhcp-export.xml
To import these settings to another DHCP server:
Import-DhcpServer -ComputerName msk-dhcp2 -File C:\dhcp\dhcp-export.xml -BackupPath C:\dhcpbackup\
Configuring a DHCP server on Windows Server 2019 automates IP address management and simplifies centralized control of network devices. We’ve covered installation and configuration via the GUI and PowerShell, offering flexible server management options.


