This article explains how to transfer Windows 10, 8, or 7 from one drive to another (e.g., from HDD to SSD) using Acronis True Image. This software is often provided for free with drives from well-known manufacturers like Western Digital (WD) or SanDisk, making disk cloning straightforward.
Why Acronis True Image?
Acronis True Image is provided free with certain drives from major manufacturers. For example, Acronis True Image WD Edition is available for users with WD or SanDisk drives. If you have a Kingston SSD, the software is also provided with an product key.
Step 1: Preparing and Launching Acronis True Image
After downloading and installing Acronis True Image (e.g., WD Edition), the program will automatically detect a compatible WD or SanDisk drive and allow you to start working. If the drive is not initialized, the program may not launch, and you will need to initialize the drive using the Disk Management utility.
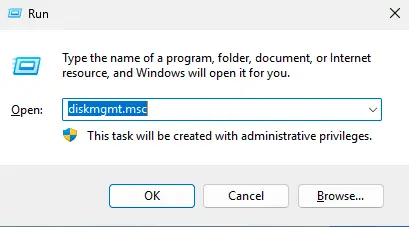
Press Win + R, type diskmgmt.msc, and the Disk Management window will open.
Select the uninitialized disk, right-click, and choose Initialize Disk.
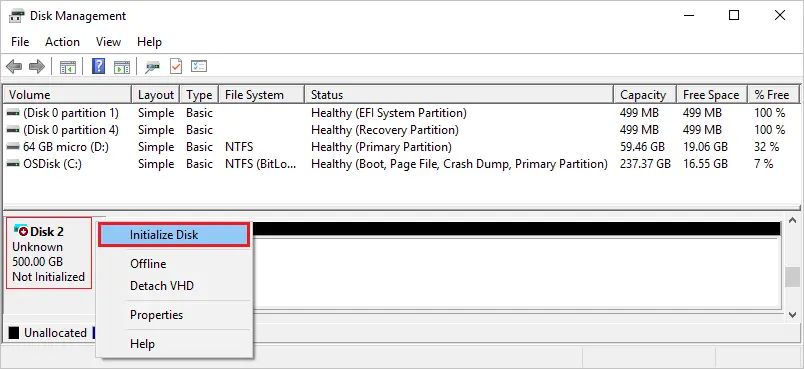
After initialization, restart Acronis, and the program will recognize your disk.
Step 2: Cloning the Disk
1. Open the program and navigate to the Tools section.
2. Select the Clone Disk option.

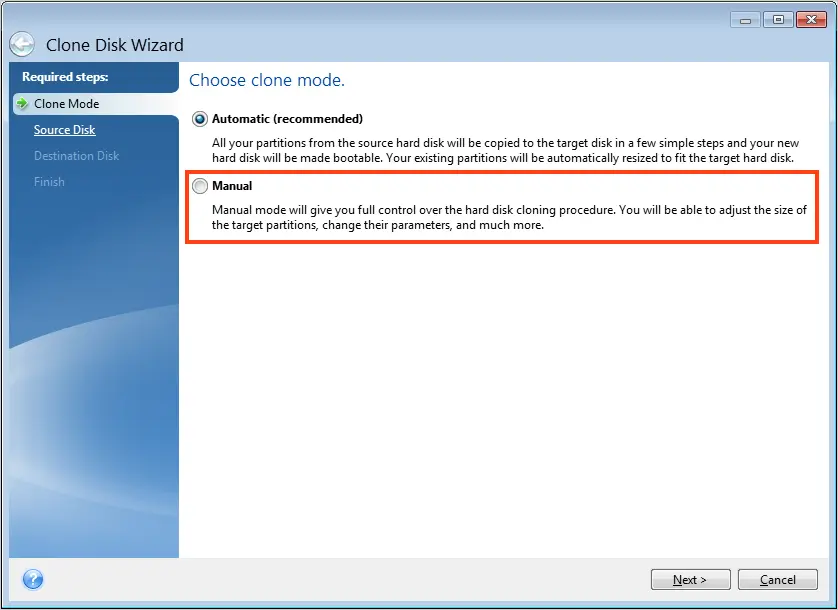
3. You will be offered two cloning options:
– Automatic: The program automatically adjusts the source disk’s size to fit the target disk.
– Manual: This method allows you to configure partition parameters and sizes on the target disk manually.
Choose the method that suits you. For most users, the automatic option, which adjusts partition sizes automatically, is sufficient. In this example, we will choose Manual.
Step 3: Configuring the Cloning Process
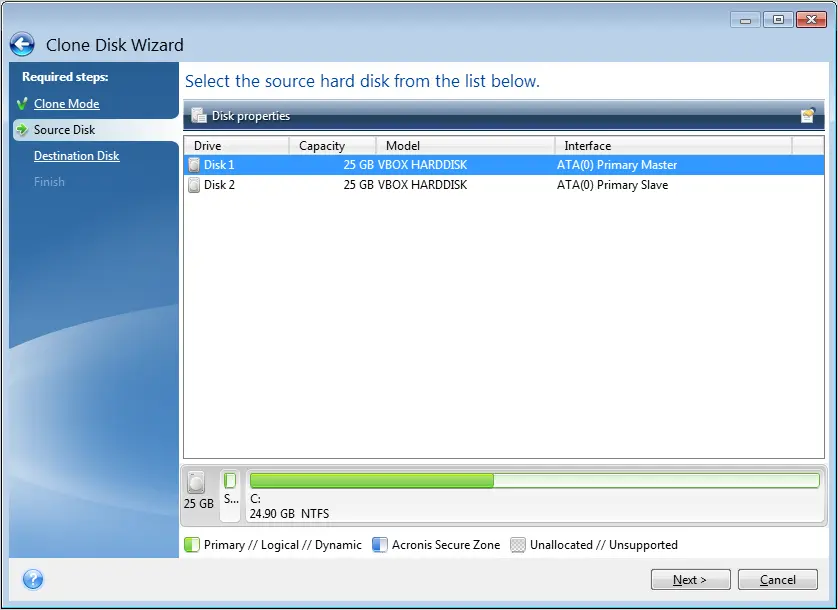
1. Select the source disk (the disk you want to clone from).
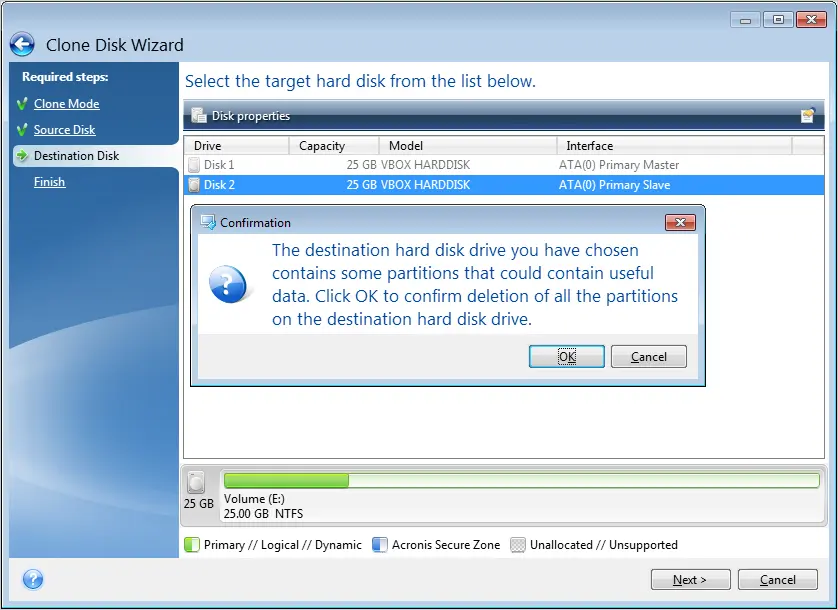
2. Select the target disk (the disk to which the system will be cloned). Note that all data on the target disk will be erased.
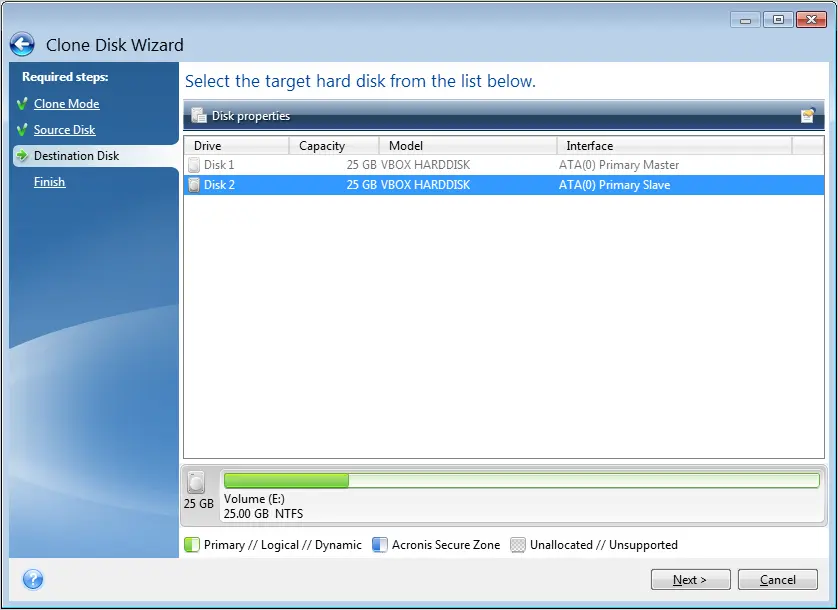
Click OK.
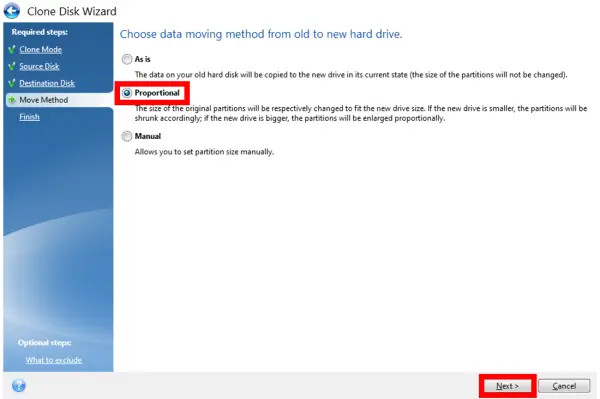
3. Choose the cloning method:
– As is: Exact copying of partitions.
– Proportional: The program adjusts partition sizes to fit the target disk, which is useful if the source disk is larger than the target.
The Proportional option is recommended, as it automatically optimizes partition sizes.
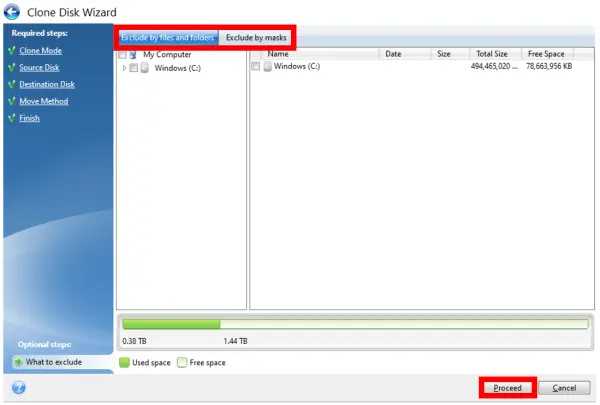
Step 4: Excluding Files
If the target disk has insufficient space, the program will prompt you to exclude certain files.
For example, you can exclude ISO images or virtual machines if they take up significant space.
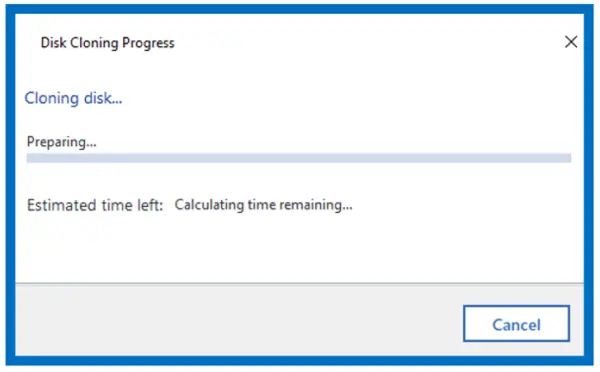
Step 5: Transfer and Completion
After configuring the cloning settings, click Proceed. The program will begin transferring data. The process may require a system restart, and a black screen may appear during cloning. This is a normal part of the process, so don’t be alarmed—the system will reboot after some time.
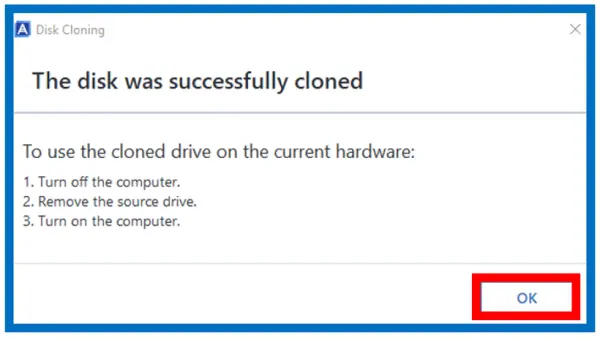
Step 6: Configuring BIOS
After cloning is complete, you may need to adjust the boot order in the BIOS to ensure the system boots from the new disk. If this is not done, the computer may continue booting from the old disk. If you cannot change the boot order in the BIOS, try physically swapping the disks inside the computer.
Acronis True Image makes it easy and quick to clone a system to a new SSD or HDD. Despite potential challenges, such as a black screen during the transfer, the cloning process typically completes without issues.