In this article, we will discuss how to share the internet via Wi-Fi from a laptop running Windows 10. A step-by-step guide for setup is provided, along with troubleshooting recommendations if something doesn’t work, such as if the hosted network fails to start, the connecting device doesn’t receive an IP address, or the connection works without internet access.
Such a “virtual router” can be created with a wired internet connection or by using a USB modem. Although during testing, it was also found that it is possible to share internet obtained via Wi-Fi, which was not always possible before.
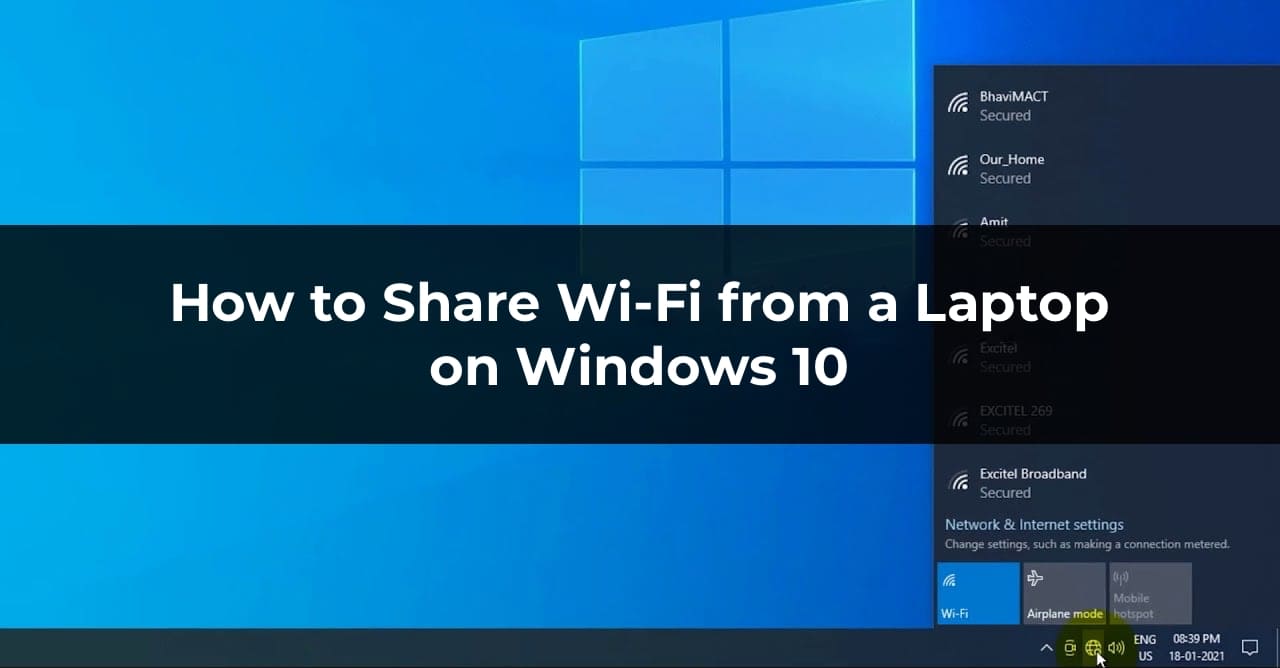
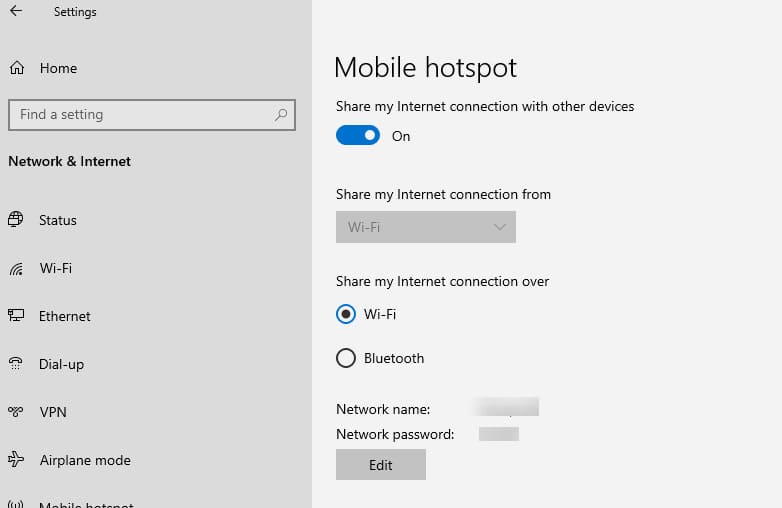
After the anniversary update, Windows 10 introduced a built-in feature that allows sharing the internet via Wi-Fi from a laptop or computer. It is called “Mobile Hotspot” and is located in the “Settings” -> “Network & Internet” section. This function can also be enabled by clicking the connection icon in the notification area.
All you need to do is enable this feature, select the connection that other devices will access, and set the network name and password. After that, you can connect to the created network. If you have the latest version of Windows 10 and your connection type is supported, no additional setup methods are required (for example, sharing PPPoE may not work).
Checking the Ability to Share
1. Open Command Prompt as Administrator (right-click the “Start” button, type “cmd”, right-click and select “Run as administrator”).
2. Enter the following command:
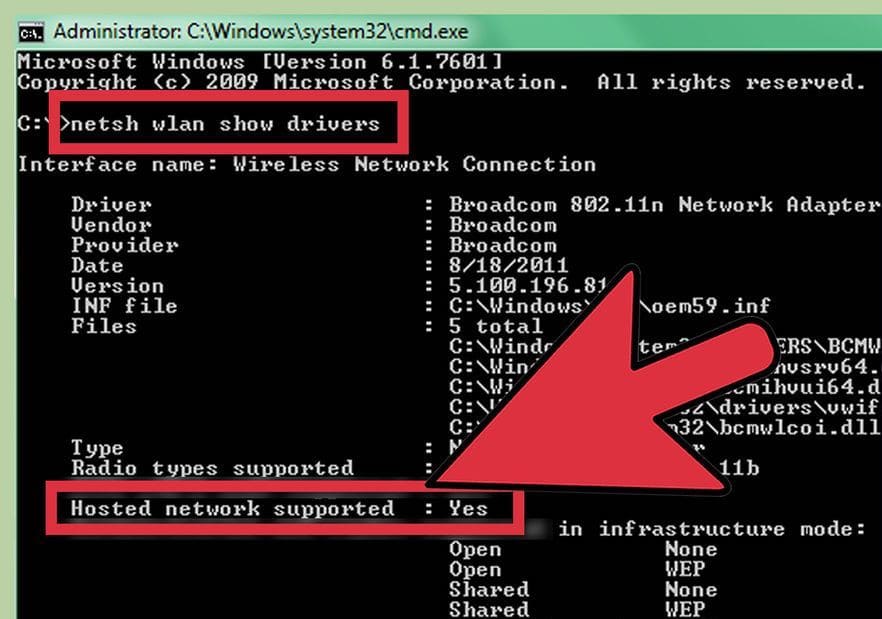
netsh wlan show drivers
This command will display information about your Wi-Fi adapter and its supported features. Look for the line “Hosted network supported.” If it says “Yes,” you can proceed. If not, update your Wi-Fi adapter drivers from the manufacturer’s website.
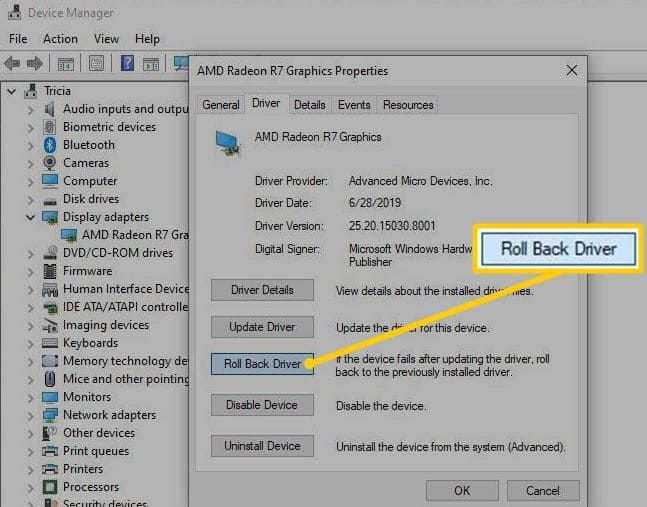
In some cases, reverting the driver to a previous version may help. To do this, go to the Windows 10 Device Manager (accessible via right-clicking the “Start” button), find the required device under Network adapters, right-click it – Properties > Driver tab — Roll Back Driver.
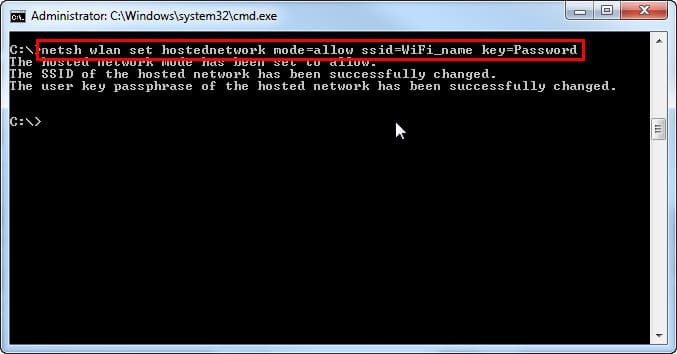
1. Continue using the Command Prompt with administrator privileges and enter the following command:
netsh wlan set hostednetwork mode=allow ssid=softcomputers key=secretpassword
Here, WiFi=name is the name of the wireless network (you can set your own), and Password is the password (at least 8 characters, it is recommended not to use Cyrillic characters).
Note: If a message appears stating that the hosted network cannot be started, even though the previous step indicated support (or the device is not connected), perform the following actions:
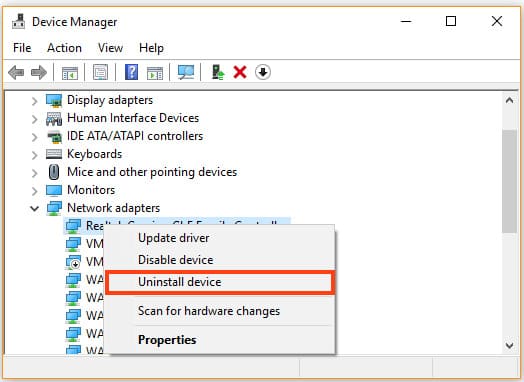
– In the Device Manager, disable the Wi-Fi adapter, then enable it again (or remove the adapter and update the hardware configuration).
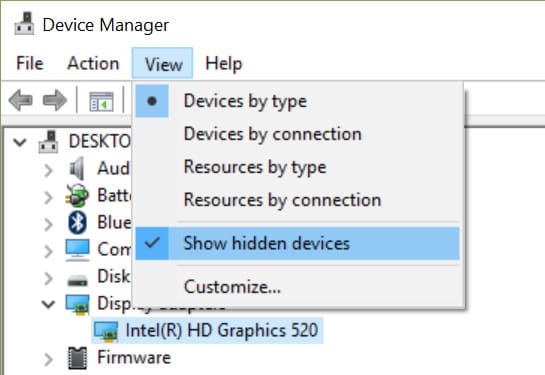
– In the Device Manager, open the View menu and enable Show hidden devices.
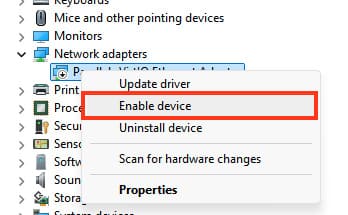
– In the Network adapters section, find Microsoft Hosted Network Virtual Adapter, right-click it, and select Enable.
2. To start the hosted network, enter the command:
netsh wlan start hostednetwork
After executing the command, a message should appear indicating that the hosted network has started. You can now connect to this network from other devices, but internet access on them will still be unavailable.
3. To provide internet access through the created network, perform the following steps:
– Right-click the “Start” button and select “Network Connections.”
– Find the connection used for internet access, right-click it, and select “Properties.”
– Go to the “Sharing” tab and enable the option “Allow other network users to connect through this computer’s Internet connection.”
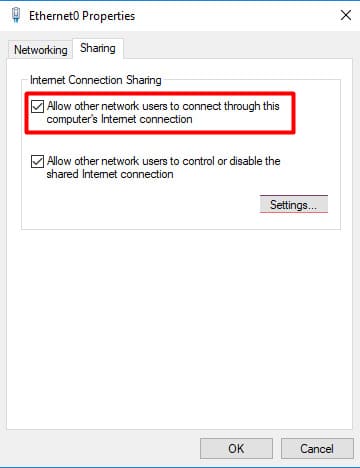
– If the network does not start, try disabling and enabling the Wi-Fi adapter in the Device Manager. You can also remove the adapter and update the hardware configuration.
– If the “Sharing” tab does not appear in the internet connection properties after starting the hosted network, ensure that sharing is not already enabled for another connection. It should be enabled for the connection used for internet access. For example, if you have a local network connection and internet access via Beeline L2TP or Rostelecom PPPoE, sharing should be enabled for the latter two.
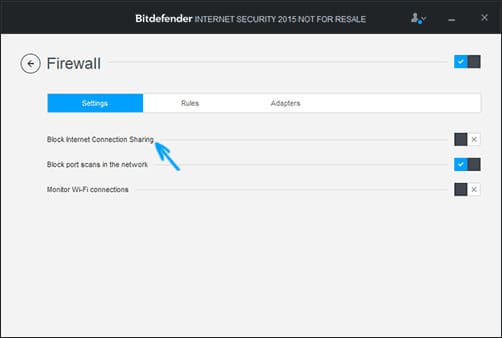
– Firewalls and antivirus programs may block Wi-Fi sharing. Temporarily disable them to check if they are causing the issue.
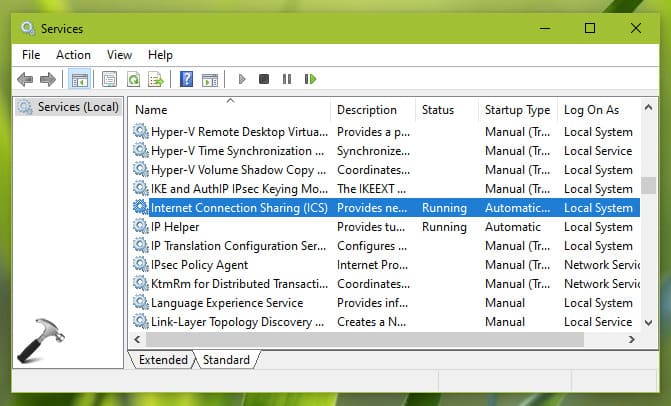
– Check if the “Internet Connection Sharing (ICS)” service is active via Win+R -> services.msc.
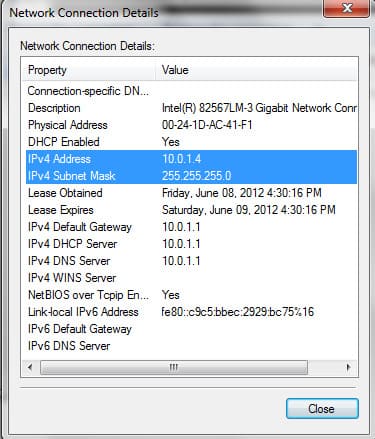
– After starting Wi-Fi sharing, a new wireless connection appears in your list of network connections. Right-click it and click “Details” (State — Details). Check if the IPv4 Address and subnet mask are listed there. If not, manually specify them in the connection properties.
To share the internet via Wi-Fi in Windows 10, you can also use applications such as Connectify Hotspot or MyPublicWiFi. Connectify Hotspot offers additional features, such as automatic sharing upon system login, but is paid. MyPublicWiFi is a free utility that can also help in setting up Wi-Fi.
One of the suggested methods should work if your laptop is equipped with a modern Wi-Fi adapter and supports the necessary functions. If you encounter difficulties, try following the troubleshooting recommendations. We hope this guide helps you successfully share Wi-Fi from your laptop on Windows 10.


