The Windows Sandbox in Windows 11 is a critical system component that allows running programs in an isolated environment, protecting the main operating system. This is particularly useful when working with suspicious applications. Unlike virtual machines like Hyper-V, Windows Sandbox requires fewer resources and does not retain data after shutdown.
In this article, we will cover how to set up and use Windows Sandbox in Windows 11, discuss its configuration options, and explain how to remove it.
You can also download installers of various Windows 11 versions from our catalog.
Enabling Windows Sandbox in Windows 11
To use Windows Sandbox, several conditions must be met:
– The computer must run Windows 11 Pro, Enterprise, or Education. Windows Sandbox is not available in Windows 11 Home without additional modifications.
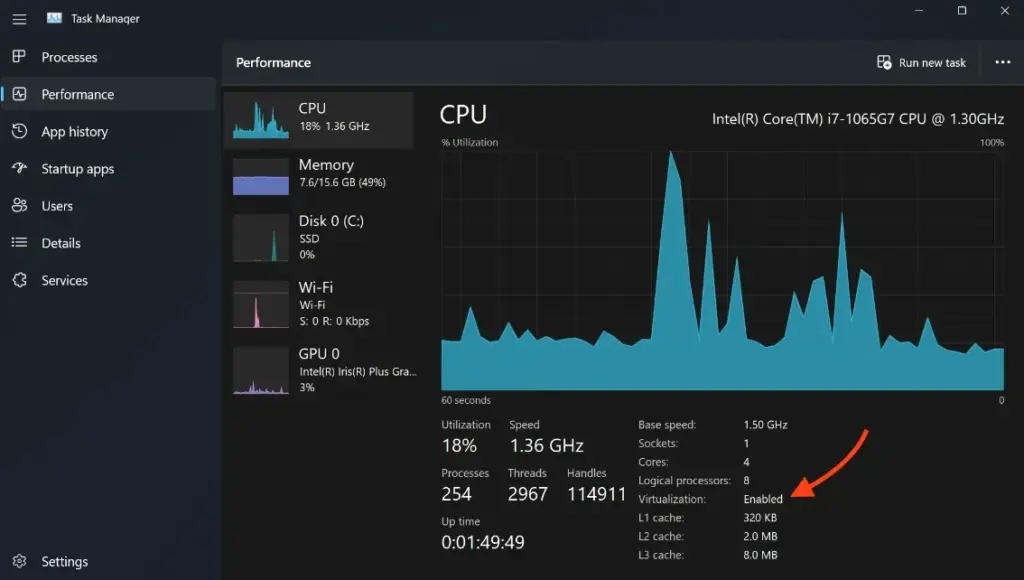
– Virtualization must be enabled in the BIOS. You can check its status in Task Manager under the “Performance” tab, “CPU” section.
– Minimum requirements: 4 GB of RAM (8 GB recommended), 1 GB of disk space, and a 2-core processor.
If these conditions are met, you can enable Windows Sandbox using one of the following methods.
Method 1: Through Programs and Features
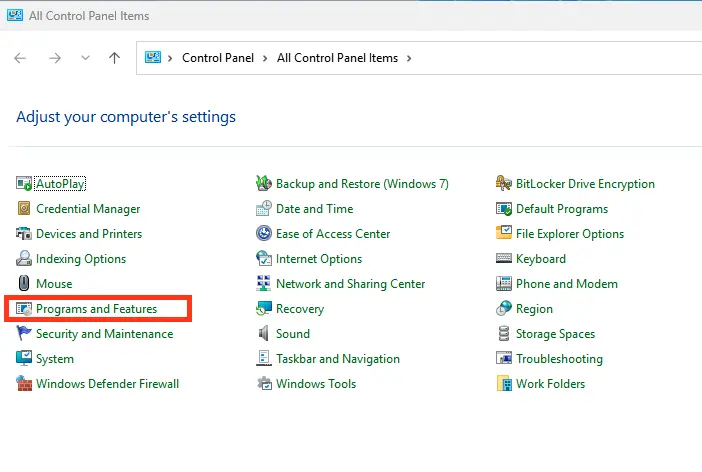
1. Open Control Panel and select “Programs and Features”.
2. Click “Turn Windows features on or off”.
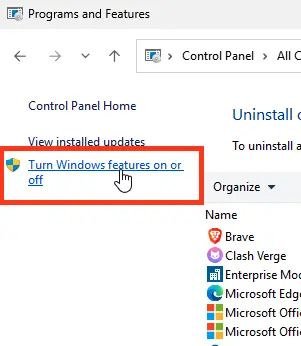
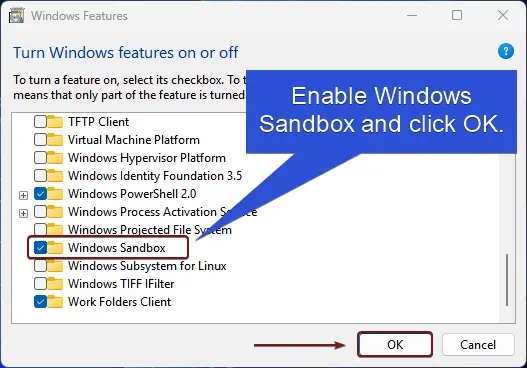
3. Locate and check “Windows Sandbox”, then click “OK” and reboot the computer.
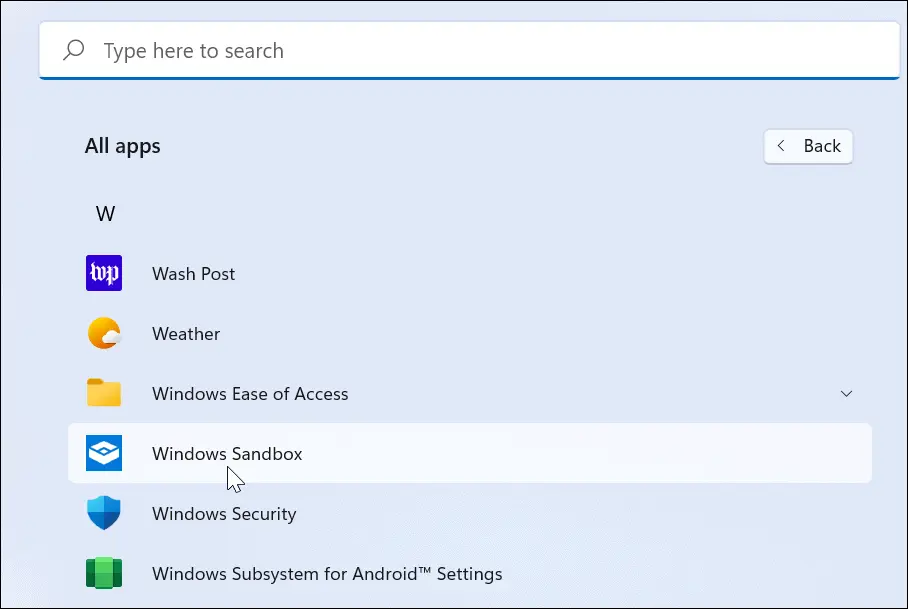
After rebooting, Windows Sandbox will be available in the “All apps” menu.
Method 2: Using PowerShell or Command Prompt
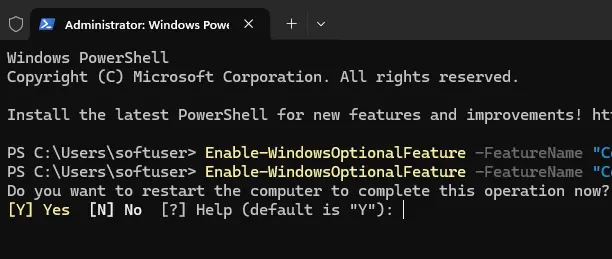
You can enable Windows Sandbox using commands. For Command Prompt:
dism /online /Enable-Feature /FeatureName:"Containers-DisposableClientVM" -All
For PowerShell:
Enable-WindowsOptionalFeature -FeatureName "Containers-DisposableClientVM" -All -Online
Both commands require administrative privileges and a system reboot.


Enabling Windows Sandbox in Windows 11 Home
Although Windows Sandbox is not officially available in Windows 11 Home, you can attempt to enable it using a script. Note that functionality is not guaranteed after this modification. Create a .bat file with the following content, run it as Administrator, and confirm the reboot after installing all components:
@echo offecho Checking for permissions
>nul 2>&1 "%SYSTEMROOT%\system32\cacls.exe" "%SYSTEMROOT%\system32\config\system"echo Permission check result: %errorlevel%
REM --> If error flag set, we do not have admin.
if '%errorlevel%' NEQ '0' (
echo Requesting administrative privileges...
goto UACPrompt
) else ( goto gotAdmin ):UACPrompt
echo Set UAC = CreateObject^("Shell.Application"^) > "%temp%\getadmin.vbs"
echo UAC.ShellExecute "%~s0", "", "", "runas", 1 >> "%temp%\getadmin.vbs"echo Running created temporary "%temp%\getadmin.vbs"
timeout /T 2
"%temp%\getadmin.vbs"
exit /B:gotAdmin
if exist "%temp%\getadmin.vbs" ( del "%temp%\getadmin.vbs" )
pushd "%CD%"
CD /D "%~dp0"echo Batch was successfully started with admin privileges
echo .
cls
GOTO:menu
:menu
Title Sandbox Installer
echo Select Action
echo 1 Install
echo 2 Uninstall
echo 3 Exit
set /p uni= Enter your option:
if %uni% ==1 goto :in
if %uni% ==2 goto :un
if %uni% ==3 goto :ex:in
cls
Title Install Sandboxpushd "%~dp0"
dir /b %SystemRoot%\servicing\Packages\*Containers*.mum >sandbox.txt
for /f %%i in ('findstr /i . sandbox.txt 2^>nul') do dism /online /norestart /add-package:"%SystemRoot%\servicing\Packages\%%i"
del sandbox.txt
Dism /online /enable-feature /featurename:Containers-DisposableClientVM /LimitAccess /ALL /NoRestart
goto :remenu
:un
cls
Title Uninstall Sandboxpushd "%~dp0"
Dism /online /disable-feature /featurename:Containers-DisposableClientVM /NoRestart
dir /b %SystemRoot%\servicing\Packages\*Containers*.mum >sandbox.txt
for /f %%i in ('findstr /i . sandbox.txt 2^>nul') do dism /online /norestart /remove-package:"%SystemRoot%\servicing\Packages\%%i"
del sandbox.txt
goto :remenu
:remenu
cls
echo Restart computer?
echo 1 Yes
echo 2 No
set /p uni= Input 1 or 2:
if %uni% ==1 goto :re
if %uni% ==2 goto :ex:re
shutdown /r /t 0 /f
goto :ex:ex
exit
Using Windows Sandbox
To launch Windows Sandbox, open the Start menu and search for “Windows Sandbox”. It will start an isolated Windows 11 environment. To transfer files, simply copy and paste them between the main system and the Sandbox. The Sandbox also supports internet access and application installation for testing.
Alternatively, press Win+R, type windowssandbox, and press Enter. The executable file for Windows Sandbox is located at:
C:\Windows\System32\WindowsSandbox.exe
This will open a Windows 11 window representing the isolated environment known as the Sandbox. Note that the interface will be in English, even if your main Windows 11 system is in Russian.
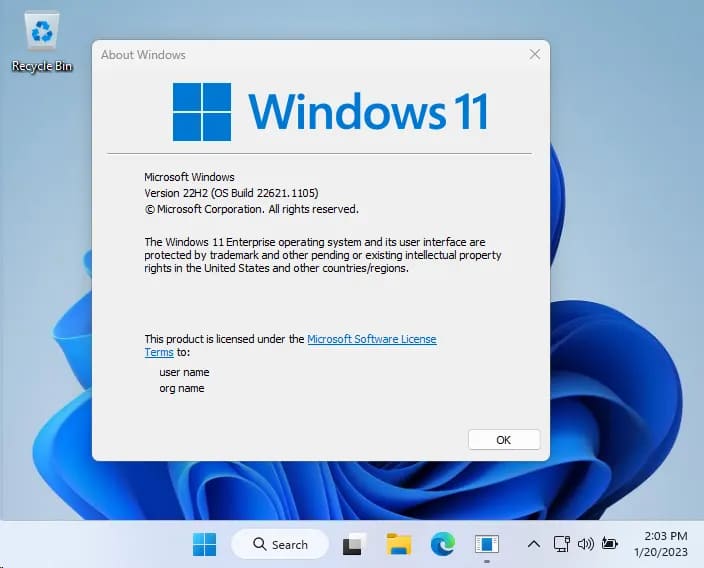
Key information for using Windows Sandbox:
– To transfer a file from the main system to the Sandbox, copy it and paste it within the Sandbox. This works in both directions.
– By default, Windows Sandbox in Windows 11 has internet access and includes Microsoft Edge, which can be used to download programs for testing.
– You can set the input language to Russian in the Sandbox via Settings > Time & Language > Language and Region. However, this setting and all other changes will be lost after closing the Sandbox.
– The Sandbox window size can be freely adjusted, and the internal screen resolution will adapt accordingly.
– Screenshots in the Sandbox can be created using the same methods as in the main system (e.g., Windows 11 screenshot methods).
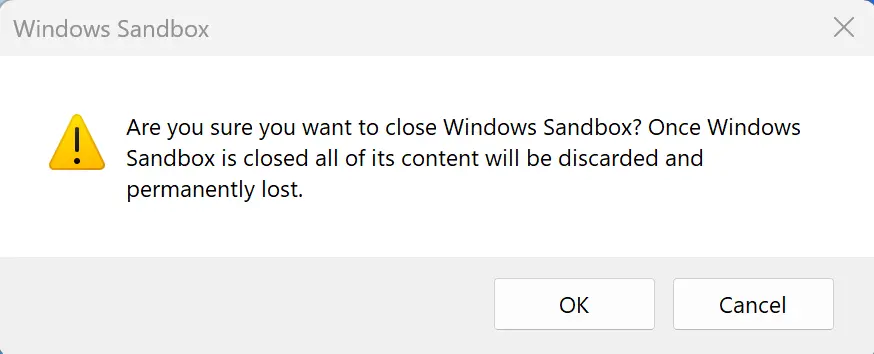
– Nothing done in the Sandbox is saved after closing it. You will be notified of this each time you close the isolated application environment.
Windows Sandbox Configuration Options
Windows Sandbox supports configuration files in the .wsb format, which allow you to specify settings such as network access, GPU access, shared folders, and more.
– vGPU: Enable or disable access to the GPU (graphics card).
– Networking: Enable or disable network access from the Sandbox.
– MappedFolders: Enable shared access to folders between the main system and the Sandbox, with an option for read-only access.
– LogonCommand: Specify a command to execute upon Sandbox startup.
– AudioInput: Enable or disable audio input.
– VideoInput: Enable or disable video input.
– ProtectedClient: Enable additional security features for the Sandbox session.
– PrinterRedirection: Enable printer redirection.
– ClipboardRedirection: Enable clipboard redirection.
– MemoryInMB: Specify the amount of RAM (in megabytes) available to the Sandbox.
For more details, refer to the official Microsoft documentation at Microsoft’s website.
Example configuration file:
You can download it from our website.
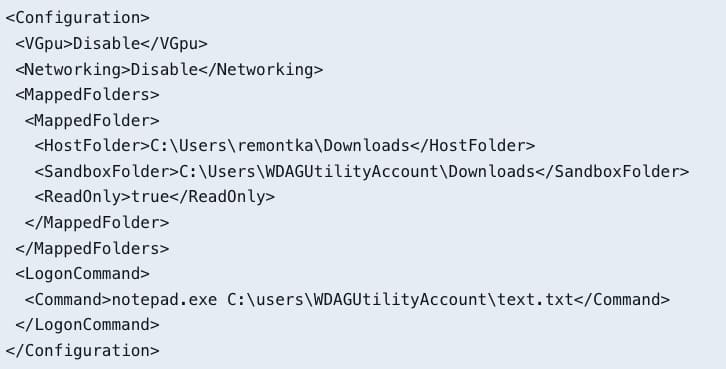
After creating and saving the configuration file with a .wsb extension, simply run the file to launch the Sandbox with the specified settings.
Removing Windows Sandbox
To remove Windows Sandbox, return to Control Panel, go to “Programs and Features”, uncheck “Windows Sandbox”, and reboot the computer. Alternatively, use the following commands:
For Command Prompt:
Dism /online /Disable-Feature /FeatureName:"Containers-DisposableClientVM"
For PowerShell:
Disable-WindowsOptionalFeature -FeatureName "Containers-DisposableClientVM" -Online
