RAID 5 (Redundant Array of Independent Disks, Level 5) is one of the most popular RAID levels, offering distributed data and parity across all disks in the array. It combines high read performance, fault tolerance, and efficient use of disk space.
How RAID 5 Works
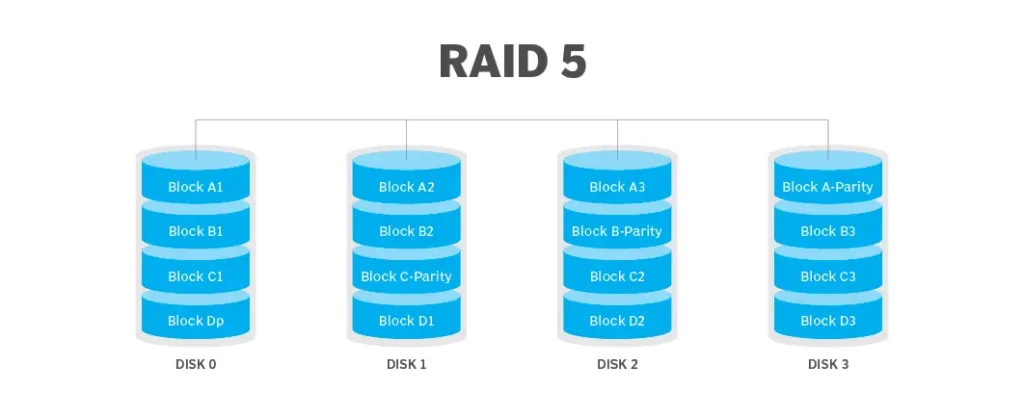
Data Striping
– Data is divided into blocks and written across multiple disks in the array.
– Example with a 4-disk array:
– Block 1 → Disk 1
– Block 2 → Disk 2
– Block 3 → Disk 3
– Parity for blocks 1, 2, 3 → Disk 4
Distributed Parity
– Parity, calculated using the XOR operation, is distributed across all disks in the array, alternating between them.
– This eliminates the bottleneck found in RAID 4, where parity was stored on a single dedicated disk.
– If one disk fails, its data can be reconstructed using the data and parity from the remaining disks.
Minimum Disk Requirement
– RAID 5 requires at least 3 disks.
– The total usable capacity is calculated as N−1, where N is the number of disks, as one disk’s worth of capacity is used for parity.
Performance
– Read Operations: High performance due to parallel data access across multiple disks.
– Write Operations: Slower than RAID 0 due to the need to calculate and write parity.
Parity is labeled as Dp, Cp, Bp, Ap in the screenshot below:
Advantages of RAID 5
– Fault Tolerance: Continues to operate in degraded mode if one disk fails, with data recoverable from remaining disks.
– Efficient Storage Use: Only one disk’s capacity is used for parity, making it more space-efficient than RAID 1.
– High Read Speed: Benefits from parallel data access across multiple disks.
– Wide Support: Supported by most hardware RAID controllers and software solutions.
Disadvantages of RAID 5
– Slower Write Performance: Calculating and writing parity reduces performance during intensive write operations.
– Recovery Vulnerability: Rebuilding data after a disk failure requires reading all remaining disks, which can be time-consuming.
– Double Failure Risk: If a second disk fails before recovery completes, all data is lost.

Setting Up RAID 5 in Windows
Windows supports creating RAID 5 through built-in tools (in Pro, Enterprise, and Server editions) or third-party software. Below are the methods:
1. Using Windows Disk Management
Requirements:
– At least 3 disks of the same size.
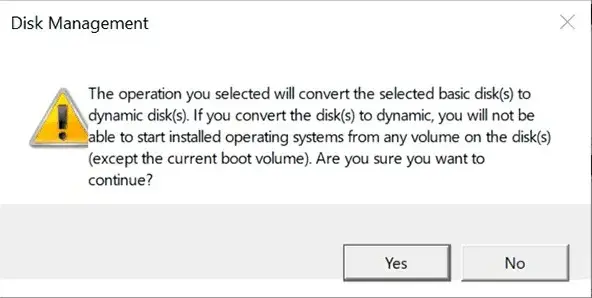
– Disks must be “basic disks” and contain no data.
Steps
1. Open Disk Management (right-click Start → Disk Management).
2. Right-click unallocated space on one disk and select Create RAID-5 Volume.
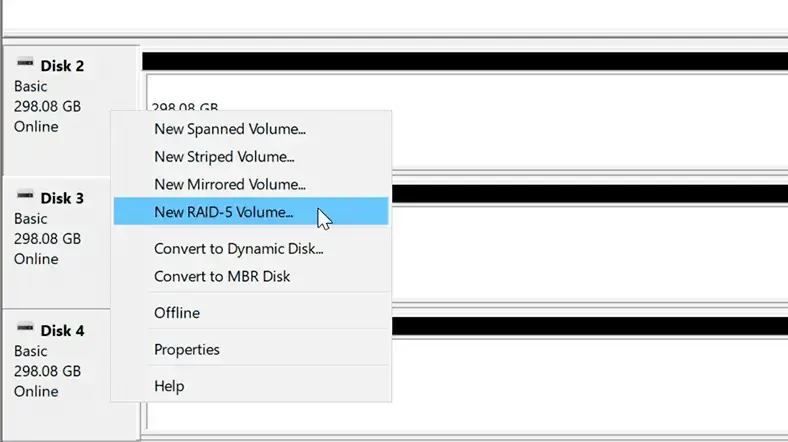
3. Select the additional disks to include in the RAID 5 array.
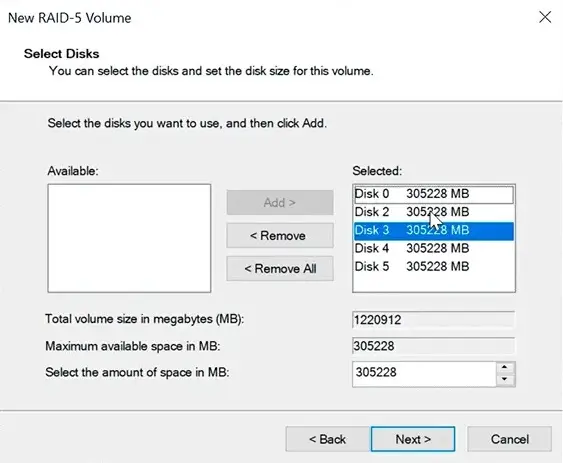
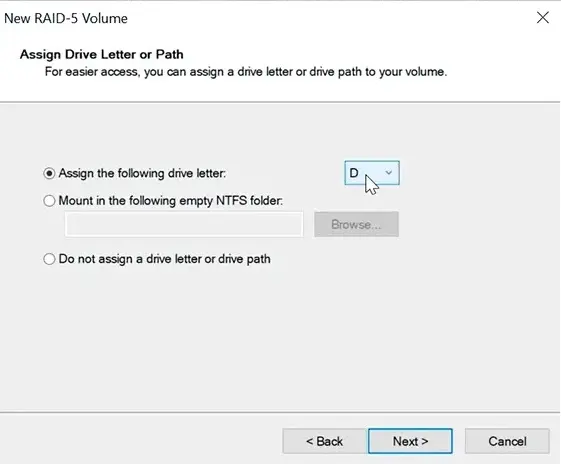
4. Assign a drive letter and file system (NTFS).
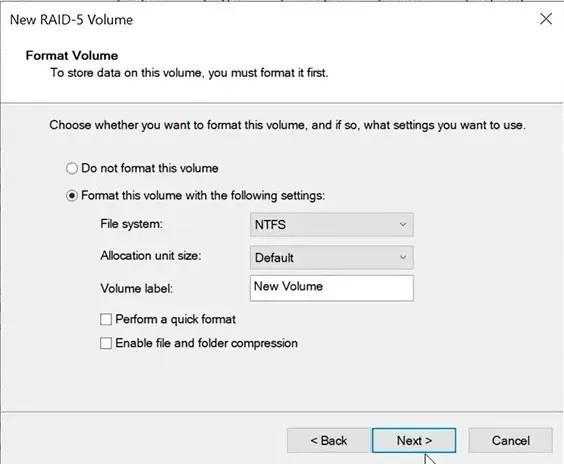
5. Confirm the array creation. Windows will automatically configure the RAID 5 array.
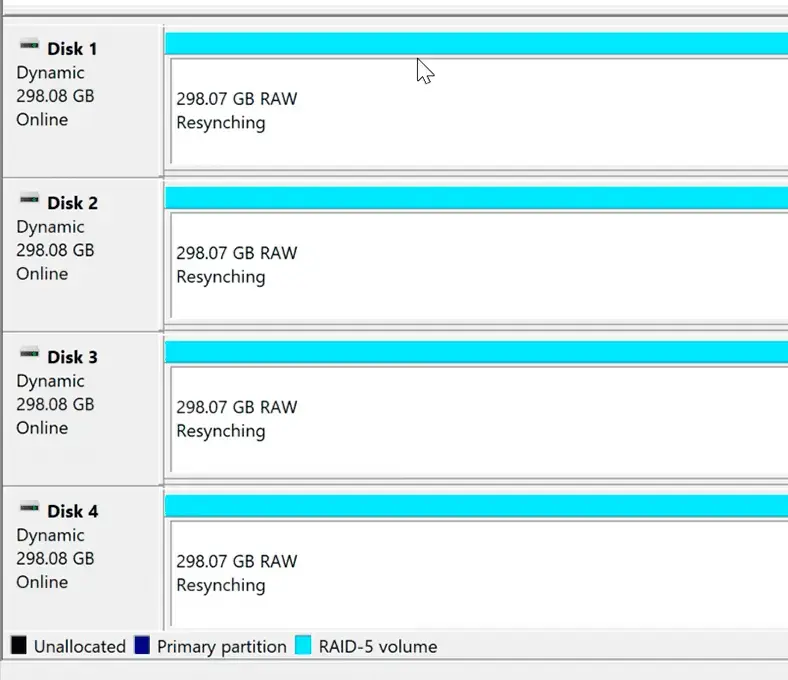
Note: Windows implements RAID 5 as a software RAID, which may have lower performance compared to hardware solutions.
2. Using Storage Spaces
Storage Spaces is a modern tool available in Windows 8 and later, offering a more flexible way to create fault-tolerant storage pools.
Steps
1. Open Control Panel → System and Security → Storage Spaces.
2. Select Create a storage pool and choose at least three disks.
3. Choose the Parity layout (equivalent to RAID 5).
4. Configure the pool name, drive letter, and file system.
5. Create the storage space and format it.
6. Monitor and manage the storage pool via the Storage Spaces interface.
3. Using a Hardware RAID Controller
A hardware RAID controller is the best option for performance and reliability.

Suitable Controllers:
– Adaptec (e.g., Adaptec 8805)
– LSI MegaRAID (Broadcom)
– Dell PERC Controllers
– HP Smart Array Controllers
Steps
1. Install the RAID controller in your system.
2. Connect at least three disks to the controller.
3. Access the controller’s configuration utility during boot (e.g., Ctrl+R or Ctrl+I).
4. Select RAID 5 as the array type.
5. Choose the disks and configure the array settings.
6. Initialize the array and format it in Windows using Disk Management.
7. Install the controller’s management software for ongoing maintenance.
4. Using Third-Party Software
If built-in tools are insufficient, consider these software options:
– SoftRAID: Supports RAID 5 with a user-friendly interface.
– StableBit DrivePool: A convenient tool for managing RAID arrays.
– RAID Recovery Software: Suitable for creating and recovering RAID arrays.
Steps for SoftRAID
1. Download and install SoftRAID from the official website.
2. Connect at least three disks to your system.
3. Open SoftRAID and select Create a new RAID array.
4. Choose RAID 5 as the array type.
5. Select the disks and configure settings (e.g., block size).
6. Initialize and format the array for use in Windows.
7. Monitor and manage the array using SoftRAID’s interface.
– Hardware vs. Software RAID: Hardware RAID controllers provide better performance and reliability by offloading processing. Software RAID (e.g., Windows Disk Management or SoftRAID) is more flexible but may impact CPU performance.
– Disk Requirements: Use disks of the same size and speed for optimal performance.
– Backup: Always back up data before creating a RAID 5 array, as the process erases the disks.
– Performance Monitoring: Monitor write performance, as RAID 5 can be slower for write-heavy workloads.
– Recovery Time: Plan for potential downtime during disk failure recovery, as rebuilding can be time-consuming.
RAID 5 is ideal for scenarios requiring a balance of performance, storage efficiency, and fault tolerance, such as file servers or media storage. For optimal performance, consider using a hardware RAID controller.