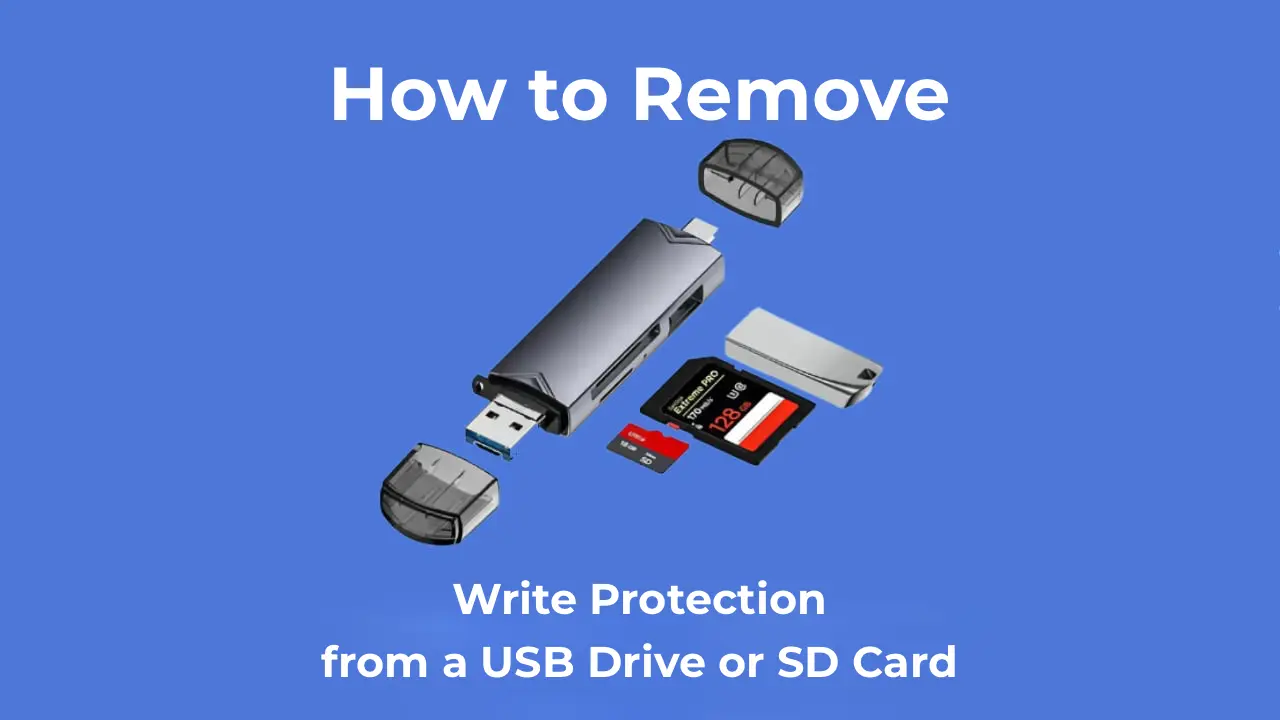
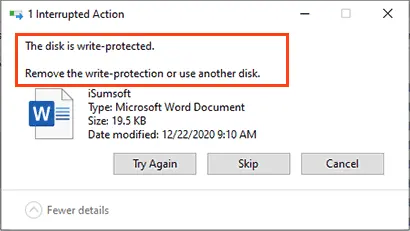
In this article, we will explore what to do if you receive a message stating that the disk is write-protected when attempting to write to a USB drive or memory card. We will cover several methods to resolve this issue, starting with simple steps like checking the physical switch on the device, to more advanced solutions involving the Command Prompt and the Windows Registry.
Purchase genuine product keys with instant delivery to your email for Windows 11, 10, and more in our catalog:
Windows 11 – from 11.20 €
Windows 10 – from 9.16 €
Step 1: Check the Physical Switch on the Device
The first thing to check is the physical switch on the USB drive or memory card. Some devices have a switch that can lock the write function. Ensure the switch is in the position that allows writing. If you are using an SD card adapter, check for a switch on the adapter as well, which might be broken. Try using a different adapter or card reader if the switch is not functioning.

Step 2: Use Command Prompt to Remove Write Protection
If the issue persists and the write protection is only observed on one device, you can try removing the protection using the Command Prompt. Here’s how:
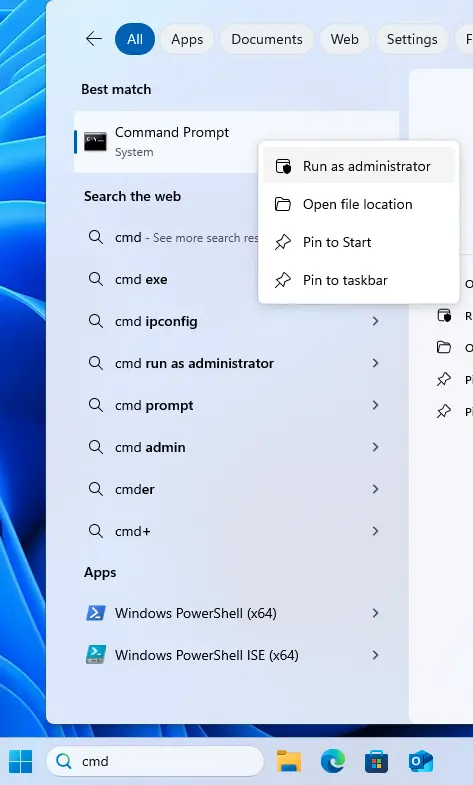
1. Open Command Prompt as an administrator. In Windows 10, you can do this by searching for “Command Prompt” and selecting “Run as administrator.”
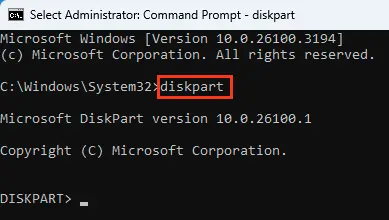
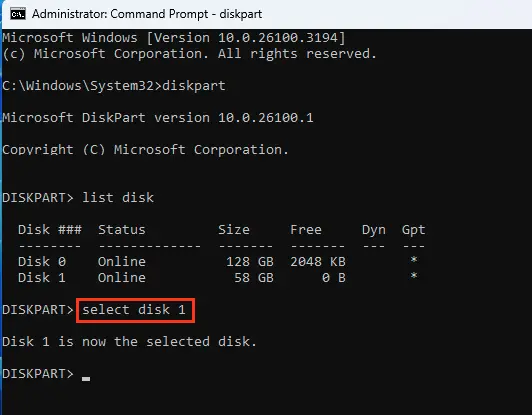
2. Type the command diskpart and press Enter.
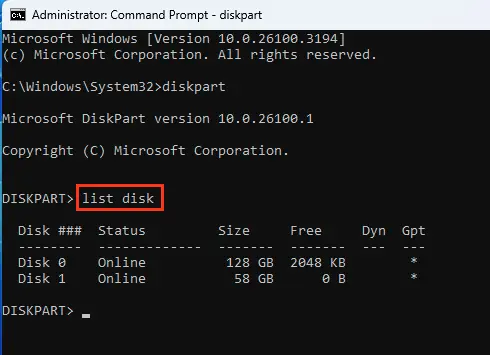
3. Then type list disk to see a list of all connected disks.
4. Identify the disk number corresponding to your problematic USB drive and type select disk [disk number].
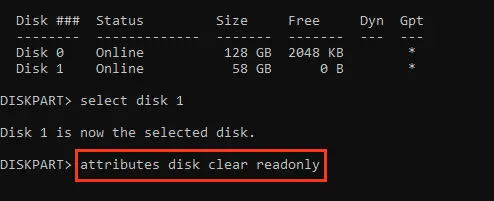
5. Type the command attributes disk clear readonly and press Enter.
6. Type exit and close the Command Prompt. Disconnect and reconnect the USB drive, then try writing data again.

Step 3: Check and Edit the Windows Registry
If the issue persists, you can check the registry settings that might be blocking write access to removable drives:
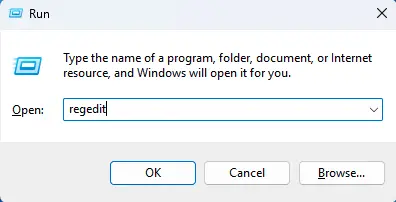
1. Open the Registry Editor by pressing Windows+R and typing regedit.

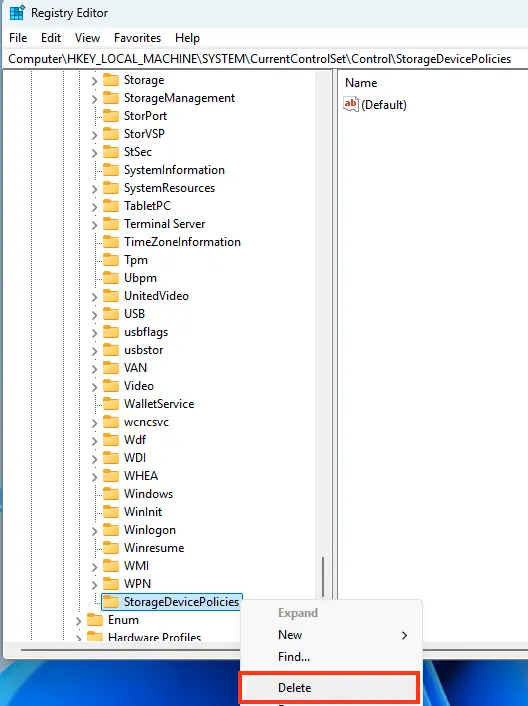
2. Navigate to HKEY_LOCAL_MACHINE\SYSTEM\CurrentControlSet\Control\StorageDevicePolicies. If this key exists, delete it.
3. Also, check and delete subkeys related to RemovableStorageDevices under the following paths:
HKEY_LOCAL_MACHINE\SOFTWARE\Policies\Microsoft\Windows\RemovableStorageDevices
HKEY_CURRENT_USER\SOFTWARE\Policies\Microsoft\Windows\RemovableStorageDevices
If these subkeys exist in your registry, delete them.
After completing these steps, disconnect and reconnect the USB drive, then try writing data again.
Step 4: Check the File System and Use Repair Utilities
If the issue persists, it might be caused by errors in the device’s file system. In such cases, it is recommended to use specialized repair utilities provided by manufacturers:
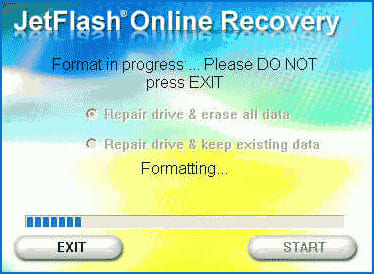
Transcend JetFlash Online Recovery
Transcend offers the JetFlash Online Recovery utility for restoring their USB drives. It is compatible with most modern Transcend USB drives. An internet connection is required to use the utility. There are two versions of the utility: one for JetFlash 620 and another for other models.
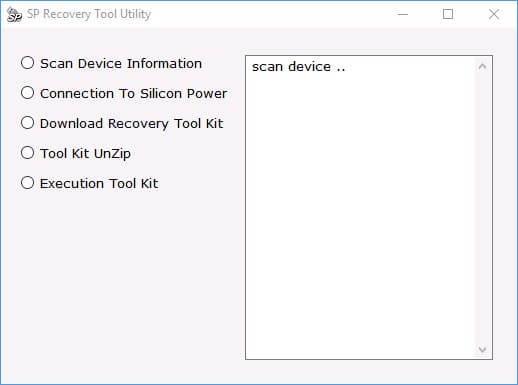
Silicon Power Flash Drive Recovery Software
The Silicon Power website offers the USB Flash Drive Recovery utility for restoring their USB drives. You need to provide an email address to download the utility. The utility requires an internet connection and can automatically restore the USB drive.
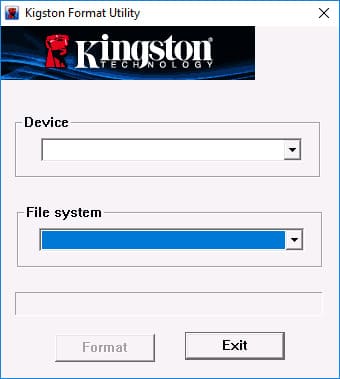
Kingston Format Utility
Owners of Kingston DataTraveler HyperX 3.0 can download the Kingston Format Utility to format their USB drives and restore them to their original state.
Apacer Repair Utility
For Apacer USB drives, the Apacer Repair Utility and Apacer Flash Drive Repair Tool are available.
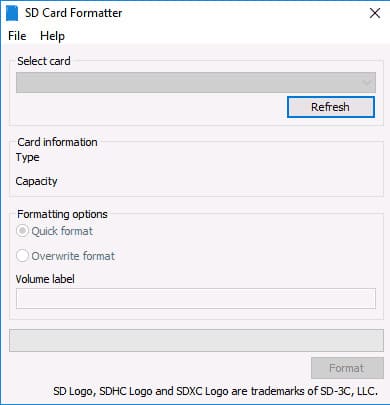
SD Memory Card Formatter
The SD Association offers the SD Memory Card Formatter utility for formatting SD, SDHC, and SDXC cards, including Micro SD. The utility is available for Windows and macOS.
If none of the above utilities help restore your USB drive, you can follow these steps to find a suitable utility:
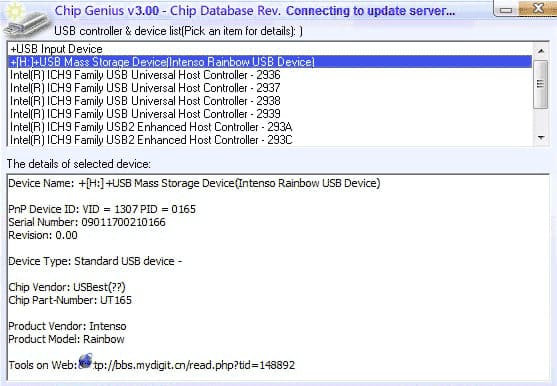
1) Download the Chip Genius or Flash Drive Information Extractor utility, which will help you identify the controller used in your drive and obtain the VID and PID data needed for the next step. These utilities can be downloaded from the following links: Chip Genius and Flash Drive Information Extractor.
2) After obtaining the VID and PID data, go to the iFlash website and enter them in the search field. Search for a USB drive repair utility on iFlash.
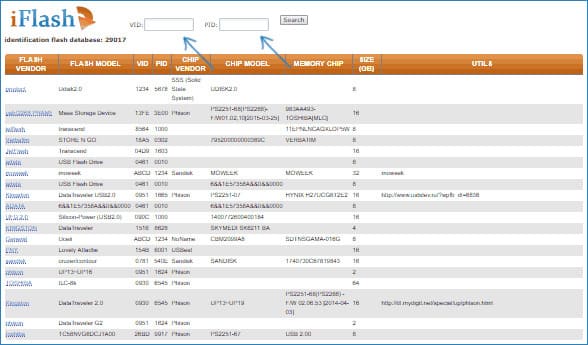
3) In the search results, pay attention to the “Chip Model” column, which lists drives with the same controller as your device. In the “Utils” column, find and download the suggested utility to repair your USB drive and check if it resolves your issue.