In this article, we will explain how to rollback Windows 11 version 24H2 to a previous version if you encounter performance or compatibility issues after the update.
Every year, Windows 11 receives important updates. One such update is version 24H2, which offers new features, performance improvements, and bug fixes. However, sometimes updates can cause problems, and in such cases, you may need to rollback the system to the previous version.
Windows 11 24H2 is a significant update to the operating system released by Microsoft. It includes numerous improvements, such as new interface features, system optimization, and vulnerability fixes, making it safer and more reliable for users. However, like any other update, 24H2 may not suit all users. Some may encounter compatibility or performance issues.
Download original Windows 11 ISOs with the latest versions from our website.
When is a Rollback to an Older OS Version Needed?
A rollback to the previous OS version is necessary in the following cases:
1. Performance Issues: if after the update the system started working slower or freezing.
2. Errors and Crashes: if you encounter frequent crashes or errors that didn’t occur before.
3. Application Incompatibility: if important applications stop working or show errors.
4. Driver Problems: if the update caused conflicts with hardware drivers.
How to Rollback Windows 11 24H2 via Settings
After updating Windows 11, a folder Windows.old is created on the system partition, which stores files of the previous system version. This folder serves as the basis for the rollback. However, there are several important points to consider:
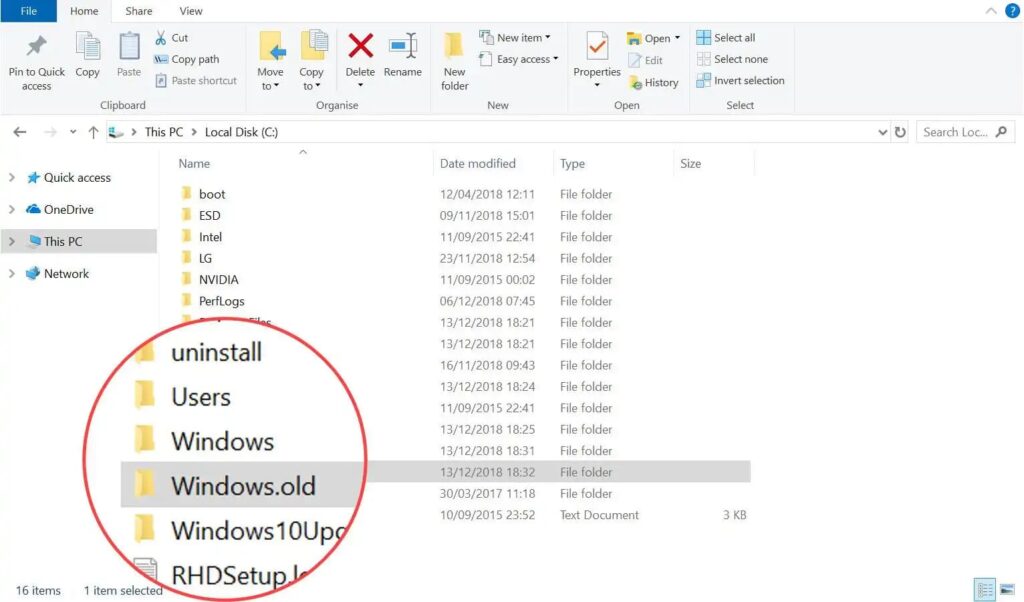
– Rollback Period: by default, you can rollback within 10 days after the update. After that, the files will be deleted.
– Changing the Retention Period: you can increase this period to 30 days by executing a command in the command line as administrator:
dism /online /Set-OSUninstallWindow /Value:30

– Deleting the Windows.old Folder: if you have manually deleted the folder or it was deleted automatically, you can only restore the old version with a clean system installation.
If all conditions are met and the necessary rollback files are available, follow these steps:
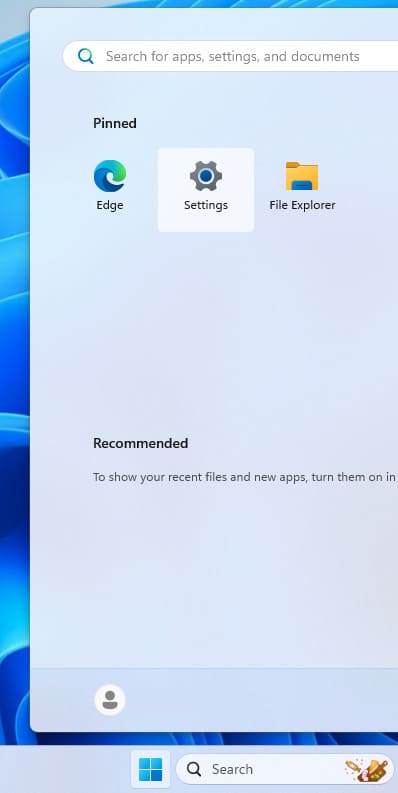
1. Open Settings: use the Start menu or press the Win + I key combination.
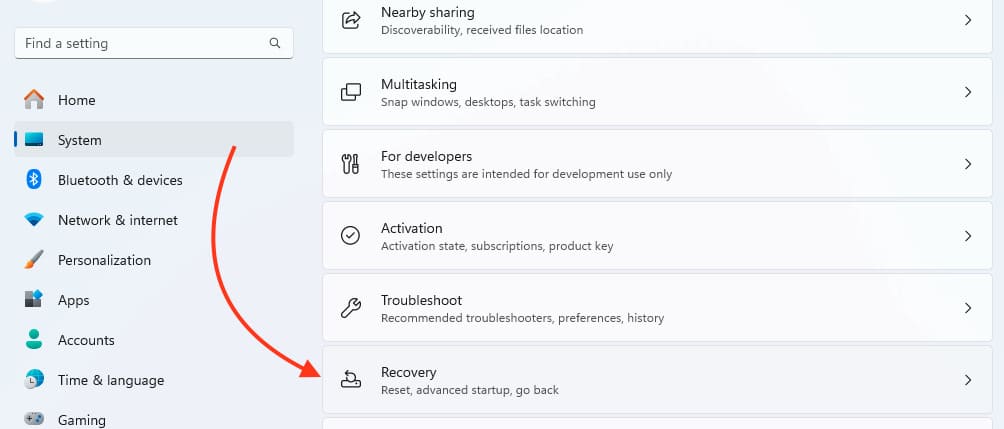
2. Go to the “System” section: find the “Recovery” item or open “Windows Update Center” and select “Update History” — “Recovery”.
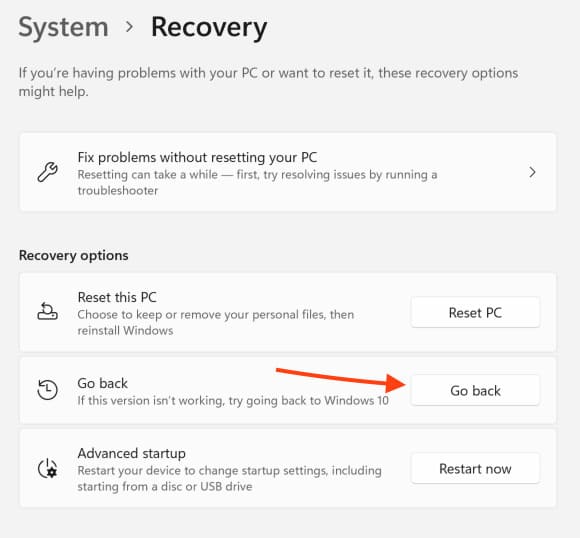
3. Click the “Go back” button: in the “Recovery Options” section, select the option to return to the previous version.
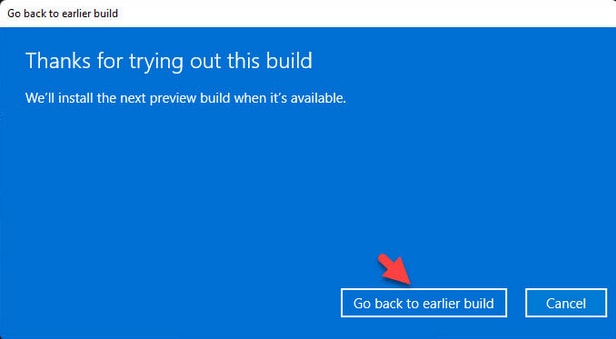
4. Follow the on-screen instructions: read the warnings and click “Next”. On the last screen, confirm the rollback to an earlier build.
What to Do if the OS Shuts Down with a Blue Screen (BSOD)?
If your system does not boot and you encounter a Blue Screen of Death (BSOD), a rollback via Settings will not be possible. In this case, you can try the following steps:
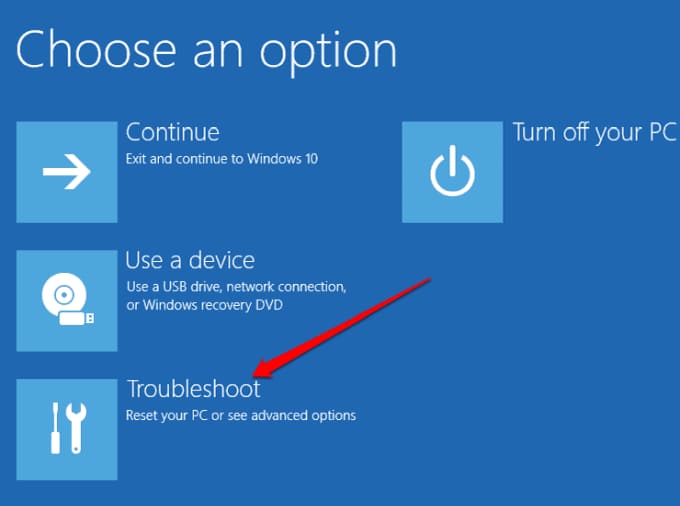
1. Use the Recovery Environment: restart the computer and during boot press the F8 key or Shift + F8 (depending on your device model) to enter the recovery menu.
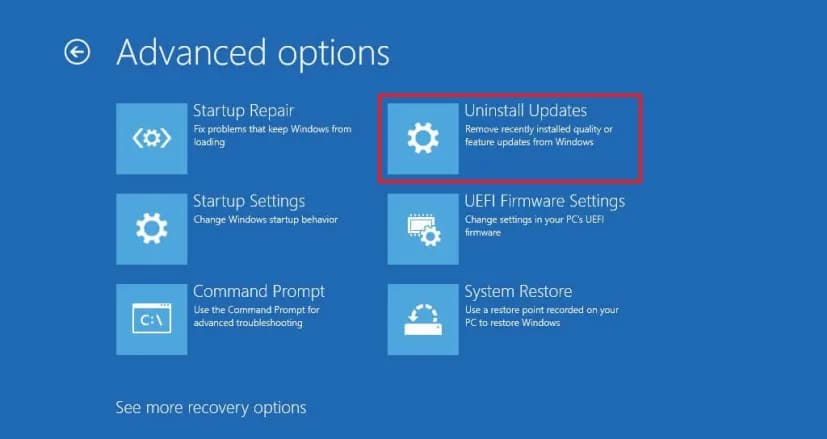
2. Select “Troubleshoot”: in the recovery menu, choose “Troubleshoot”, then “Advanced Options”.
3. Select “Uninstall Updates”: if available, choose the option to revert to the previous Windows version.
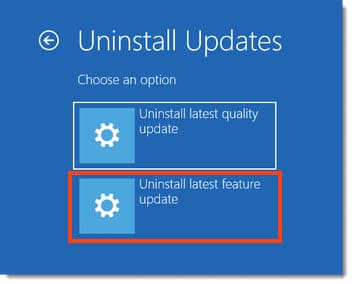
4. Select the rollback option “Remove latest features updates” and confirm the removal of component updates. The computer will perform actions and return Windows 11 to the previous version.
If problems arose after updating Windows 11, rolling back to the previous version can be an effective solution. By following simple instructions, you can return your system to a more stable and reliable version.
Don’t forget the importance of adhering to file retention periods and regularly backing up important data. This will help you avoid data loss and preserve valuable files.

