In this article, we’ll explain how to quickly and correctly create an automatic table of contents in a Microsoft Word document. This approach eliminates the need for manual entry or text copying, which many users resort to. We’ll explore a simple method for generating a table of contents using Word’s built-in tools. This process is helpful for both beginners and experienced users.
You can purchase original Microsoft Office product keys in our catalog, starting at 7.00 €.
Step 1. Adding an Automatic Table of Contents
1. Place the cursor on a blank page designated for the table of contents.

2. Go to the References tab.
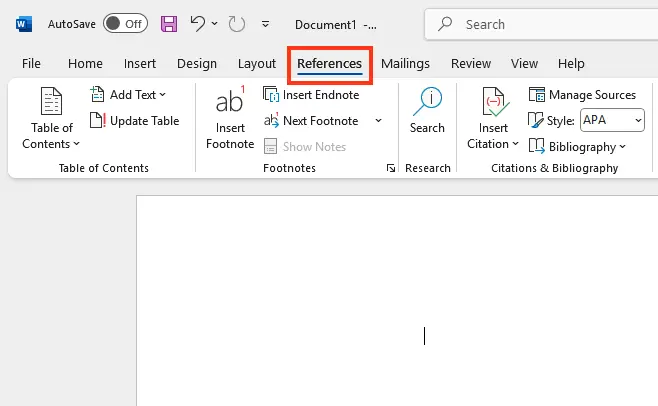
3. In the upper-left corner, locate and click the Table of Contents button.
4. Select the topmost option from the list provided.

5. In the dialog box that appears, click OK.

Step 2. Adjusting Document Zoom
For easier navigation with the table of contents, it’s recommended to adjust the page display zoom:
1. Go to the View tab.
2. In the zoom options, select Multiple Pages.

Step 3. Adding Headings to the Table of Contents
1. Highlight the text you want to include in the table of contents (e.g., Introduction).

2. Return to the References tab and click Add Text.
3. From the dropdown list, select Level 1.

4. Go back to the table of contents and click Update Table — the added heading will appear in the table with its page number.


Step 4. Adding Subsections
1. If your document includes subsections, highlight their text.
2. Go to the References tab, click Add Text, and select Level 2.

3. Update the table of contents. Subsection titles will appear slightly indented, reflecting the document’s structure.


Step 5. Tips for Quick Text Selection
To speed up text selection without dragging the cursor:
1. Place the cursor in the middle of the heading line.
2. Hold down the Ctrl key and, while holding it, click the left mouse button. This will select the entire text fragment more quickly.

Step 6. Navigating the Document
After creating the table of contents, you can easily navigate between sections:
1. Hover the cursor over the text in the table of contents.
2. Hold down the Ctrl key and click the left mouse button to jump to the desired section.


Step 7. Fixing Heading Formatting Issues
Sometimes, when assigning a level to text, the font color, style, or alignment may change automatically. This happens if the text was initially formatted incorrectly. To fix this:
1. Click on the heading that changed format.
2. Go to the Styles menu, right-click the heading style (e.g., Heading 1).
3. Select Modify and adjust the font, text color, indents, and other settings.


4. In the “Format” section, you’ll find additional heading customization options.

After this, all headings using the same style will automatically adopt the new formatting rules.

Creating an automatic table of contents in Microsoft Word takes just a few minutes if you properly prepare the headings and use the application’s built-in features. It’s crucial to correctly set heading levels to avoid formatting issues. With this approach, navigating the document becomes convenient, and the table of contents can always be updated automatically.