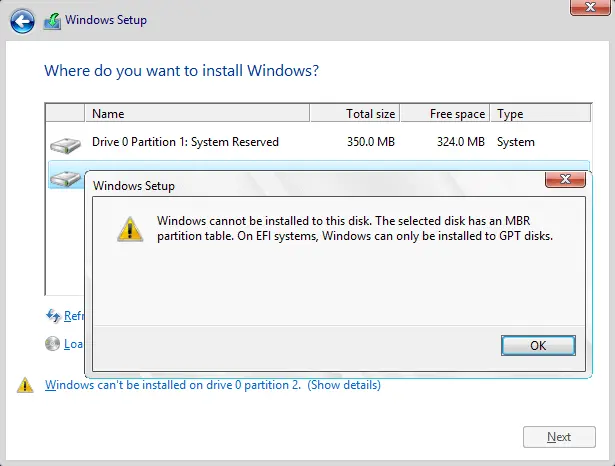
In this article, we will discuss what to do if, during the installation of Windows 11, Windows 10, or Windows 8 from a USB drive, you encounter the issue where Windows cannot be installed on the selected partition. This happens when you boot in UEFI mode, but the disk uses an MBR partition table instead of GPT. We will explore how to resolve this issue by converting the disk from MBR to GPT, as well as suggest alternative methods to ensure a successful installation.
Purchase genuine product keys with instant delivery to your email for Windows 11, Windows 10, and Windows 8 from our store:
Windows 11 – from 11.20 €
Windows 10 – from 9.16 €
Windows 8 – from 9.00 €
We will consider two main ways to solve this problem: booting in Legacy mode and converting the disk from MBR to GPT.
Step 1: Booting in Legacy Mode
If your computer supports both boot modes (UEFI and Legacy), you can try installing Windows by booting in Legacy mode. To do this:
1. Restart your computer and enter the BIOS/UEFI. Usually, this requires pressing the Del, F2, F10, or another key, depending on your device’s manufacturer.
2. In the BIOS settings, find the boot options and switch the mode from UEFI to Legacy or CSM (Compatibility Support Module).
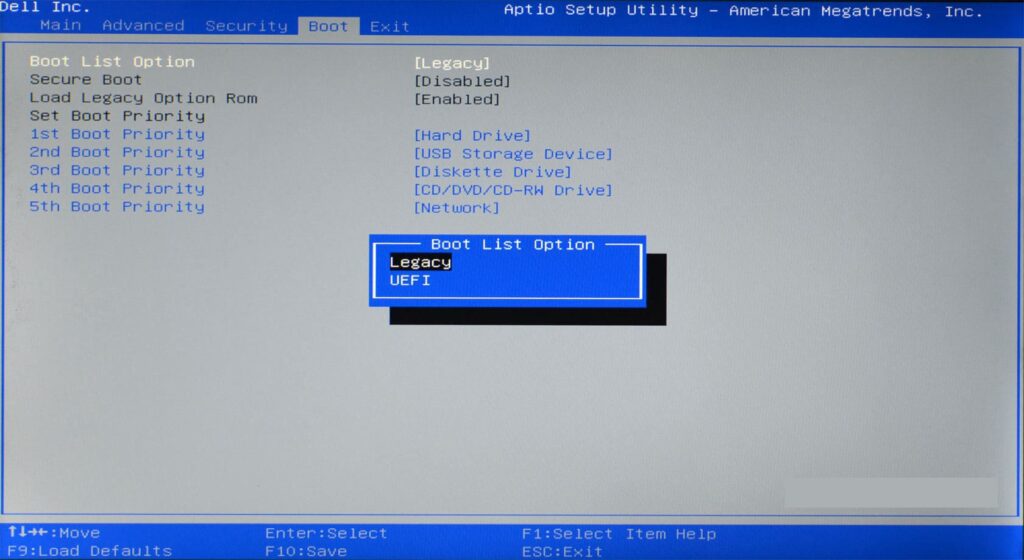
3. Save the changes and restart.
4. In some BIOS/UEFI setups, the USB drive may appear twice: once with a UEFI label and once without. Choose the option without the UEFI label and proceed with the installation.
When booting in Legacy mode, the partition table error will not occur, and you will be able to install Windows on a disk with an MBR partition table.
Step 2: Converting the Disk from MBR to GPT
If you want to install Windows in UEFI mode, you will need to convert the disk from MBR to GPT. We will consider two scenarios: when the data on the disk is not important and when the data needs to be preserved.
Important: Before performing any of these actions, ensure you have backups of all important data. Errors during conversion or accidental partition deletion can lead to data loss.
Option 1: Conversion with Data Deletion
If there is no important data on the disk, you can convert it directly during the Windows installation process:
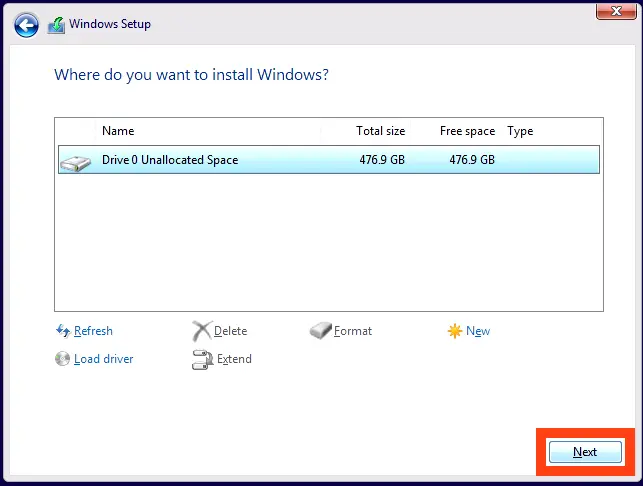
1. During the Windows installation, when you see the list of partitions, select the disk you want to convert.
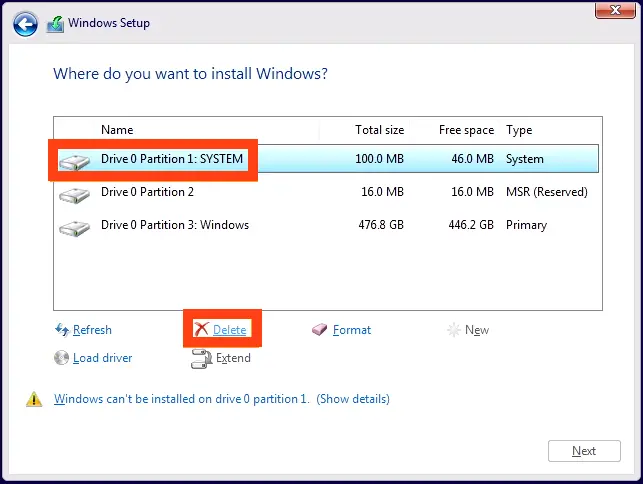
2. Delete all partitions on this disk until only “Unallocated Space” remains.
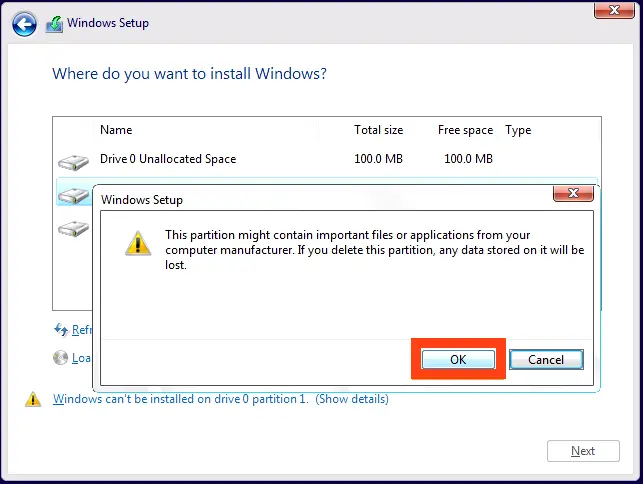
3. Select this unallocated space and click Next. The installer will automatically convert the disk to GPT, and the installation will proceed.
Option 2: Conversion Without Data Loss
If there is important data on the disk that cannot be lost, use third-party utilities for conversion:
1. Using MiniTool Partition Wizard:
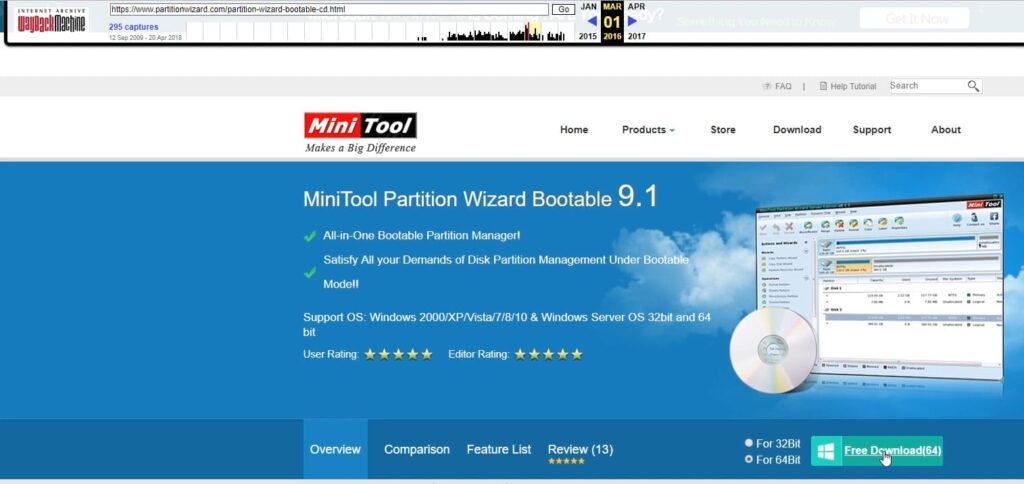
– To convert the disk without data loss, you can use the MiniTool Partition Wizard utility. However, you will need to boot from a USB drive with this utility.
– Previously, the ISO image of the utility was available for free on the developer’s website, but now it can be found through internet archives.
– Visit the site via Web Archive and download the ISO image (The site loading may take some time, so please wait).
– Write it to a USB drive using the Rufus utility. You can learn how to do this in our other article.
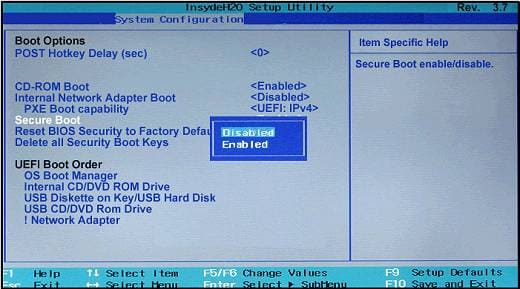
– Disable Secure Boot in the BIOS and boot from the created USB drive.
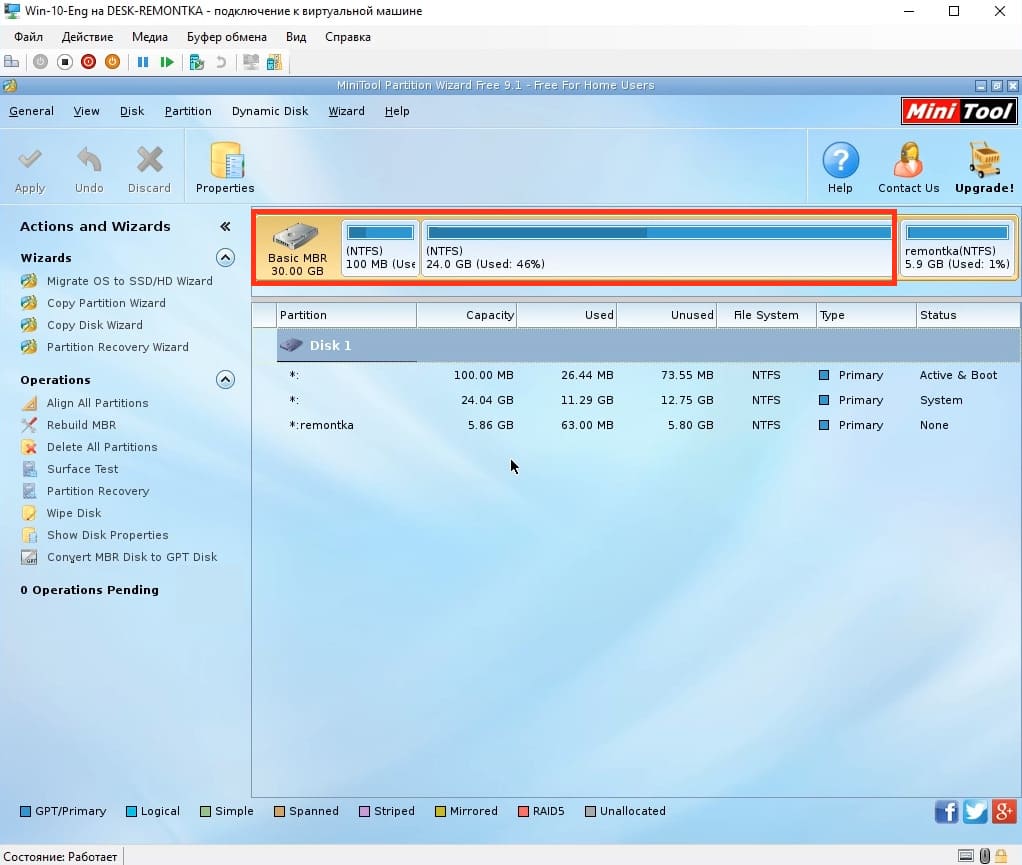
– In the MiniTool Partition Wizard utility, select the disk you want to convert.
– Click Convert MBR Disk to GPT Disk.
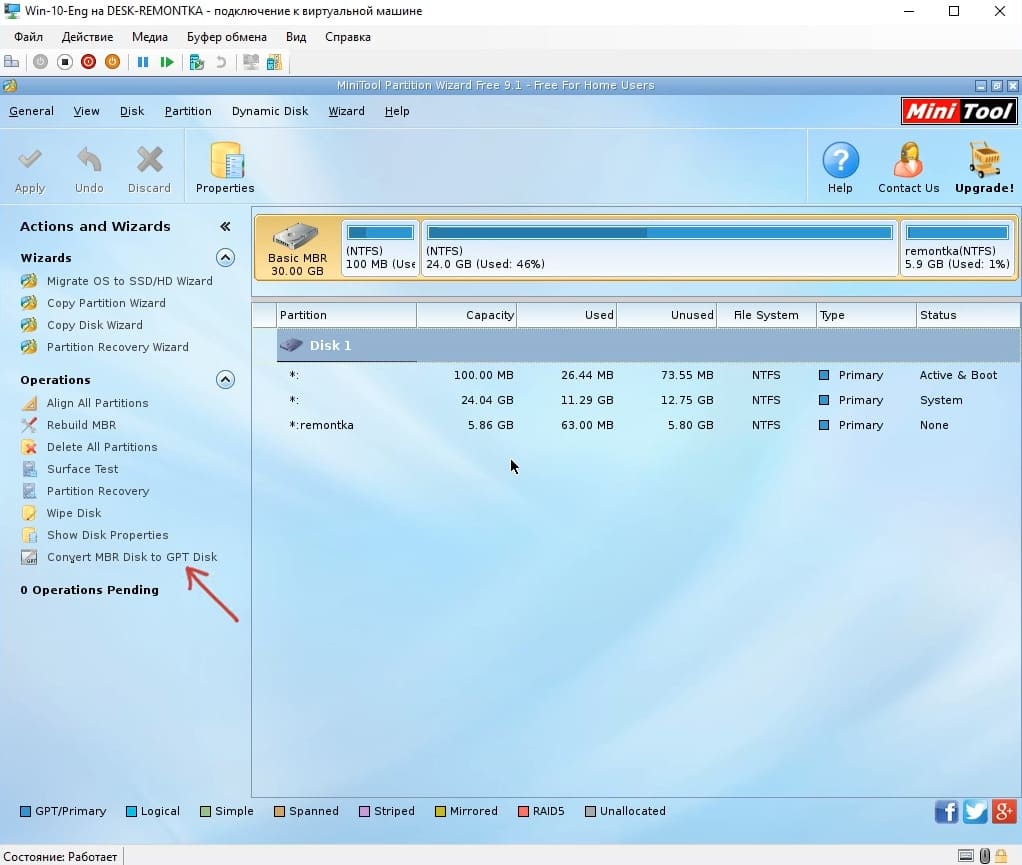
– If the utility indicates that the disk is a system disk and conversion is not possible, delete the system partitions at the beginning of the disk (make sure there is no important data on these partitions).
– After deleting the system partitions, select the disk conversion to GPT again and apply the changes.
– Restart your computer and continue the Windows installation in UEFI mode.