This article explains how to configure a tagged network interface with VLAN in Windows 10/11 and Windows Server 2019 (also applicable to Windows Server 2022/2016/2012 R2). VLAN (Virtual LAN), defined in the 802.1Q standard, is used for network segmentation. VLANs tag traffic with a VLAN ID (vlanid), which is essential for distributing traffic across virtual networks. Using VLANs allows you to segment a network into multiple logical segments, isolate broadcast domains, and enhance network security.
You can purchase original product keys from our catalog:
Windows 11 – from 11.20 €
Windows 10 – from 9.16 €
Windows Server 2022 – from 28.00 €
Windows Server 2019 – from 16.90 €
Windows Server 2016 – from 11.50 €
Windows Server 2012 R2 – from 11.90 €
To work with VLANs, the switch port connected to your computer or server must be configured. This port should be switched from access mode to trunk mode. In trunk mode, all VLANs are typically allowed, but you can specify a list of VLANs (from 1 to 4094) permitted for a specific Ethernet switch port.
Configuring VLAN Interfaces in Windows 10 and 11
Desktop versions of Windows do not have built-in VLAN support. Typically, network adapter drivers strip VLAN tags from packets, making VLANs inaccessible.
However, for some network adapters, you can set the VLAN ID directly in the driver settings:
1. Open Device Manager (devmgmt.msc).
2. Expand the Network adapters section and open the properties of the desired network adapter.
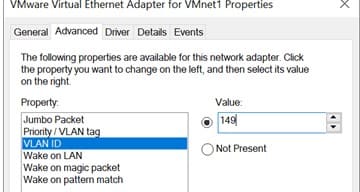
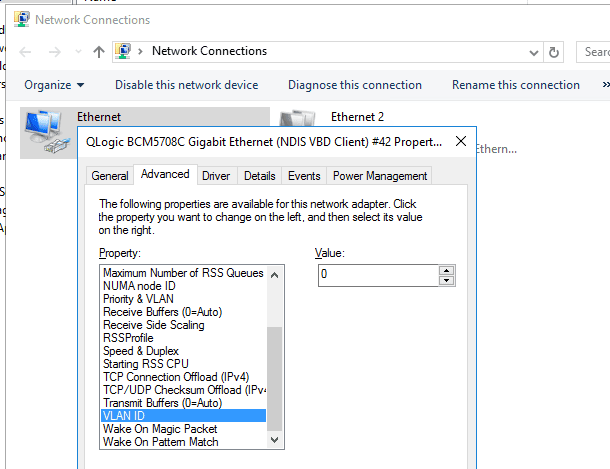
3. Go to the Advanced tab and locate the VLAN ID option, where you can specify the VLAN number.
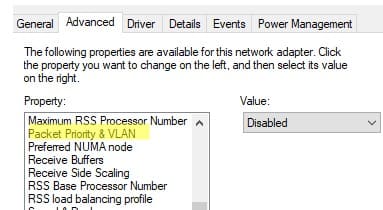
4. For some network adapters, you may need to enable Packet Priority and VLAN first.
For modern versions of Windows 10 and 11, you can use a PowerShell cmdlet to configure VLAN. For example, to set VLAN 50 for a network interface named Ethernet1:
Set-NetAdapter –Name "Ethernet1" -VlanID 50
Note that Windows allows assigning multiple IP addresses to a single network interface, but IP addresses cannot be bound to different VLANs. To address this, create additional virtual network adapters.
Some network adapters (Intel, Broadcom, HP, Realtek) support VLAN tagging through dedicated utilities. To enable this, install a driver with 802.1Q support and the manufacturer’s official utility.
Creating VLAN Interfaces in Windows 10/11 on Realtek Network Adapters
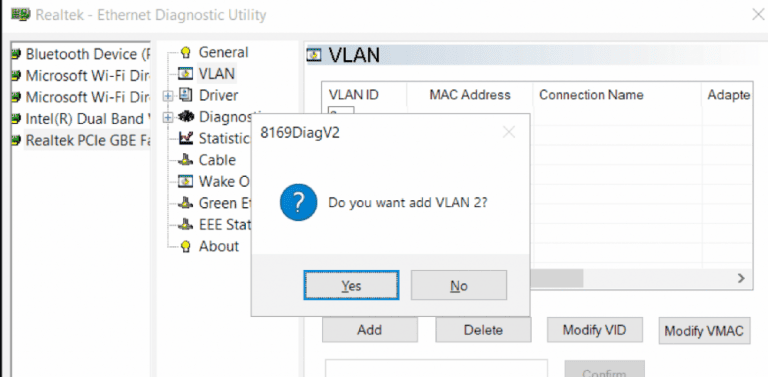
For Realtek network adapters, you can configure multiple virtual interfaces with VLANs using the Realtek Ethernet Diagnostic Utility.
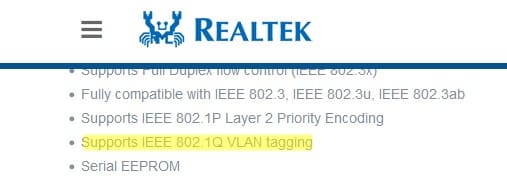
1. Verify that your Realtek adapter model supports VLANs. For example, the specification for the RTL8169SC(L) model should indicate Supports IEEE 802.1Q VLAN tagging.
2. Download and install the latest driver and Realtek Ethernet Diagnostic Utility.
3. In the utility, go to the VLAN section, click the Add button, and specify the desired VLAN ID.
Adding VLAN Interfaces on Intel Network Adapters
For Intel network adapters, VLANs are configured using the Intel Advanced Network Services (ANS) utility.
1. Confirm that your adapter supports VLANs. For example, Intel PRO/100 and PRO/1000 adapters do not support VLANs.
2. Install the driver with the Intel PROSet for Windows Device Manager and Advanced Network Services options.
3. A VLANs tab should appear in the adapter settings, where you can add VLAN interfaces.
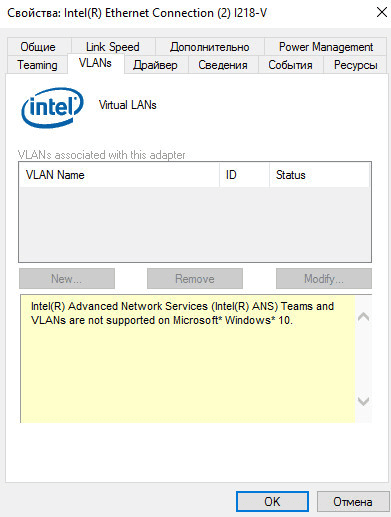
However, this method works only in Windows versions up to 10 1809. For later versions of Windows 10 and 11, the tab displays the message:
“Intel(R) Advanced Network (Intel(R) ANS) Teams and VLANs are not supported on Microsoft Windows 10.”
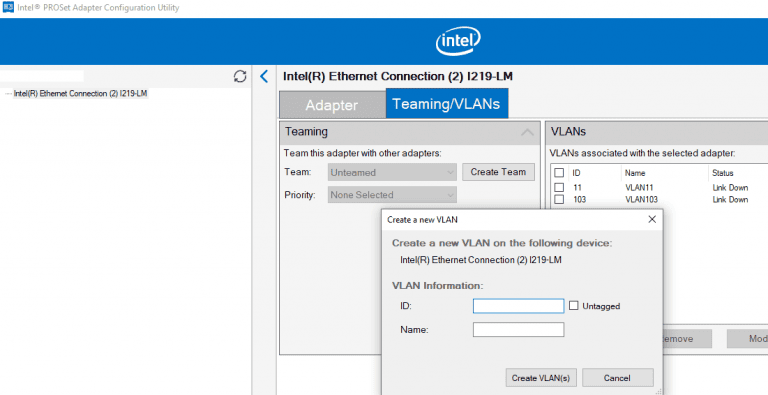
You must use the updated Intel PROSet Adapter Configuration Utility.
Launch the utility, go to the Teaming/VLANs tab, click New, and specify the network interface name and VLANID.
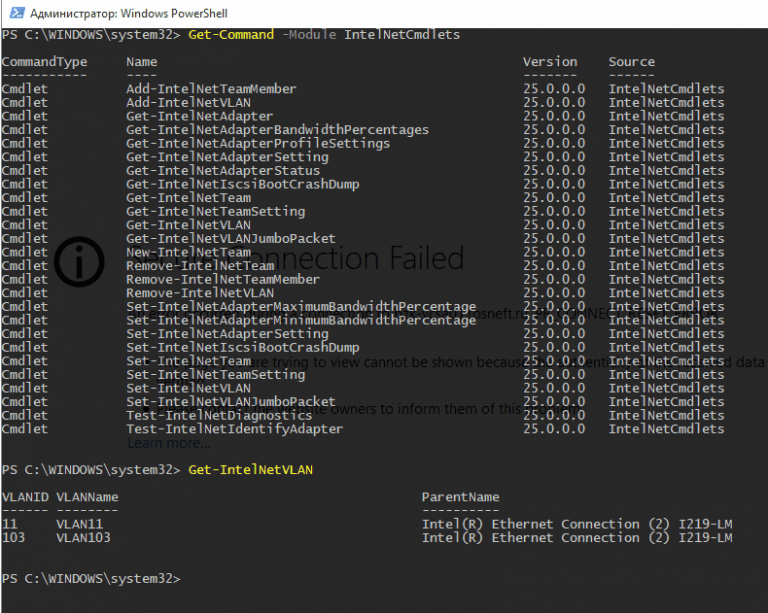
Additionally, you can add, remove, or view a list of VLANs on Intel network adapters using PowerShell cmdlets from the IntelNetCmdlets module. Import the module into your PowerShell session:
Import-Module -Name "C:\Program Files\Intel\Wired Networking\IntelNetCmdlets\IntelNetCmdlets" -Scope Local
To create an untagged virtual network adapter (typically used with native-vlan-id):
Add-IntelNetVLAN -ParentName "Intel(R) Ethernet Connection I219-LM" -VLANID 0
To create an Intel network adapter with a specific VLAN number:
Add-IntelNetVLAN -ParentName "Intel(R) Ethernet Connection I219-LM" -VLANID 11
To list all Intel virtual network adapters:
Get-NetAdapter
To remove a VLAN adapter:
Remove-IntelNetVLAN -ParentName "Intel(R) Ethernet Connection I219-LM" -VLANID 11
For Broadcom network adapters, you can create groups of virtual network interfaces and assign VLAN IDs using the Broadcom Advanced Control Suite utility.
Adding Multiple VLAN IDs in Windows Server 2019/2016
In Windows Server 2022/2019/2016, you can configure multiple VLANs on a single network interface using NIC Teaming without installing additional drivers.
1. Ensure that no VLAN is set in the network adapter driver settings (VLAN ID = 0).
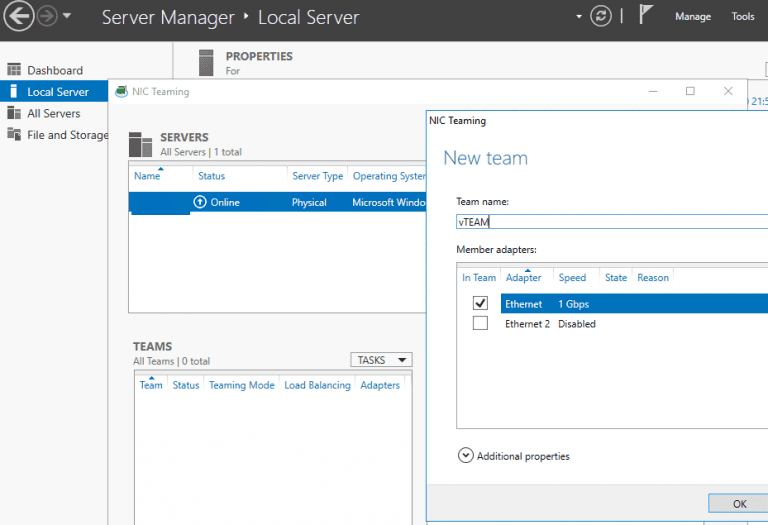
2. Open Server Manager -> Local and select NIC Teaming.
3. In the Teams section, click Tasks -> New Team and select the adapters to add to the team.
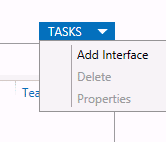
4. To add a VLAN, click Tasks -> Add Interface and specify the VLAN ID.
Specify the name of the created interface and the VLAN number.
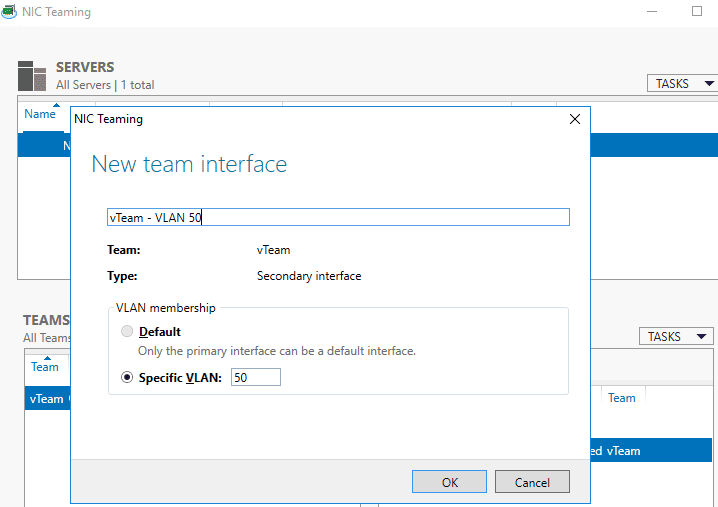
Example command to create a VLAN interface via PowerShell:
Add-NetLbfoTeamNic -Team vTeam -VlanID 50 -Name VLAN50
The maximum number of VLAN interfaces for a single NIC Teaming in Windows Server is 32.
Each network interface will appear as a separate virtual network adapter in the Network Connections panel (ncpa.cpl).
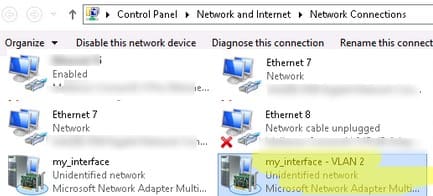
Creating Multiple VLANs in Windows Hyper-V
Windows supports programmatic VLAN handling through the Hyper-V subsystem. This functionality is available in both server editions and Windows 10/11 Pro and Enterprise editions.
To work with VLANs in Hyper-V, follow these steps:
1. Install Hyper-V components:
Enable-WindowsOptionalFeature -Online -FeatureName Microsoft-Hyper-V -All
2. Create a virtual switch using Hyper-V Manager or PowerShell.
3. To create a VLAN, use the following PowerShell commands:
Add-VMNetworkAdapter -ManagementOS -Name VLAN50 -StaticMacAddress "11-22-33-44-55-AA" -SwitchName VLAN50Switch
Set-VMNetworkAdapterVlan -ManagementOS -VMNetworkAdapterName VLAN50 -Access -VlanId 50
This will create a network adapter with the specified VLAN tag in the system.
If virtual machines (VMs) are running on your Hyper-V server, you can assign them to different VLANs. To switch a VM’s virtual network adapter to Access mode and allow it to receive traffic only from a specific VLAN ID, use:
Set-VMNetworkAdapterVlan -VMName Test1 -Access -VlanId 21
To list all VMs and their assigned VLANs:
Get-VMNetworkAdapterVLAN
For Windows Server 2022, instead of NIC Teaming, use Switch Embedded Teaming (SET).
Example of creating a virtual adapter and assigning a VLAN:
1. Create a virtual switch connected to the host’s network adapters:
New-VMSwitch -Name "HVSwitch1" -NetAdapterName "Ethernet3","Ethernet4" -EnableEmbeddedTeaming $true
2. Create a virtual adapter connected to the virtual switch:
Add-VMNetworkAdapter -ManagementOS -Name "VLAN11" -StaticMacAddress "XX-XX-XX-XX-XX-XX" -SwitchName "HVSwitch1"
3. Assign a VLAN tag to the virtual adapter:
Set-VMNetworkAdapterVlan -ManagementOS -VMNetworkAdapterName "VLAN11" -Access -VlanId 11
If you need the Hyper-V virtual adapter to accept packets from multiple VLANs, use:
Get-VMNetworkAdapter -Name youradaptername | Set-VMNetworkAdapterVlan -Trunk -AllowedVlanIdList 50-59 -NativeVlanId 0
The -NativeVlanId 0 parameter is required. This specifies that VLAN:0 is used as the native VLAN for untagged traffic.
Thus, Windows allows VLAN configuration in various ways, both at the physical adapter level and through Hyper-V, providing flexible setup for handling tagged network traffic.


