In this article, we’ll detail the process of installing a domain controller on Windows Server 2019. A domain controller runs the Active Directory Domain Services (AD DS), which provides centralized storage and management of users, groups, and computers, as well as secure access to network resources. This guide is also applicable to Windows Server 2012 R2, Windows Server 2016, Windows Server 2019, and Windows Server 2022.
You can purchase original Windows Server product keys in our store:
Windows Server – starting at 10.80 €
Windows Server RDS CAL – starting at 12.80 €
Prerequisites
To get started, you’ll need a server with Windows Server 2019 installed. In this example, the domain controller is deployed on a virtual machine.
Step 1. Preparing to Install the Domain Controller
After installing Windows Server 2019, perform the initial system configuration:
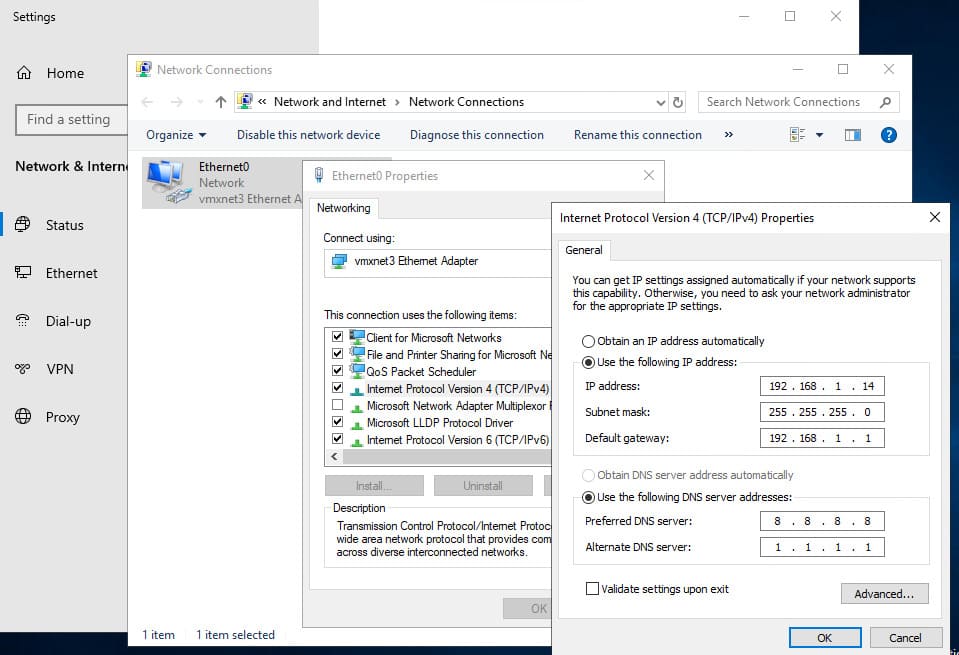
1. Configure the network. Assign a static IP address to the server. Specifying a DNS server at this stage is optional—during the domain controller setup, the DNS service will be installed and will automatically update the DNS settings. It’s recommended to disable IPv6, though this can be done post-installation.
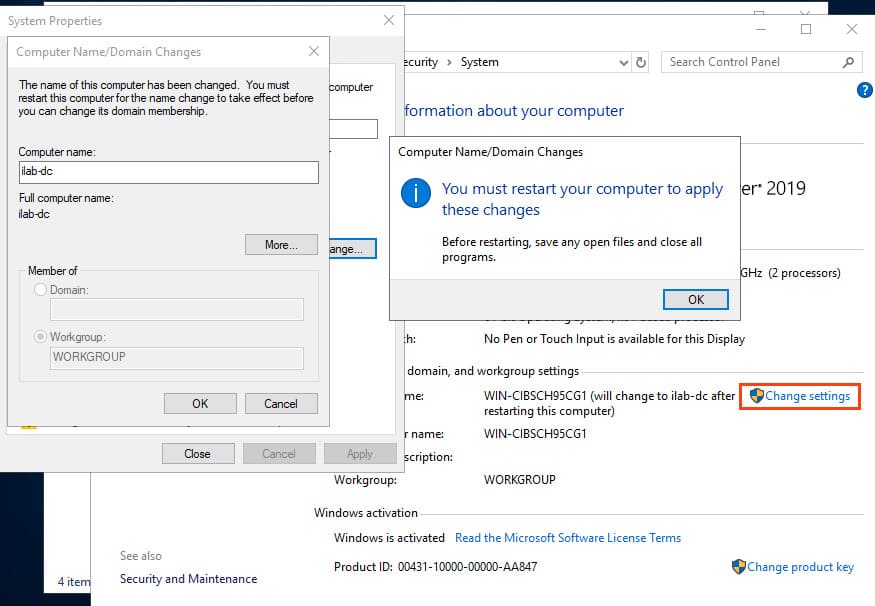
2. Set the server name. This is a mandatory step, as the server name will become the domain controller’s name.
3. Install the latest updates and drivers, and configure the correct regional settings and time.
Step 2. Installing the Active Directory Domain Services (AD DS) Role
Install the role using the local Administrator account, which will become the domain administrator. During the AD DS installation, the DNS role will also be added.
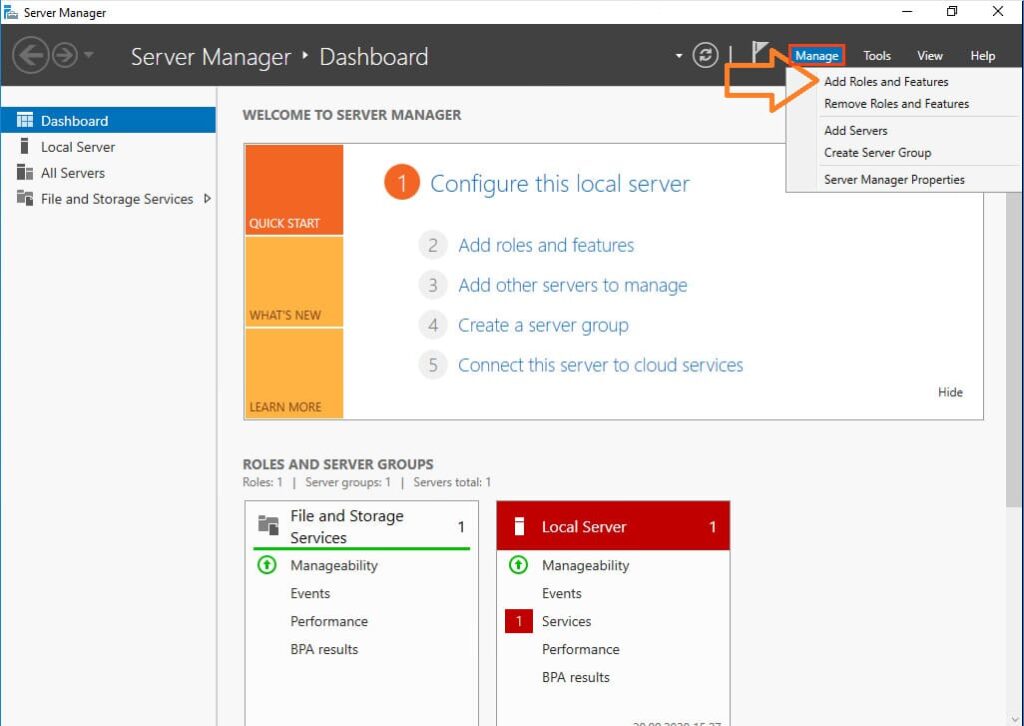
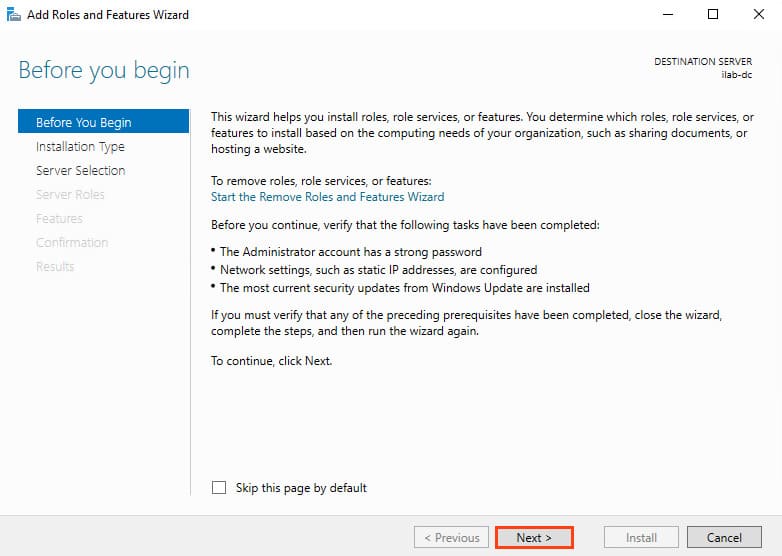
1. Open Server Manager and navigate to Manage > Add Roles and Features.
2. The Add Roles and Features Wizard will launch. On the Before You Begin step, click Next.
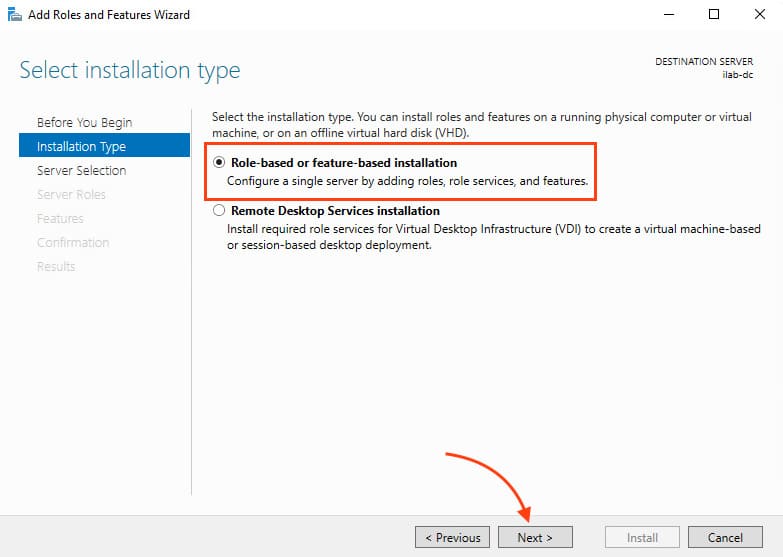
3. In the Installation Type section, select Role-based or feature-based installation and click Next.
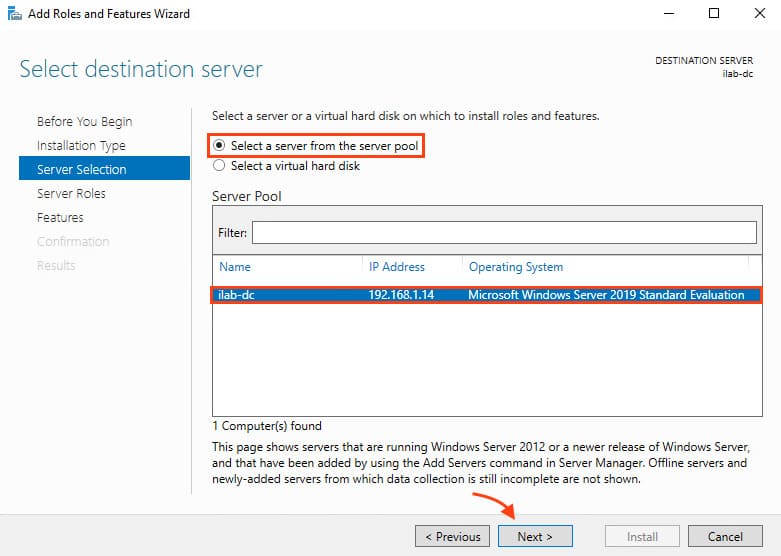
4. In the Server Selection section, choose the current server and click Next.
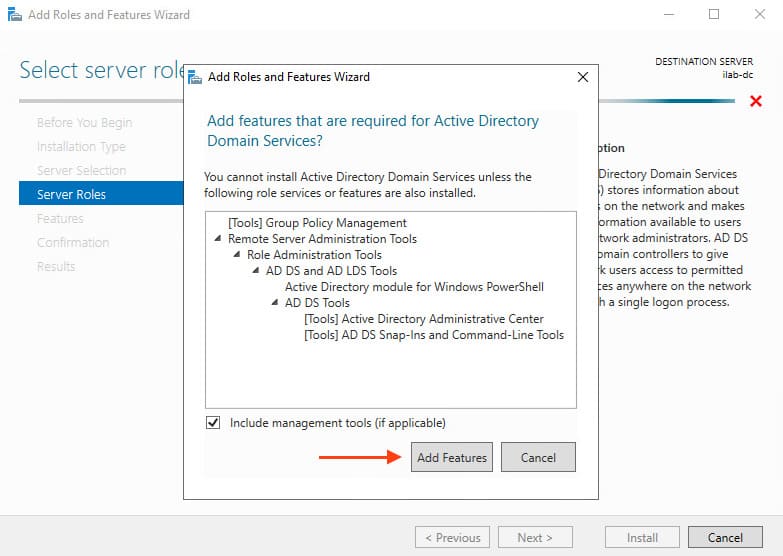
5. In the Server Roles section, check the box for Active Directory Domain Services.

6. You’ll be prompted to install additional tools, such as Group Policy Management, Active Directory module for Windows PowerShell, and others. Click Add Features.
7. The Active Directory Domain Services role should now be checked. Click Next.

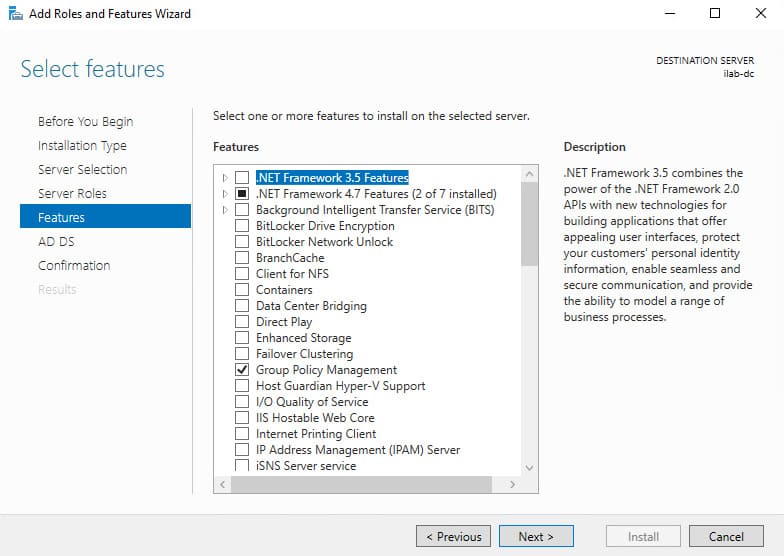
8. In the Features section, no additional options are required. Click Next.
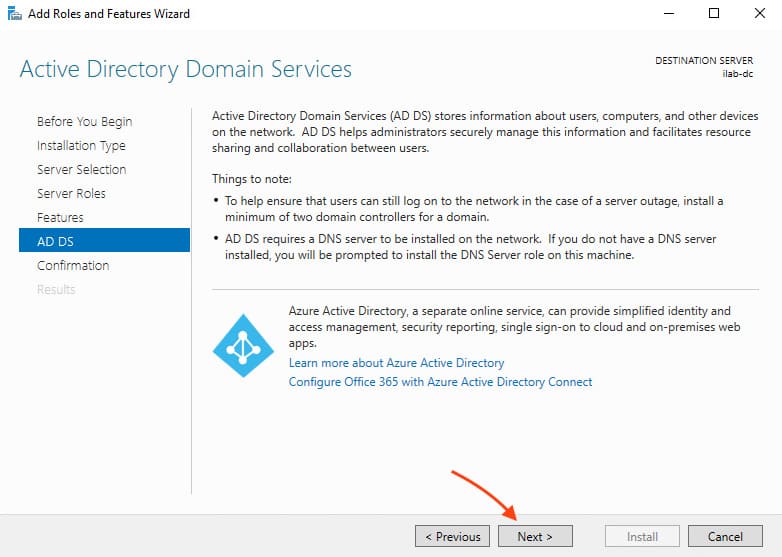
9. On the AD DS screen, click Next.
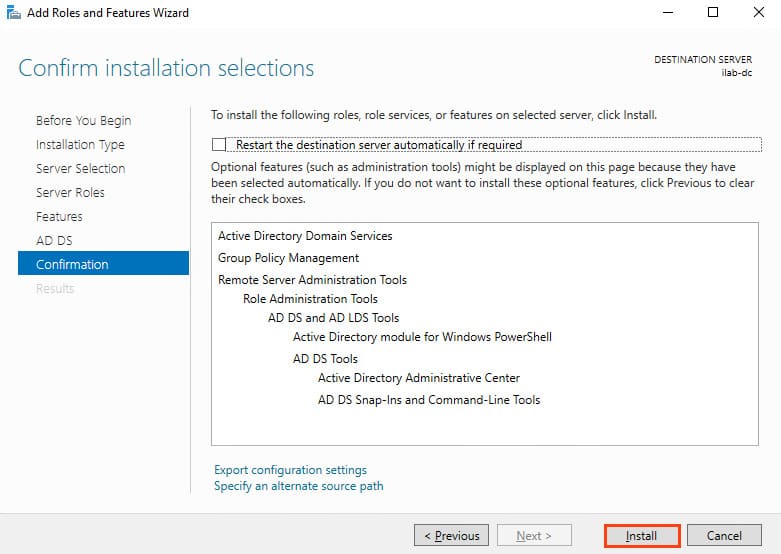
10. In the Confirmation section, confirm the installation and click Install.
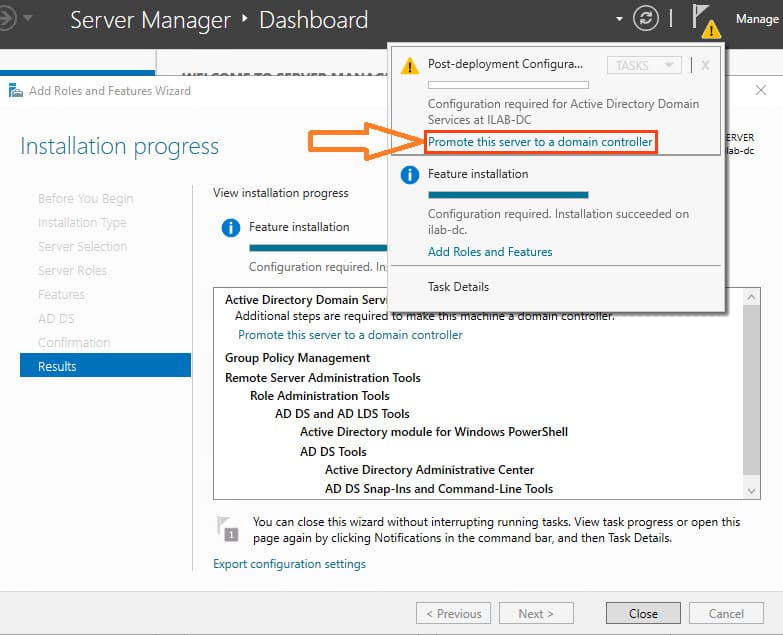
11. Once the installation is complete, a message will indicate that the server needs to be configured to be promoted to a domain controller. Click Promote this server to domain controller.

This option is also available in the warning section of the main Server Manager window. Click this link to promote the server to a domain controller.
Step 3. Promoting the Server to a Domain Controller
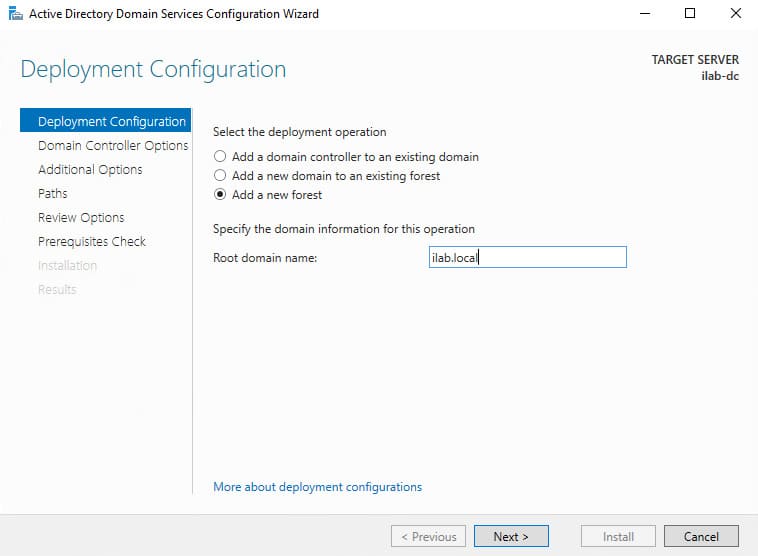
1. The Active Directory Domain Services Configuration Wizard will open. In the Deployment Configuration section, select Add a new forest.
2. Specify the root domain name in the Root domain name field (e.g., “ilab.local”) and click Next.
3. In the Domain Controller Options section, select the domain and forest functional levels, which determine the minimum server OS versions supported in the domain. For example, for servers running Windows Server 2012 or later, choose Windows Server 2012.
4. Keep the Domain Name System (DNS) server checkbox selected to install the DNS server on the domain controller. Set a password for Directory Services Restore Mode (DSRM), which is required for restoring directory services.
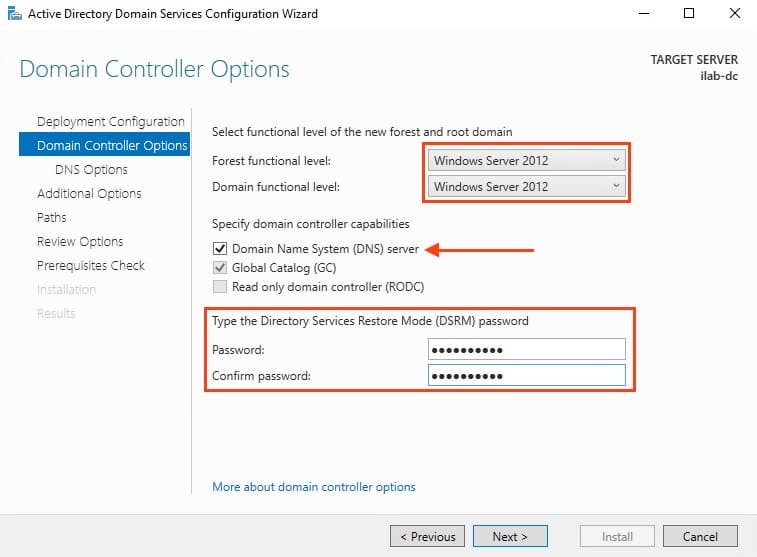
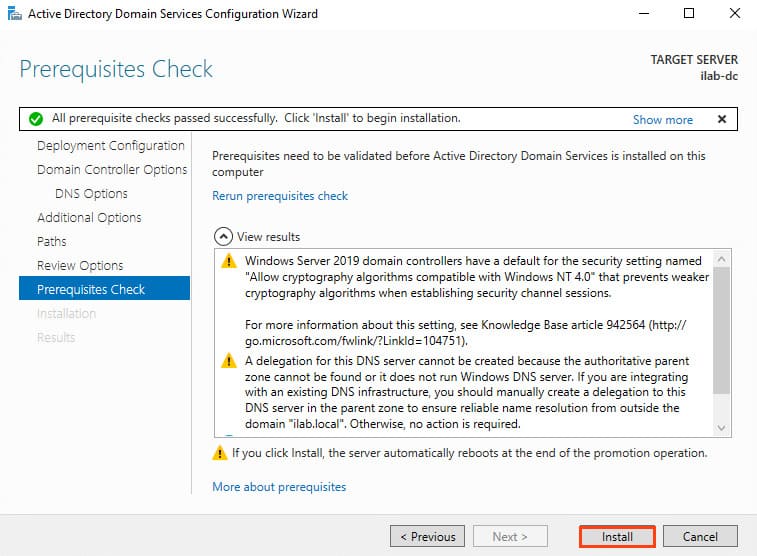
5. Ignore the warning: “A delegation for this DNS server cannot be created because the authoritative parent zone cannot be found…”. Delegation isn’t needed since the DNS server will reside on the domain controller. Click Next.

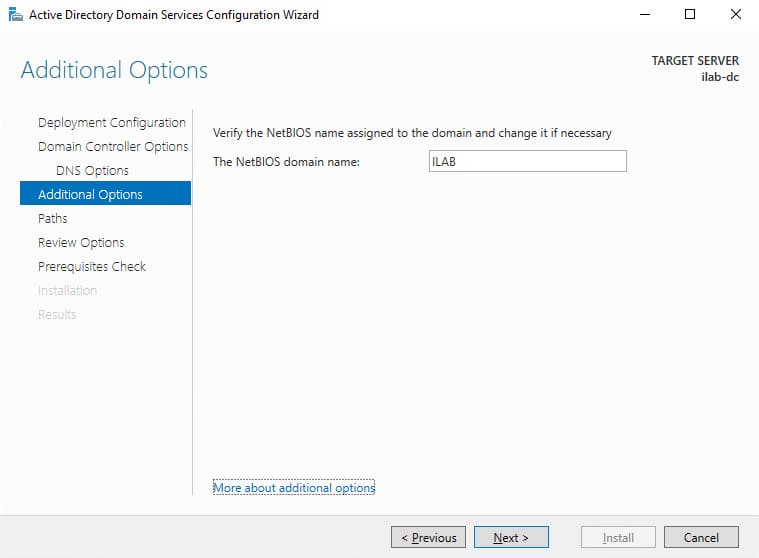
6. In the Additional Options section, specify a NetBIOS name for the domain, e.g., “ILAB”. Click Next.
7. In the Paths section, keep the default paths for the database, logs, and SYSVOL folder.

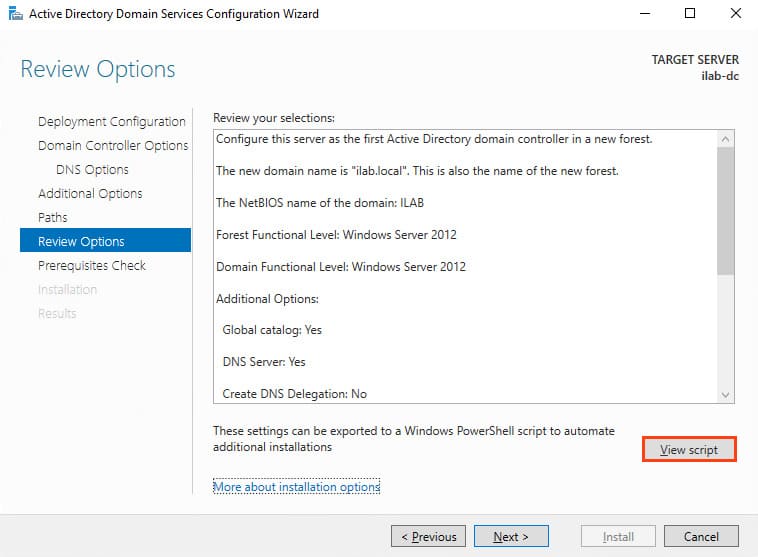
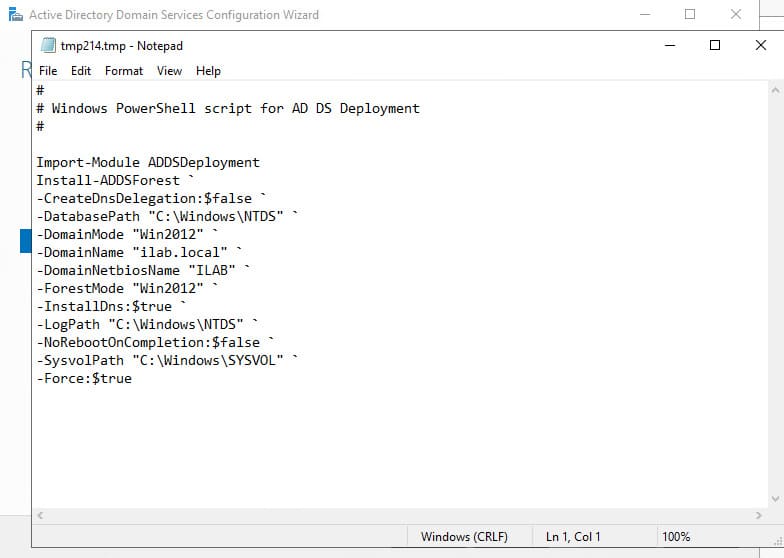
8. On the Review Options screen, verify the installation settings. You can click View script to see a PowerShell script for automation.
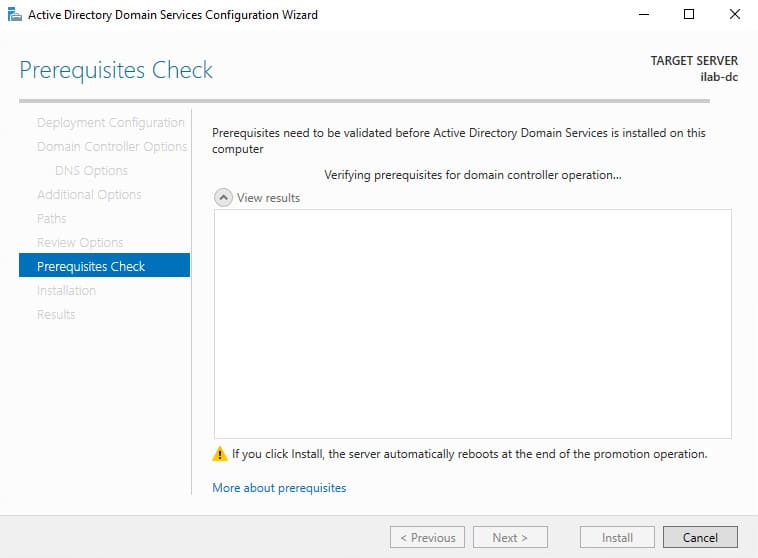
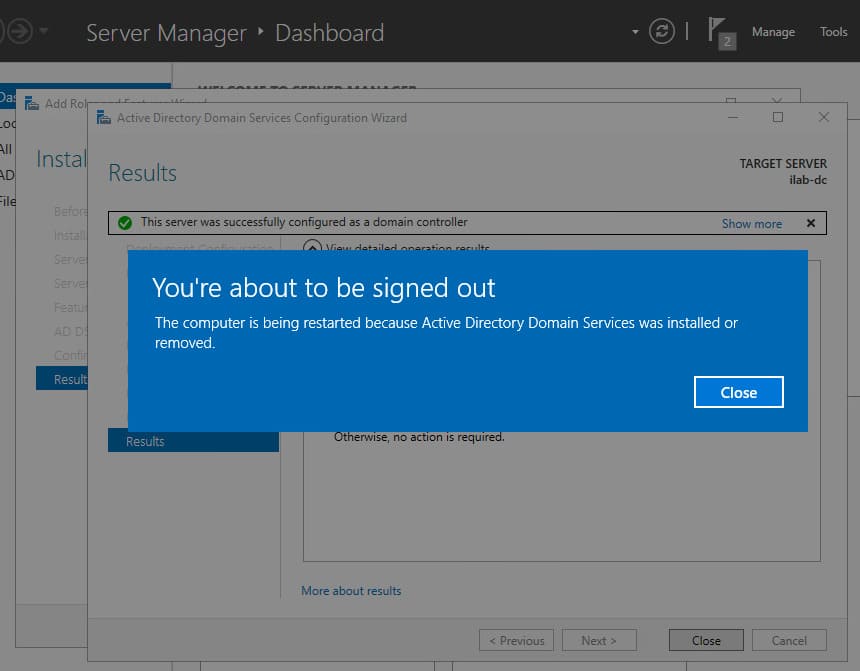
9. In the Prerequisites Check section, the wizard will perform checks. If all prerequisites are met, click Install to begin the installation.
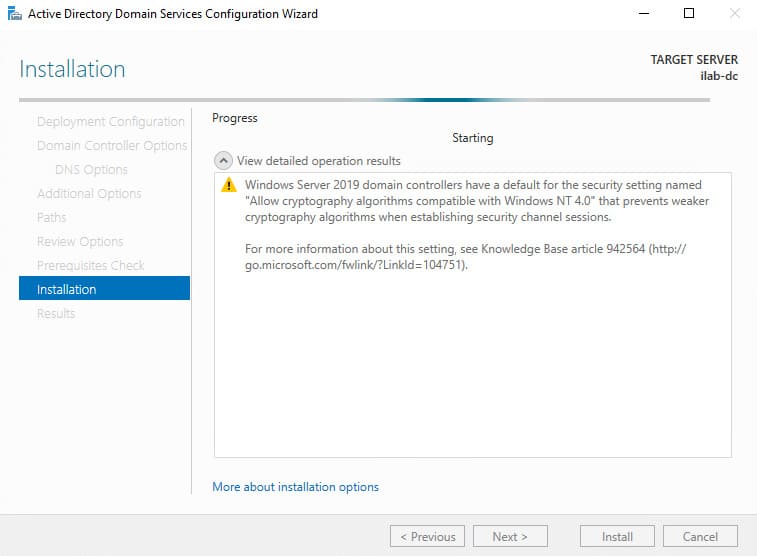
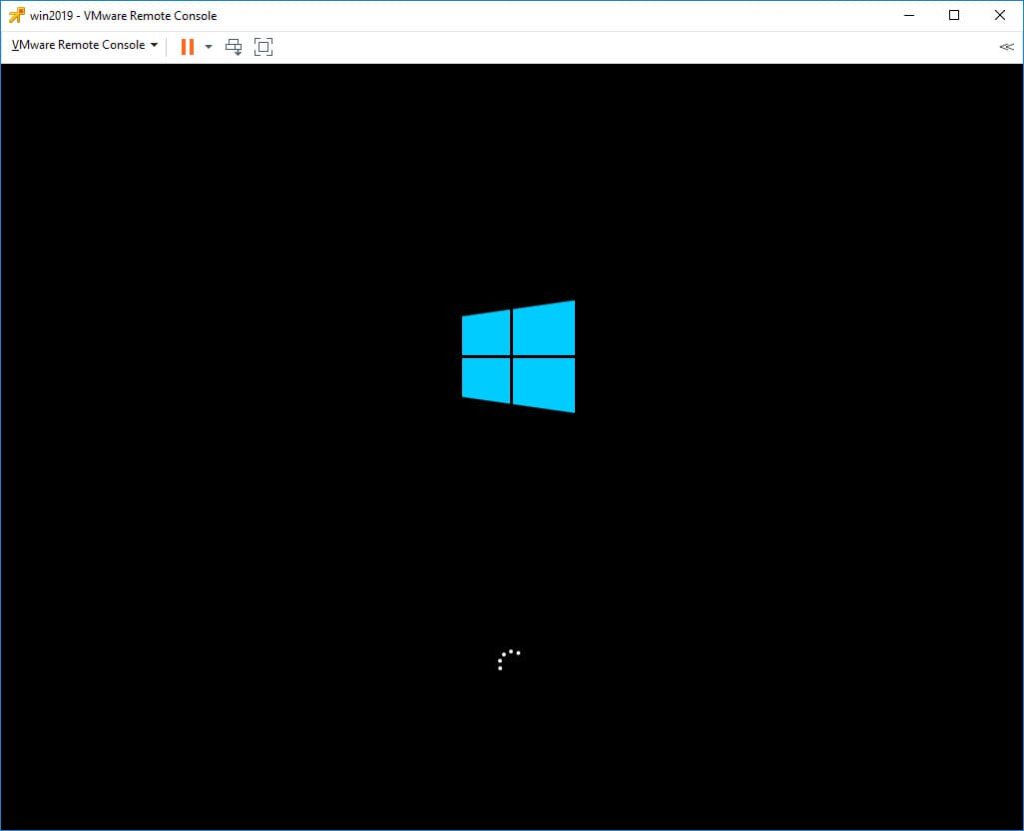
The server will automatically reboot after the installation completes.
Step 4. Initial Domain Controller Configuration
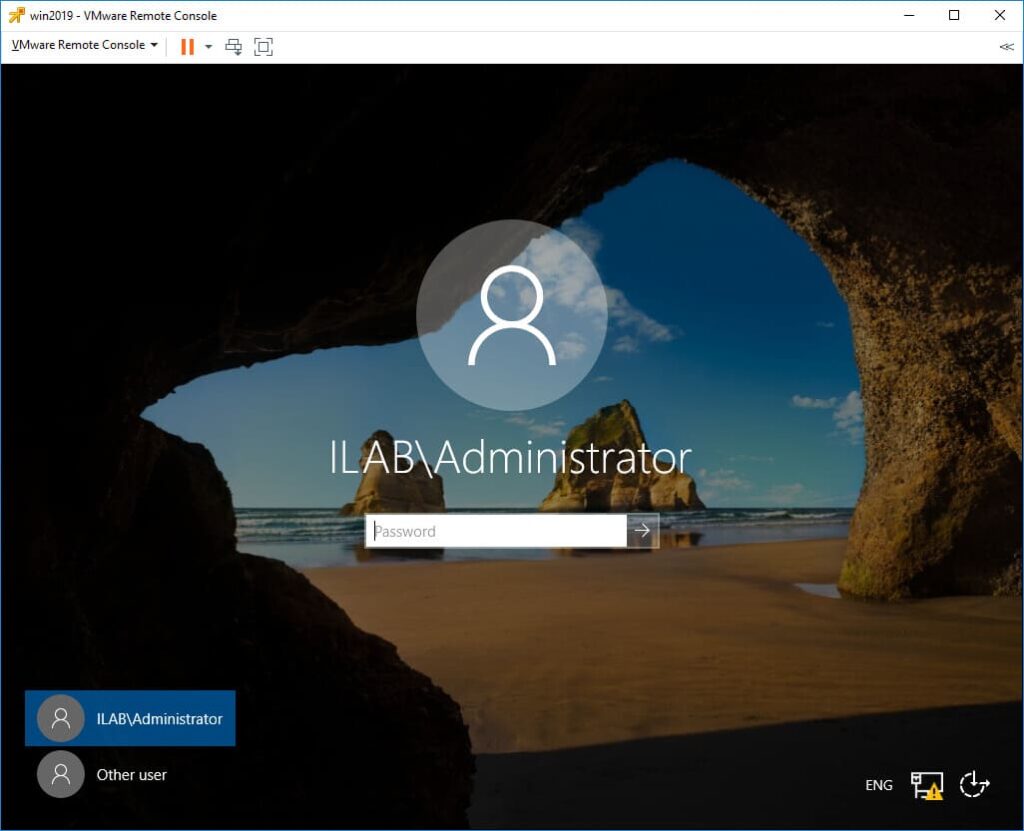
1. Log in using the domain administrator account (e.g., “ILAB\Administrator”).
2. Verify that the DNS server is automatically configured and that the domain zone (e.g., “ilab.local”) has been created.

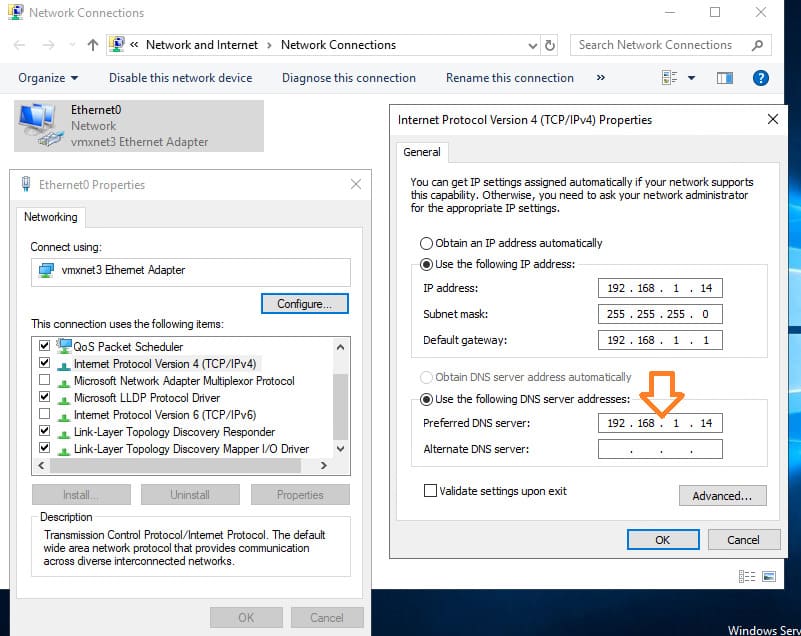
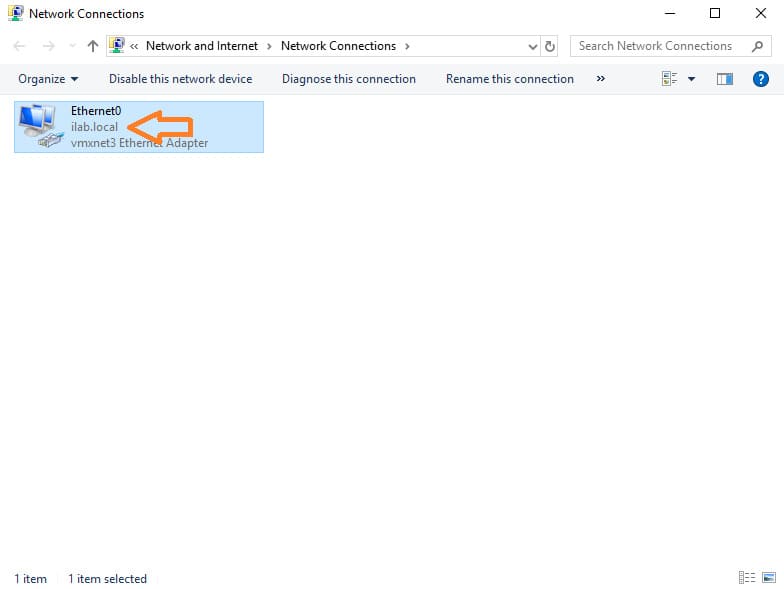
3. If the network adapter’s DNS server is set to 127.0.0.1, change it to the static IP address of your domain controller.

In our case, this is 192.168.1.14.
4. The network should now correctly display the domain connection.
Step 5. Managing Users and Groups in Active Directory
1. Open the Active Directory Users and Computers snap-in. The domain controller will appear in the Domain Controllers section.
Devices added to the domain will be listed in the Computers folder, and user accounts will be in the Users folder.

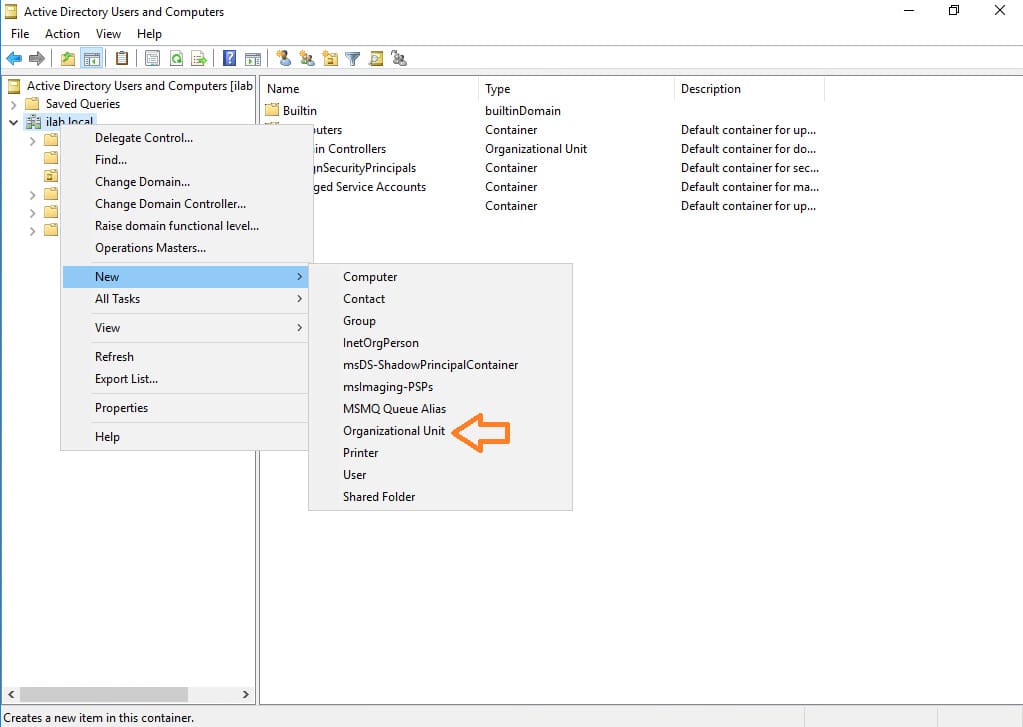
2. Create a new organizational unit (OU) for your company. Right-click the root directory and select New > Organizational Unit.
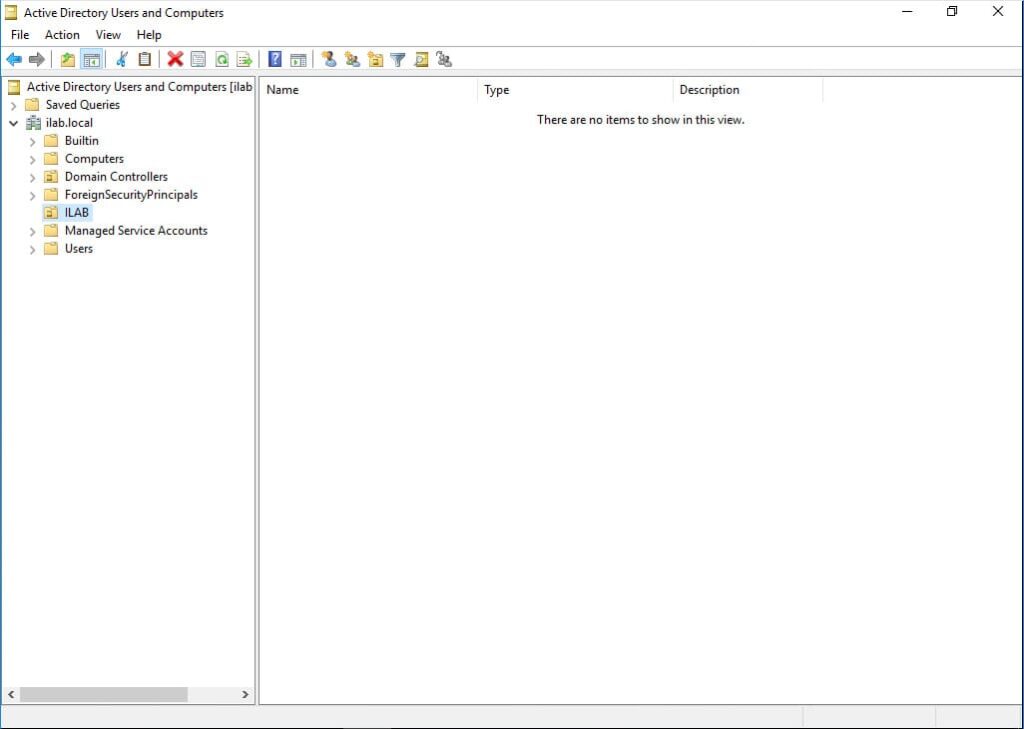
3. Create a root folder for your company. During creation, you can check the box to protect it from accidental deletion.
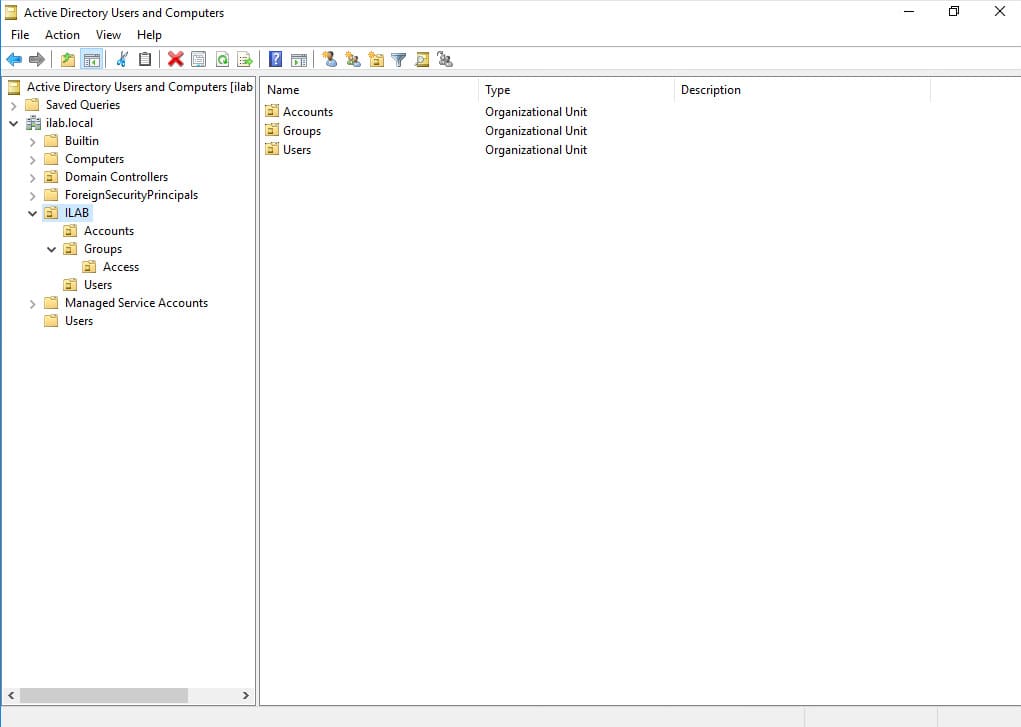
4. Build your company’s structure within the OU. You can create user accounts and access groups. Create an account for yourself and add it to the Domain Admins group.
Your server is now configured as a domain controller with operational Active Directory and DNS services. Ensure the firewall is enabled for the public network adapter and disabled for domain and private networks.