Software RAID is widely popular due to its simplicity in setup and management. It allows you to create fault-tolerant disk configurations without additional hardware. However, with the transition of modern systems to UEFI, the process of creating software RAID has its own nuances that are important to consider to avoid boot issues in case of disk failure.
In this article, we’ll look at how to create a software RAID based on dynamic disks in UEFI systems, as well as disk preparation and bootloader configuration.
Windows Partition Configuration with UEFI
Modern versions of Windows (10, 11, Windows Server 2016/2019) automatically create a standard partition configuration on GPT disks:
1) Windows RE: System recovery partition (NTFS), 500 MB in size.
2) EFI: System boot partition (FAT32), 100 MB in size.
3) MSR (Microsoft System Reserved): Service partition, 16 MB in size.
4) Windows: Main system partition where the OS is installed.

Step 1: Preparing to Create a Software RAID
1) Install Windows on one of the disks.
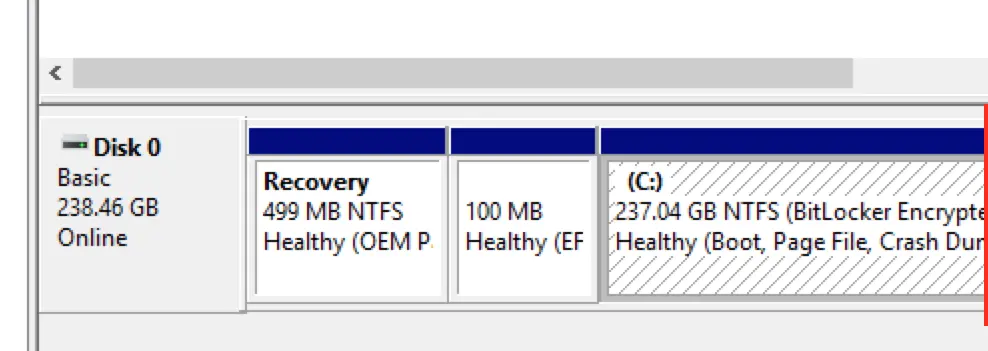
After installation, go to “Disk Management.” Here, the first partition is Windows RE, 499 MB in size, followed by the EFI partition, which is mistakenly labeled as encrypted. However, as mentioned earlier, this tool does not provide a complete picture of the partition structure.
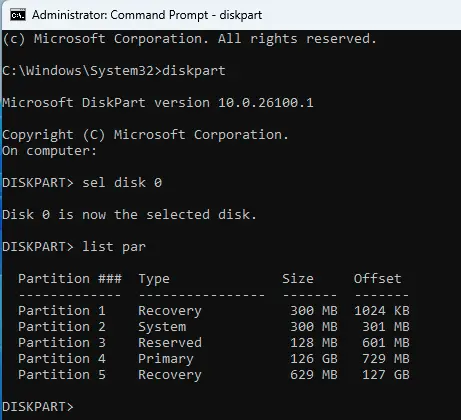
2) Launch Command Prompt as an administrator and run the following commands:
diskpart
sel disk 0
list par
This will display the partition structure on the first disk.
3) Prepare the second disk for mirroring:
sel disk 1
clean
Warning! The clean command will erase all data on the selected disk.
4) Convert the second disk to GPT:
convert gpt
During the conversion, an MSR partition will be automatically created on the disk. We don’t need it yet, so delete it with the command:
sel par 1
delete part override
After that, ensure the disk has no partitions.

5) Create partitions on the second disk identical to the first:
– For the recovery partition:
sel disk 1
create partition primary size=499
format quick fs=ntfs
Then assign the necessary GPT attributes:
set id=de94bba4-06d1-4d40-a16a-bfd50179d6ac
gpt attributes=0x8000000000000001
The identifier de94bba4-06d1-4d40-a16a-bfd50179d6ac sets the partition type as Windows RE, and the attribute 0x8000000000000001 prevents assigning a drive letter and marks the partition as essential for system operation to avoid its deletion from the disk management tool.
– For the EFI partition:
create partition efi size=99
format quick fs=fat32
– For the MSR partition:
create partition msr size=16
If everything is done correctly, you should get a partition layout that fully mirrors (except for the system partition) the layout of the first disk.
After that, restart the system.

Step 2: Creating a Software RAID
First, convert the disks to dynamic. This can be done in the Disk Management tool.
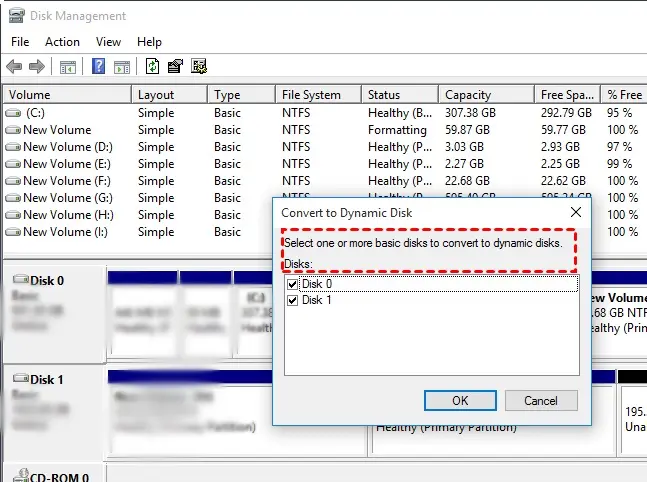
Or via diskpart:
1) Convert both disks to dynamic:
sel disk 0
convert dynamic
sel disk 1
convert dynamic
2) Create a mirrored array (RAID 1) for the system partition:
sel vol c
add disk 1
This can also be done via Disk Management.
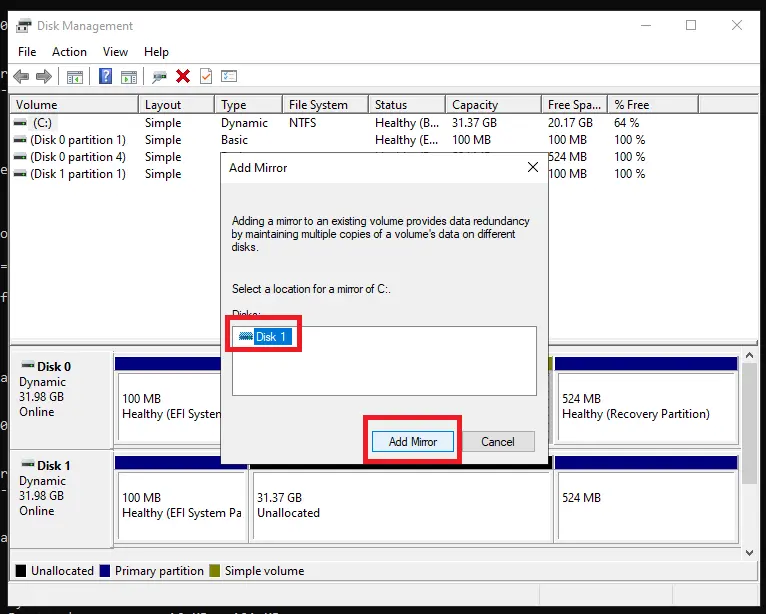
3) Wait for the data resynchronization to complete. This may take some time depending on the disk size and speed.
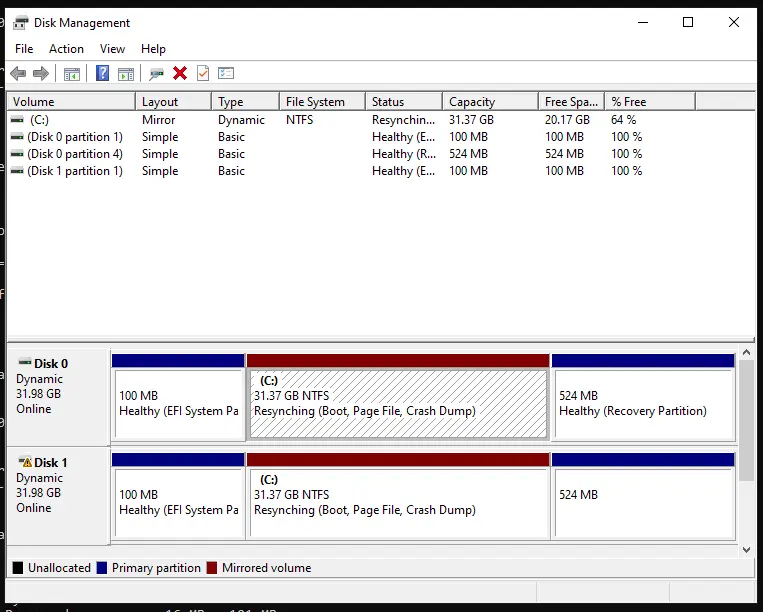
Now, during boot, a menu will appear allowing you to choose the partition. You can boot from either, but remember that the bootloader is still only present on the first disk, and changing the boot order in BIOS will prevent booting from the second disk.

Step 3: Configuring the EFI Bootloader and Copying It to the Second Partition
For full functionality of software RAID in a UEFI environment, the EFI bootloader must be configured on both disks. This ensures the system can boot in case one of the disks fails.
Step 4: Assigning Drive Letters to EFI Partitions
1) Launch diskpart via Command Prompt or PowerShell as an administrator.
2) Identify the location of the required partition on the first disk:
sel disk 0
list par
Find the EFI partition (usually partition number 2).
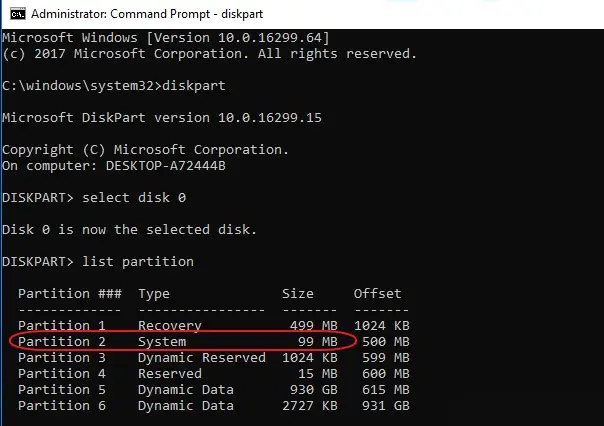
3) Select the partition and assign it a drive letter:
sel par 2
assign letter=P
4) Repeat the steps for the second disk:
sel disk 1
sel par 2
assign letter=S
Creating a Second Bootloader Instance
1) Navigate to the EFI partition of the first disk:
P:
cd EFI\Microsoft\Boot
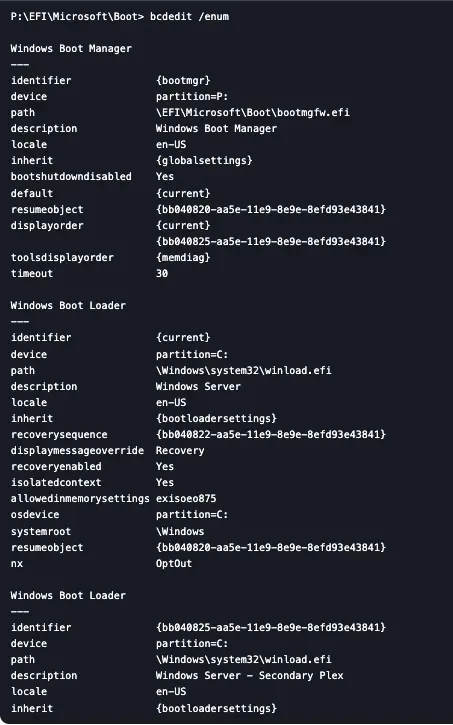
2) View the current boot entries:
bcdedit /enum
You will see a single boot manager entry and two Windows bootloader entries.
3) Create a second bootloader instance:
bcdedit /copy {bootmgr} /d "Windows Boot Manager 2"
Copy the identifier generated by the command.

4) Bind the new bootloader to the EFI partition of the second disk:
bcdedit /set {ID} device partition=s:
Replace {ID} with the identifier obtained earlier.
5) Export the BCD store of the bootloader:
bcdedit /export P:\EFI\Microsoft\Boot\BCD2
Copying the Bootloader
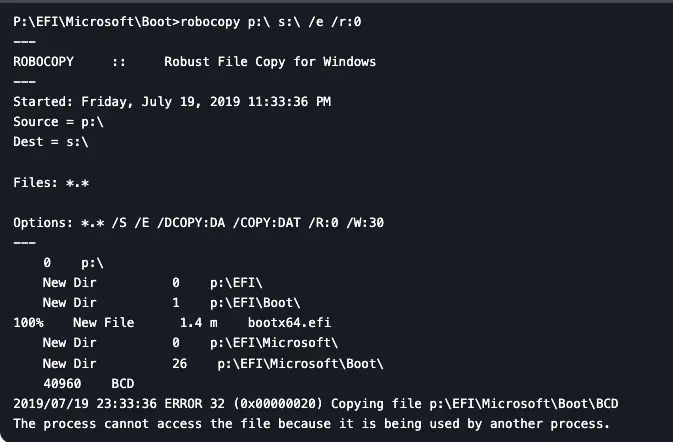
1) Copy the contents of the EFI partition from the first disk to the second:
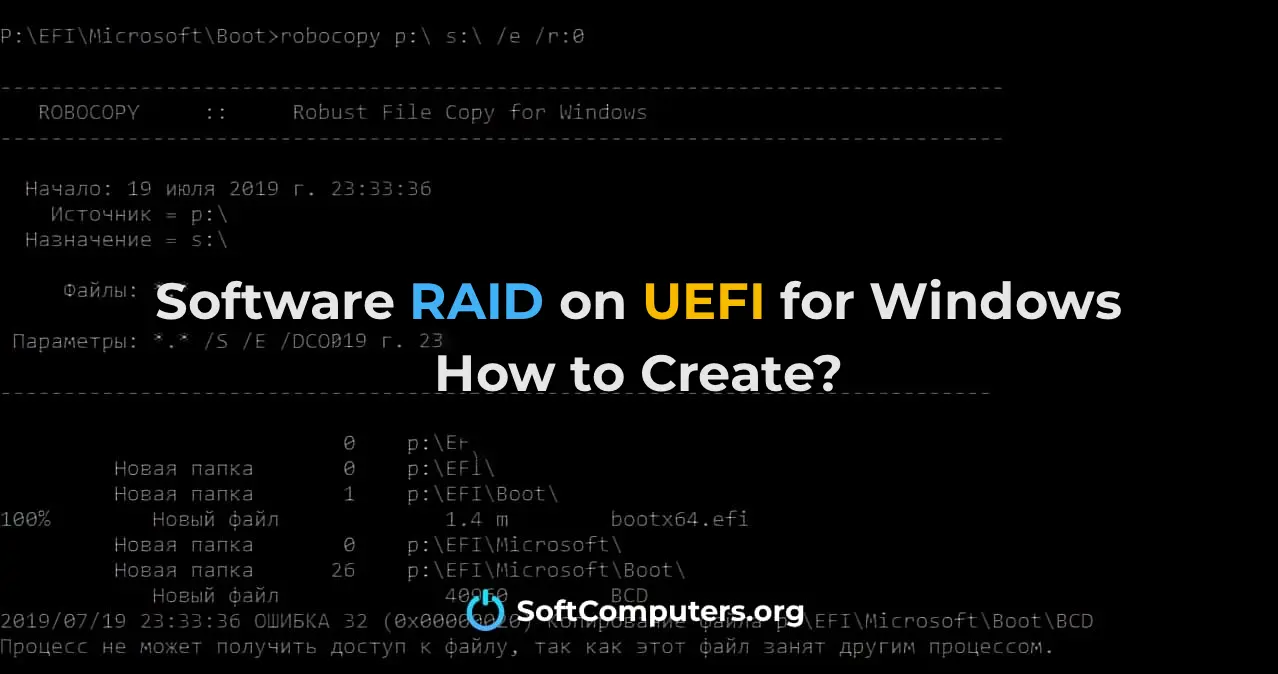
robocopy P:\ S:\ /E /R:0
Note: Errors when copying the active BCD store instance are normal.
2) Rename the BCD copy on the second disk:
rename S:\EFI\Microsoft\Boot\BCD2 BCD
3) Delete the temporary copy from the first disk:
del P:\EFI\Microsoft\Boot\BCD2
Removing Drive Letters
1) Launch diskpart and run the commands:
sel vol P
remove
2) Repeat for the second disk:
sel vol S
remove
Testing Boot
Restart the system and select Windows Boot Manager 2 in the BIOS. Then choose to boot from the secondary disk. If all settings are correct, the system will boot successfully.
Now your system is ready to work with software RAID in a UEFI environment. With proper configuration, you’ll ensure data redundancy and the ability to boot from either disk. However, remember that RAID requires regular maintenance and monitoring of the array’s health.
