In this article, we’ll show you how to set up server backups using Windows Server Backup, including connecting network storage and configuring a backup schedule. For Windows Server operating systems, Microsoft offers a built-in utility called Windows Server Backup, designed for full or partial system backups. This tool allows you to schedule backups or perform real-time backups, saving data to a local drive or network file storage.
In this guide, we’ll cover the installation of the Windows Server Backup component and the process of performing a full backup to network storage using the SAMBA/CIFS protocol.
Connecting File Storage as a Network Drive
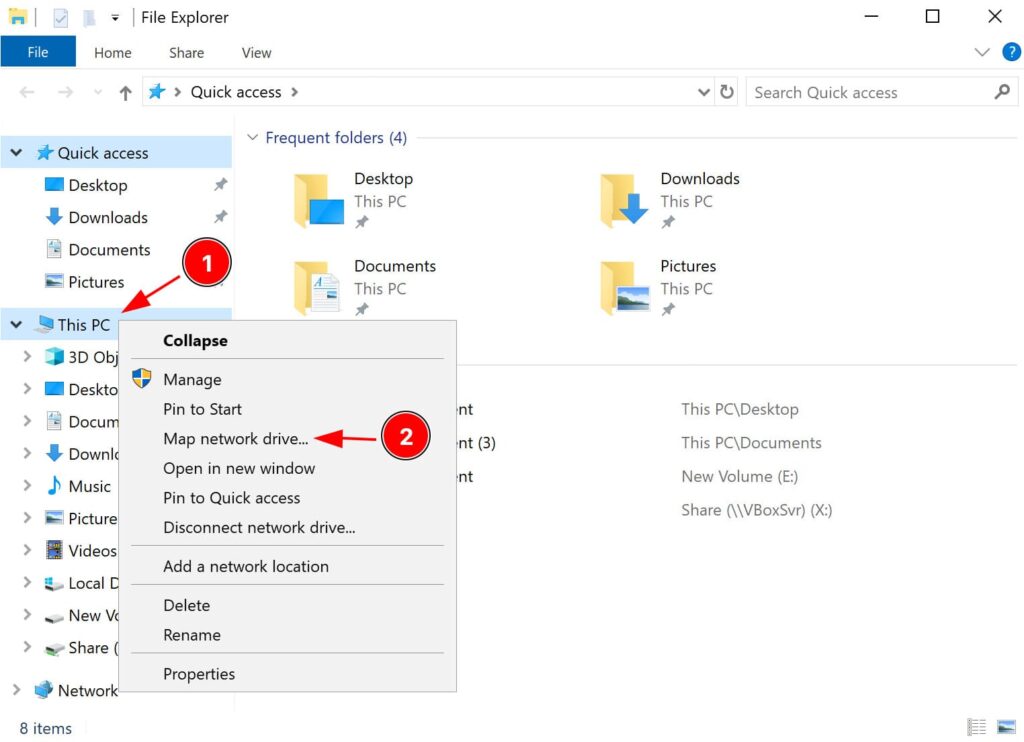
1. Open File Explorer, navigate to This PC, and click Map network drive….
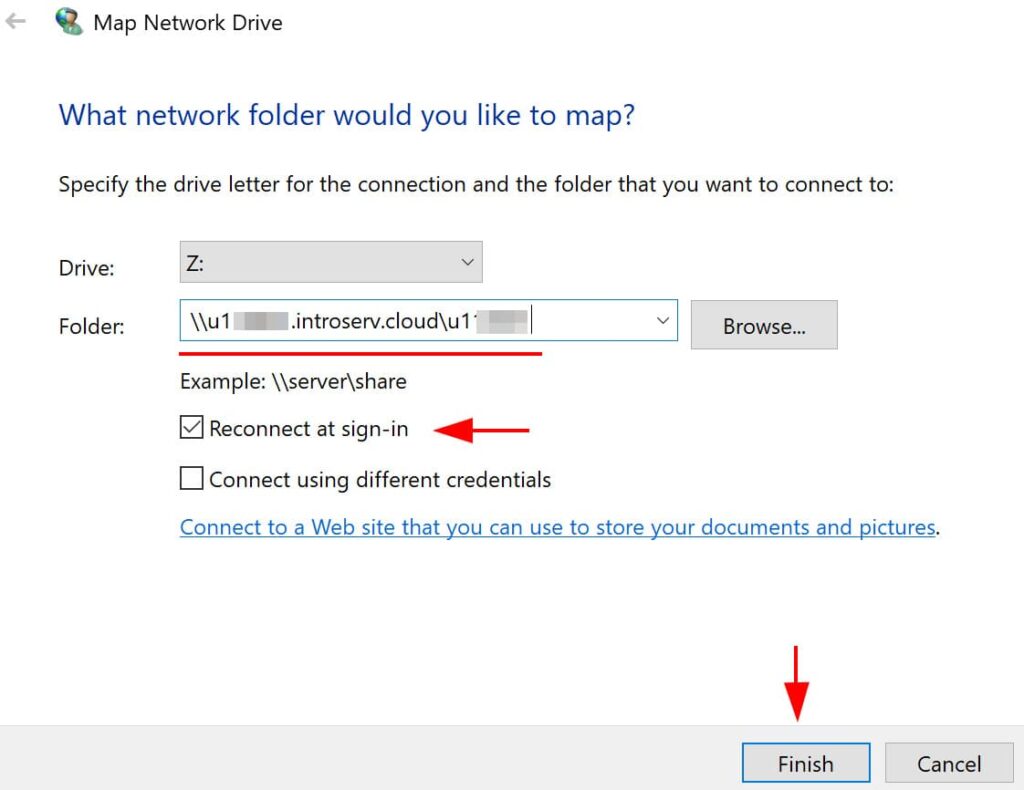
2. Enter the folder address in the format \\your_network_share and click Finish.
3. If authentication is required, a login and password window will appear. Fill in the details, and the network drive will appear in Windows File Explorer.
Now the network drive is ready for use. You can specify it in application settings or use it for full system backups with Windows Server Backup.
Installing the Windows Server Backup Component
The fastest way to install the component is via PowerShell:
1. Check if the component is already installed:
Get-WindowsFeature Windows-Server-Backup

If the component is not installed but available, you’ll see the following:

If the component is missing, run the following command to install it:
Add-WindowsFeature Windows-Server-Backup –IncludeAllSubFeature

Installing via the Graphical Interface
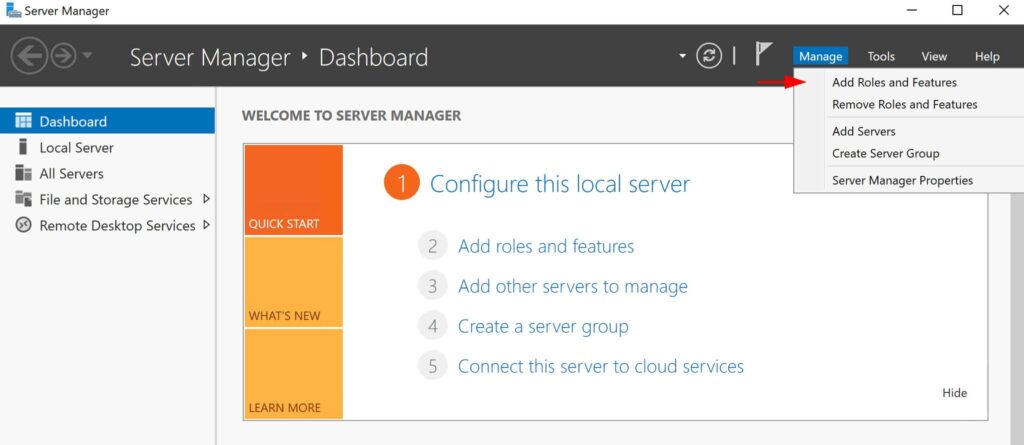
1. Open Server Manager and select Manage -> Add Roles and Features.
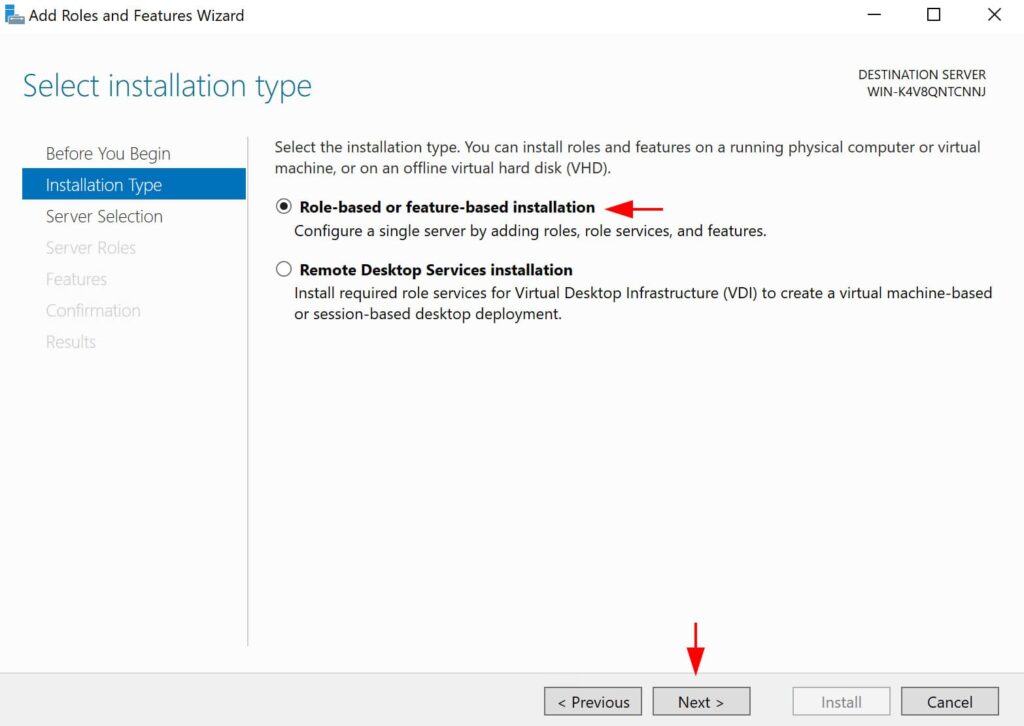
2. Choose Role-based or feature-based installation and click Next.
3. At the server selection stage, choose the current server and click Next.
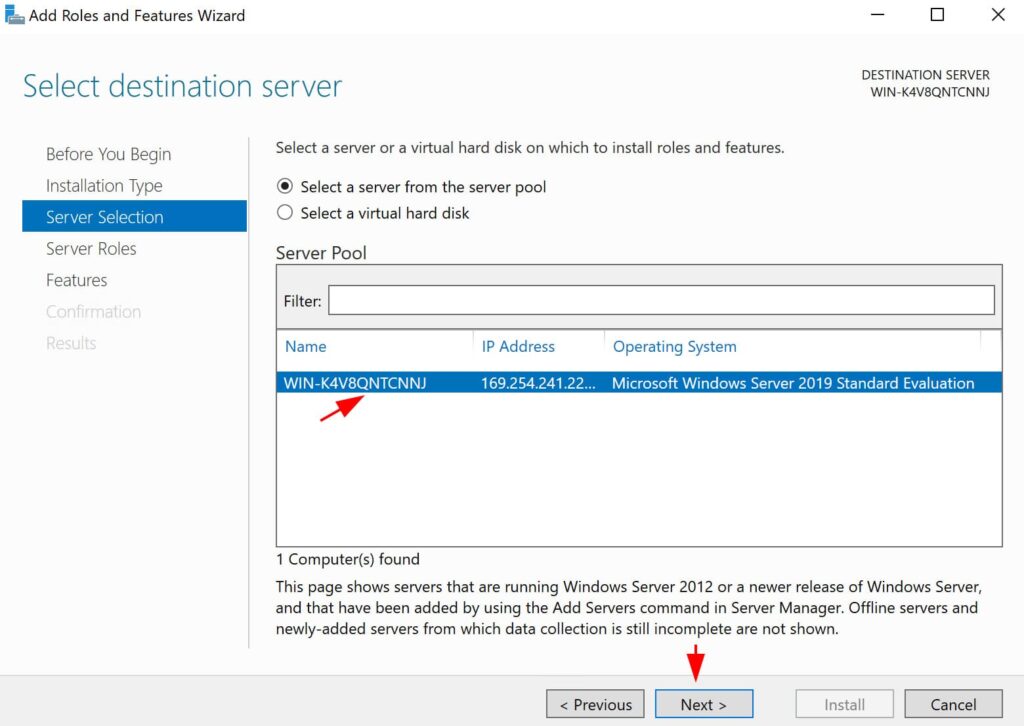
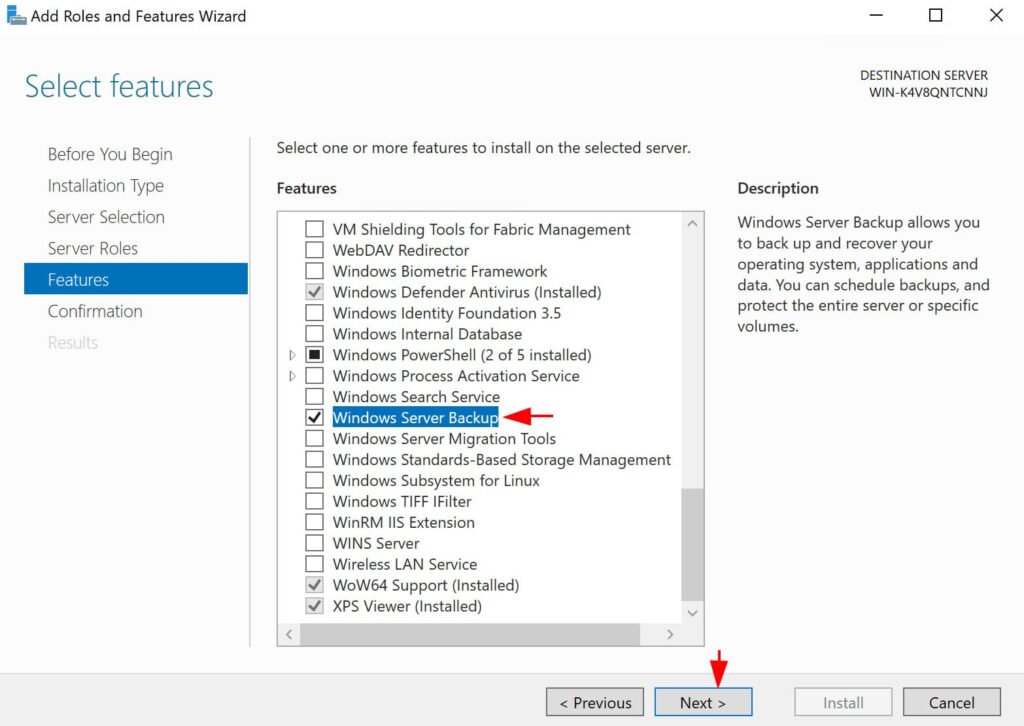
4. Leave the server roles unchanged and click Next. In the next window, select Windows Server Backup under features and click Next.
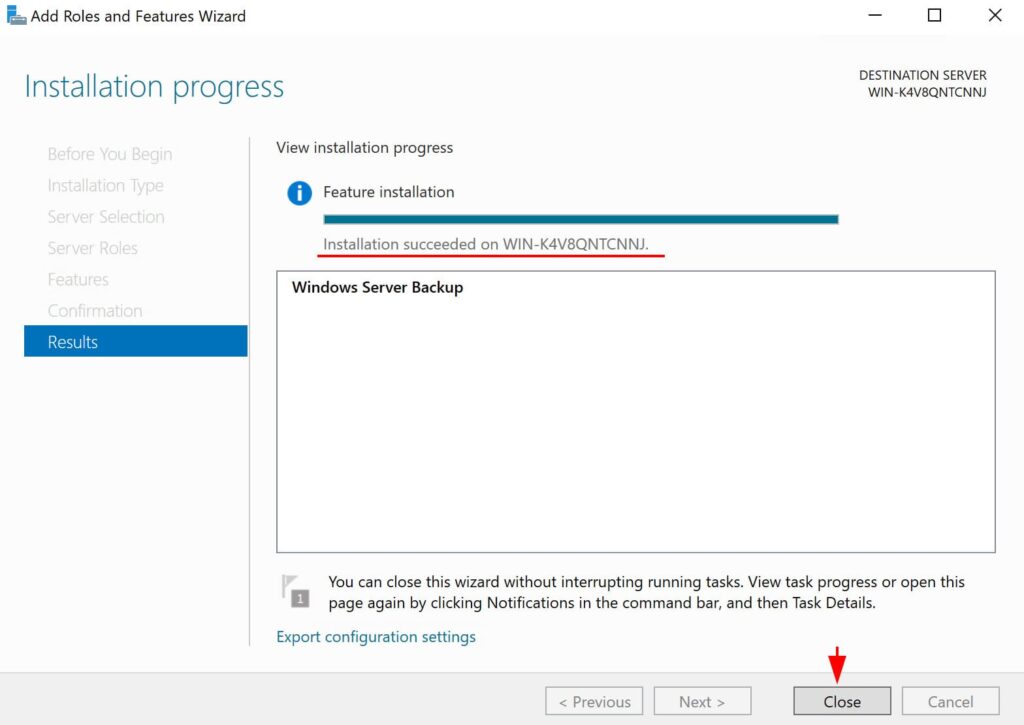
5. At the confirmation stage, click Install and wait for the process to complete.
Configuring and Creating a System Backup
1. Launch Windows Server Backup via Start -> Server Manager -> Tools -> Windows Server Backup.
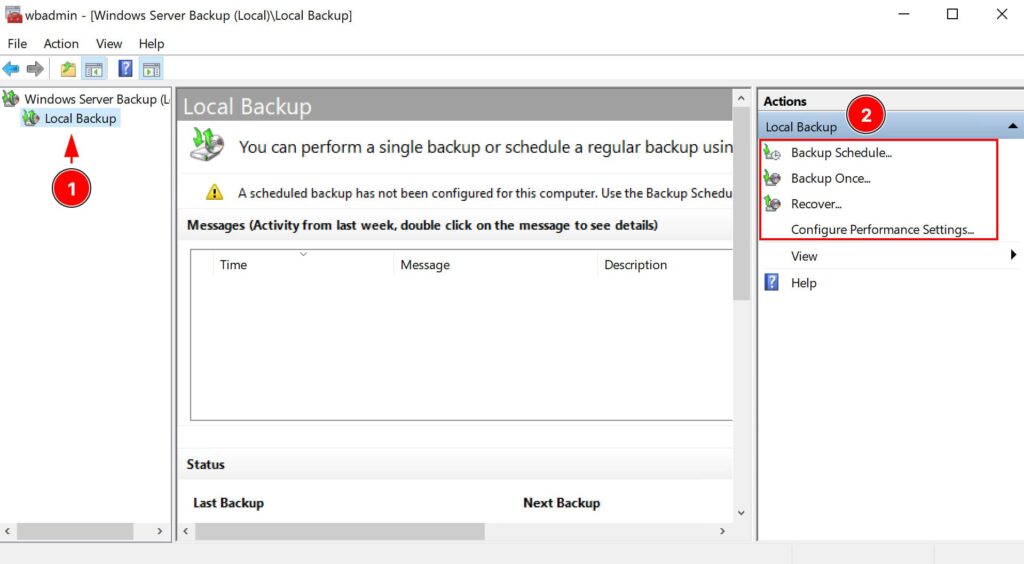
2. Under Local Backup, select Backup Once for a one-time backup or configure a schedule.
One-Time Backup
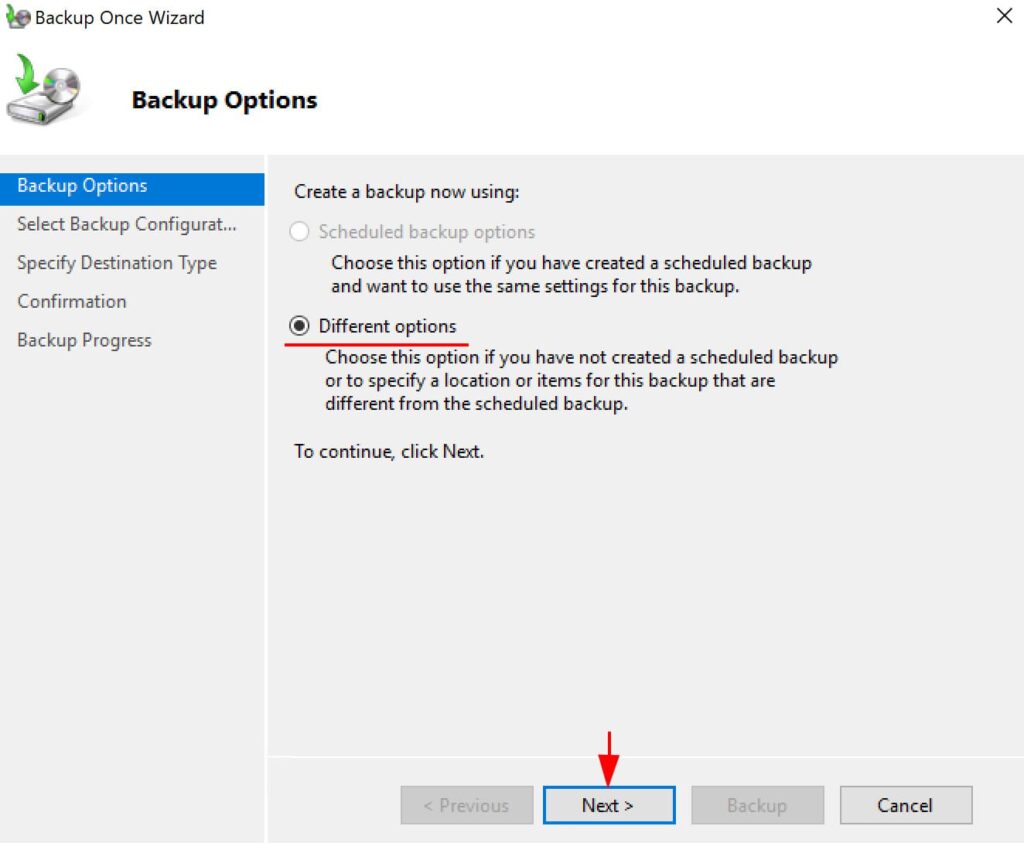
1. Click Backup Once -> Backup Options -> Different options -> Next.
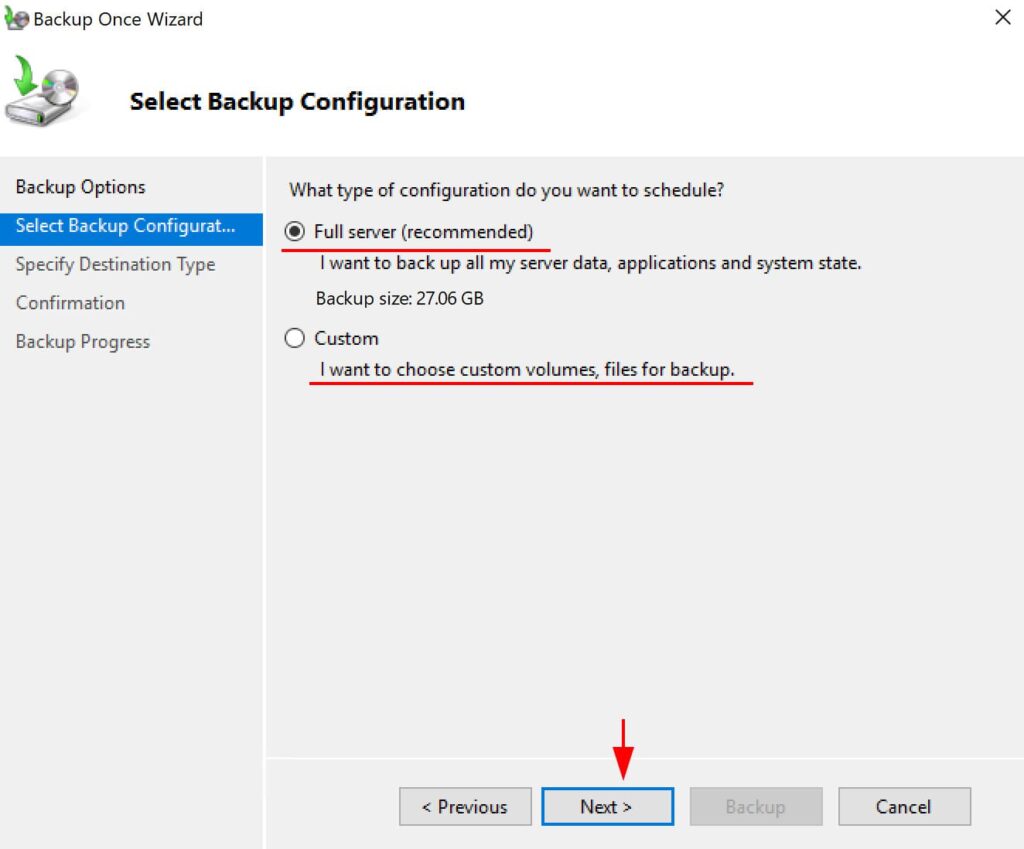
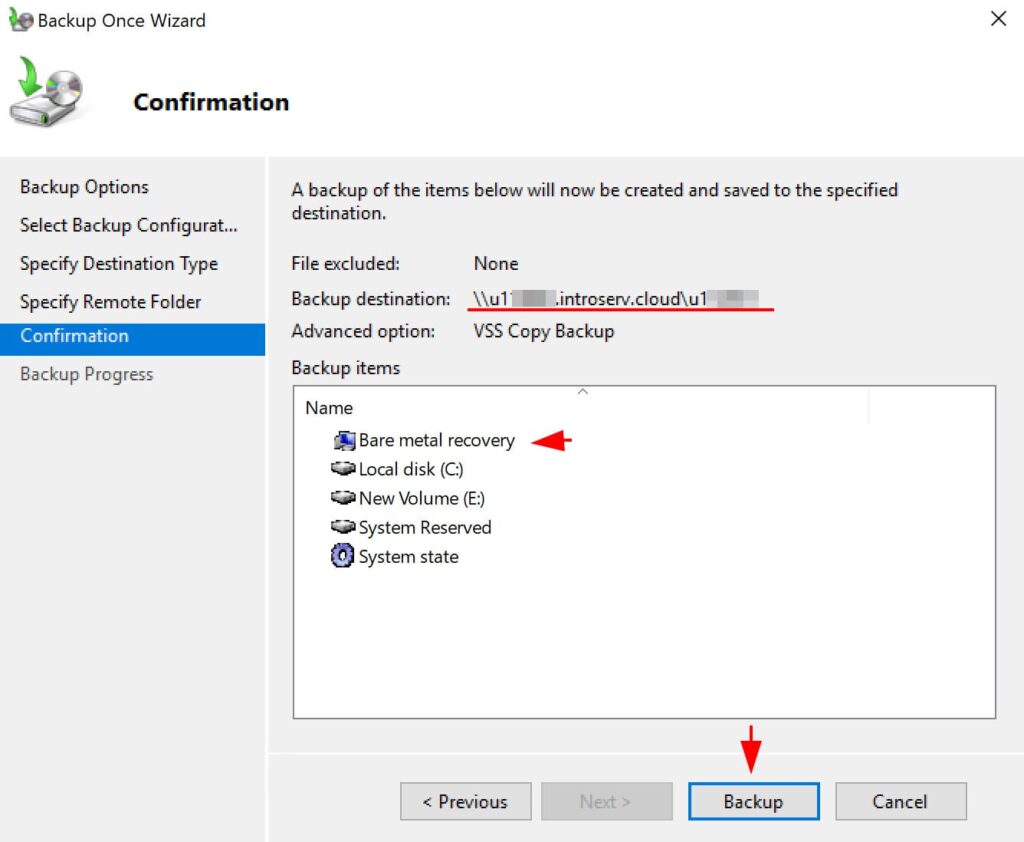
2. In the configuration section, select Full Server to create a backup of the entire system.
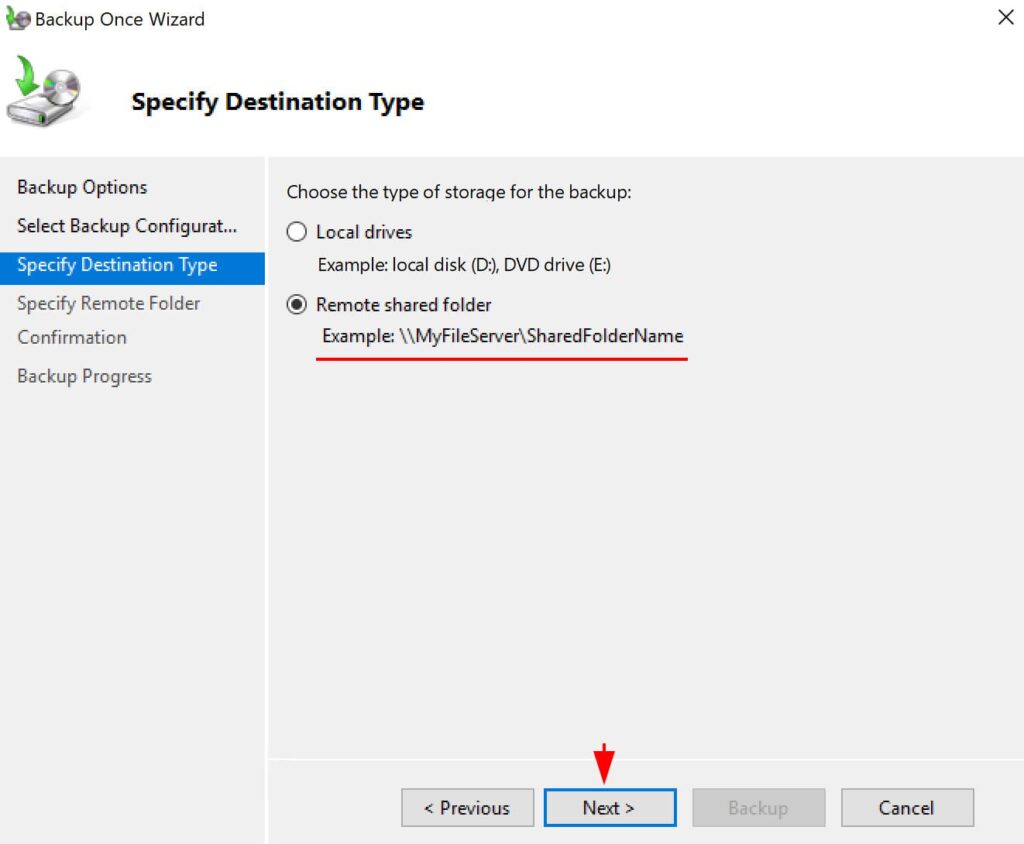
3. Specify the previously connected network drive or a local drive as the storage location. Note that this drive will be formatted and reserved for backups.
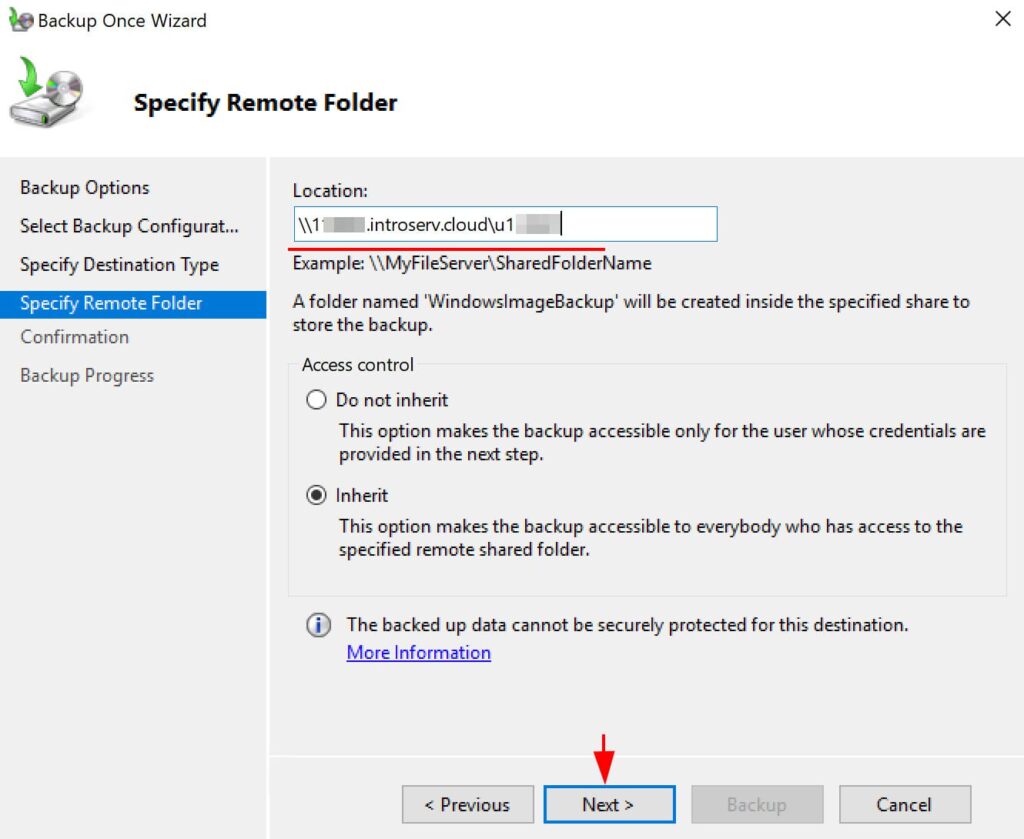
4. Enter the network storage address and click Next.
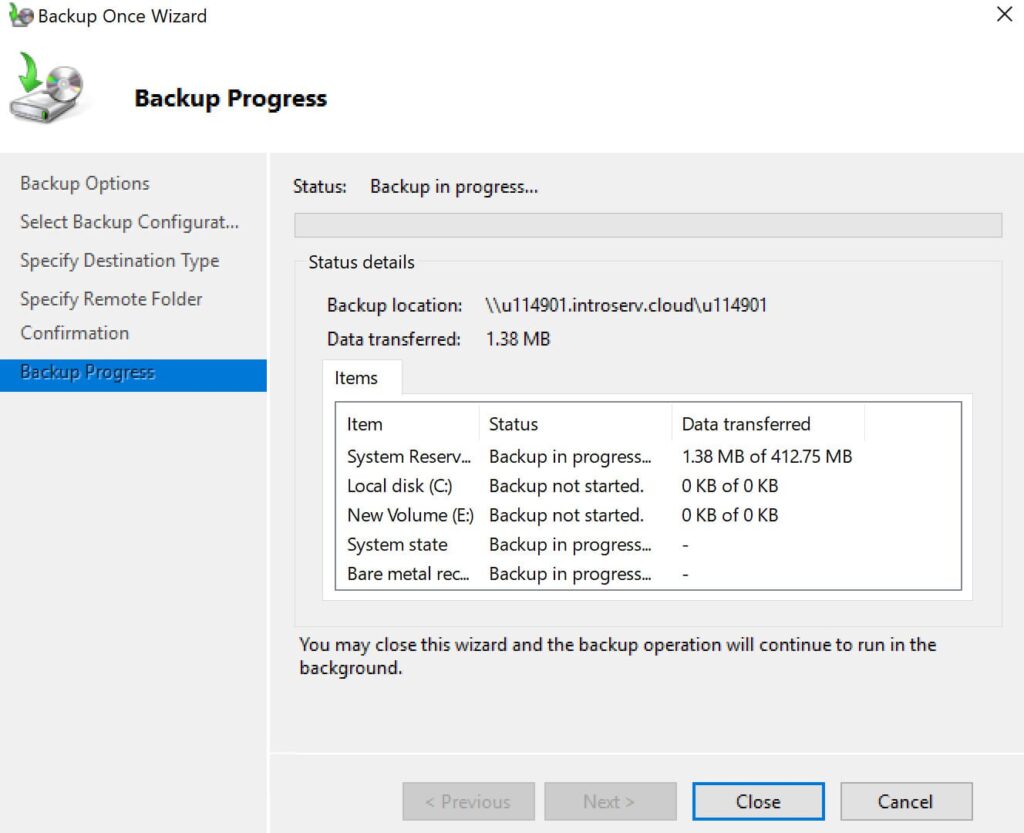
5. Click Backup and wait for the process to complete.
Once completed, a folder named WindowsImageBackup will appear in the network storage, containing the system backup.
Scheduled Backups
Scheduled backups are configured similarly but include selecting the time and frequency of backups. Windows Server Backup will automatically create backups at the specified times.
This guide will help you securely back up your server data using the built-in Windows Server Backup tool.


