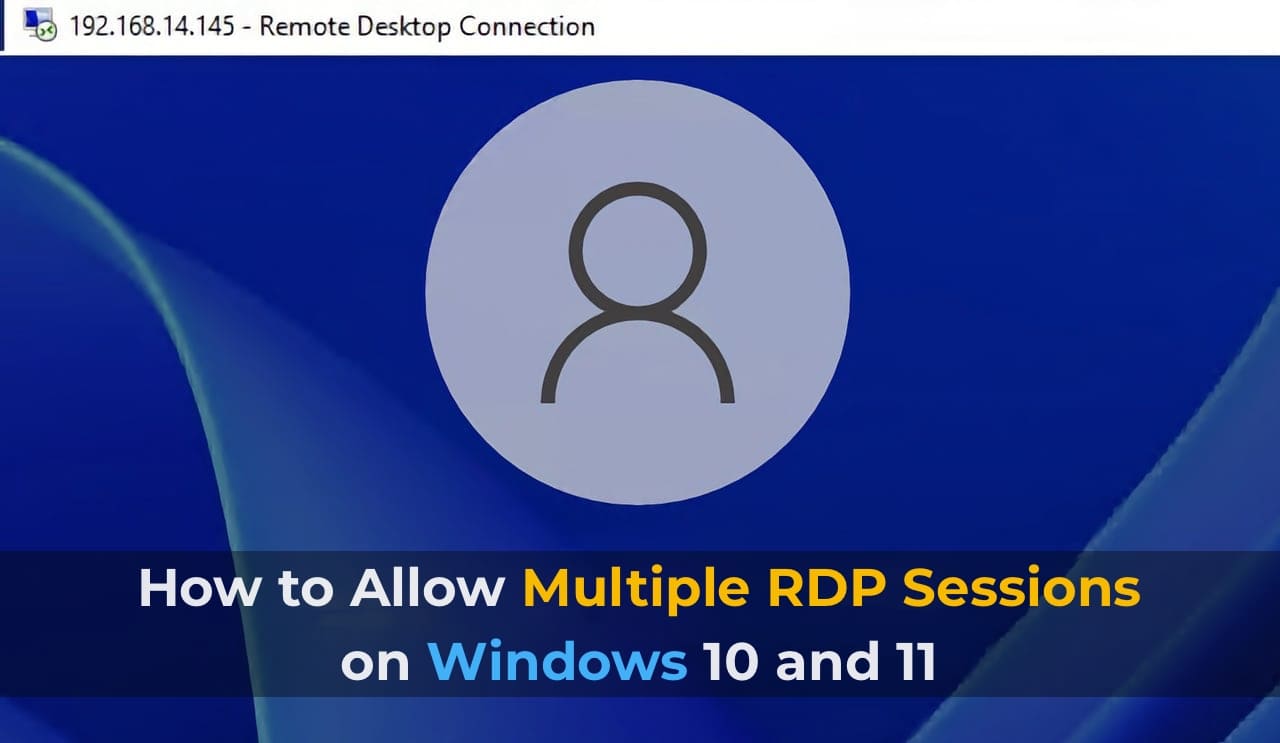
In this article, we will explain how to install multiple RDP sessions in Windows 11 and Windows 10, as well as explore methods to bypass the limitation on the number of simultaneous connections.
Remote users can connect to their computers with Windows 10 and Windows 11 operating systems through Remote Desktop Services (RDP). To do this, simply enable RDP in the device settings and connect to the computer using any remote desktop client, such as MSTSC. However, there is a limitation on the number of simultaneous RDP sessions – only one remote user can be active at a time. If you attempt to open a second session, a warning will appear requesting you to disconnect the first user’s session.
Setting Up RDP Service on Windows 10
RDP only works on Windows 10/11 Pro versions, as the necessary system components are disabled in the Home version. Additionally, you will need to protect your account with a password.
Enabling Access and Adding Users
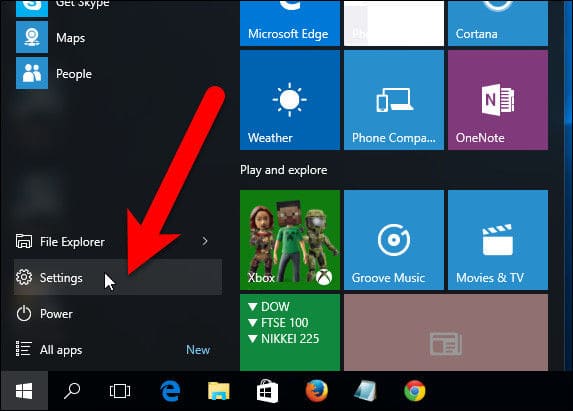
– Open “Start” and click on the “Settings” icon.
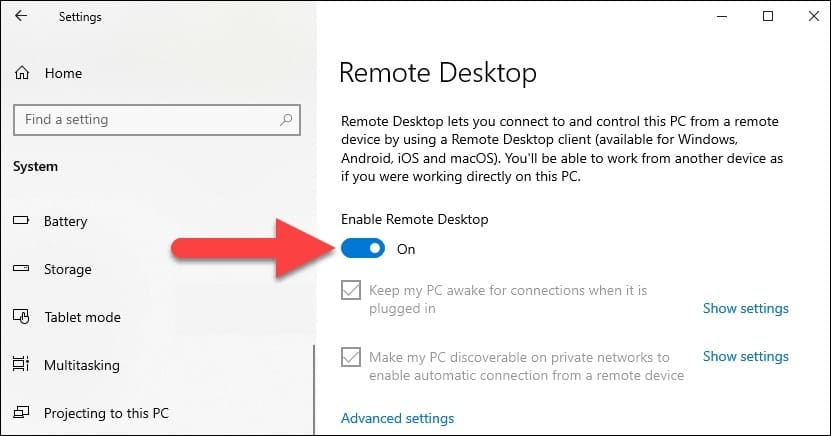
– Go to the “Remote Desktop” settings and enable it.
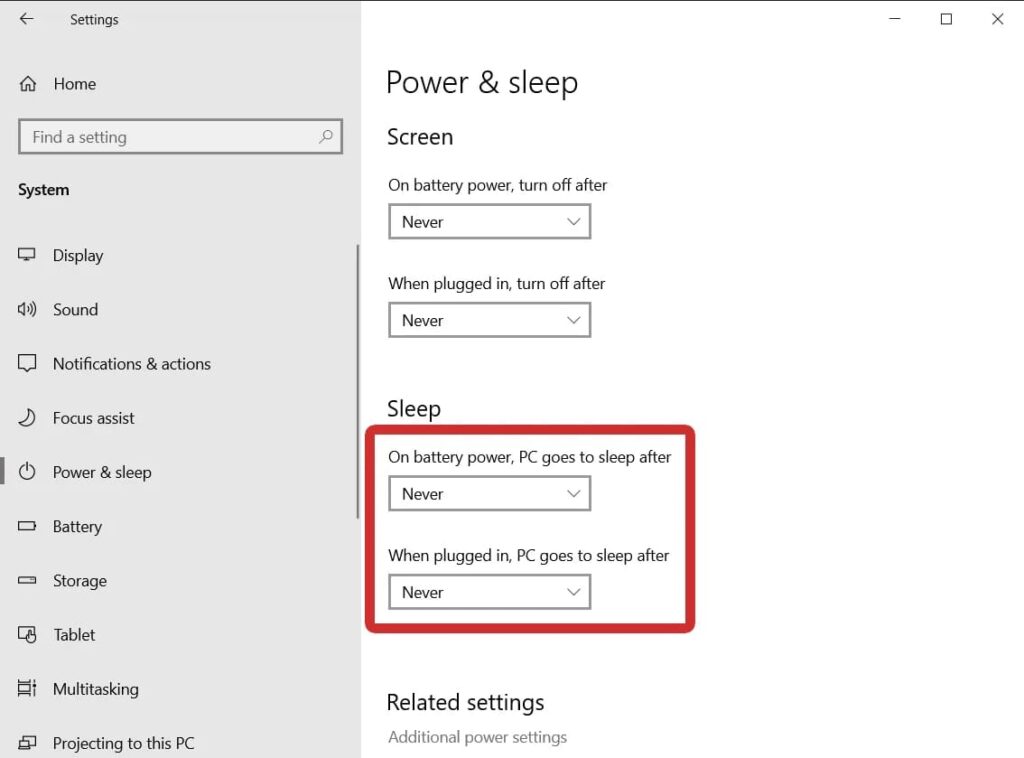
– Go to the “Power” settings and disable the computer’s sleep mode.
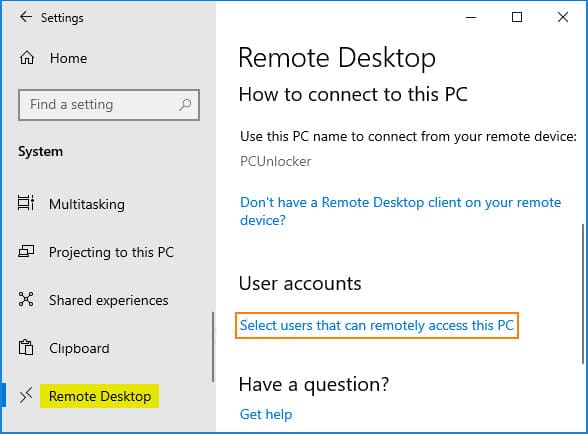
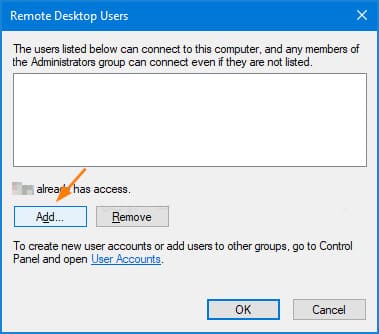
– Add users who will be granted RDP access. By default, access is granted to the computer administrator.

Limiting the Number of Simultaneous Connections
If you try to open a second RDP session, a warning will appear requesting you to disconnect the first user’s session.
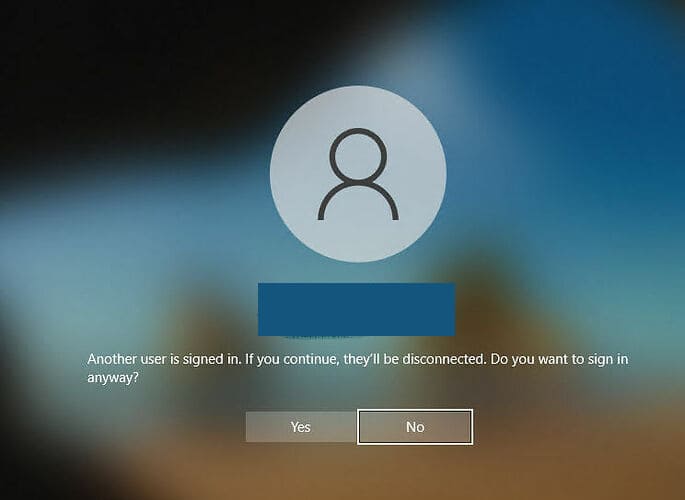
In reality, the number of simultaneous RDP connections in Windows is limited by the license, not by technical aspects. This limitation prevents creating a full-fledged terminal RDP server on a computer with Windows 10 or 11. Microsoft recommends using a Windows Server license and RDS CALs to create a remote desktop session server.
However, technically, any Windows version with sufficient RAM can support multiple remote users. The average memory consumption per session is about 200 MB (excluding running applications). Thus, the maximum number of sessions is theoretically limited only by the computer’s resources.
Methods to Allow Simultaneous RDP Connections in Windows 10/11:
– Using RDP Wrapper
– Fixing the termsrv.dll library
RDP Wrapper
RDP Wrapper is an open-source project that allows multiple RDP sessions in Windows 10 without the need to replace the termsrv.dll file. This tool acts as a bridge between the Service Control Manager (SCM) and Remote Desktop Services, enabling not only multiple simultaneous RDP sessions but also creating an RDP server on Windows Home.
RDP Wrapper does not modify the termsrv.dll file; it simply loads it with altered parameters, making it resilient to Windows updates.
You can download RDP Wrapper from the GitHub repository.
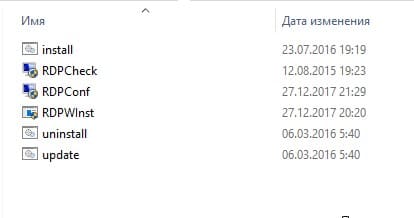
The RDPWrap-v1.6.2.zip archive contains several files:
RDPWinst.exe — RDP Wrapper installer
RDPConf.exe — RDP Wrapper configuration tool
RDPCheck.exe — RDP Checker utility (Local RDP Checker)
Install.bat, uninstall.bat, update.bat — batch files for installing, uninstalling, and updating the wrapper
To install the wrapper, you need to run the Install.bat file as an administrator.
RDPWrap Doesn’t Work in Windows 10
After completing the installation, launch RDPConfig.exe. Most likely, immediately after installation, the tool will show that the RDP wrapper is running (installed, running) but not working. Pay attention to the red warning [not supported]. It indicates that this version of Windows 10 (version 10.0.19041.1387) is not supported by the RDP wrapper.
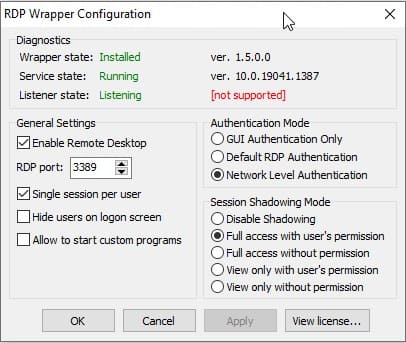
Each version of Windows 10/11 should have a description in the rdpwrap.ini configuration file. The current configuration file may not have the necessary settings for your Windows build.
You can download the current version of the rdpwrap.ini file here: https://raw.githubusercontent.com/sebaxakerhtc/rdpwrap.ini/master/rdpwrap.ini
Copy the new rdpwrap.ini file to the C:\Program Files\RDP Wrapper\rdpwrap.ini directory and restart the TermService service. In some cases, this may not work because the original file is restored when the service restarts. To solve this problem, you can use the rdpwrap.ini automatic update file.
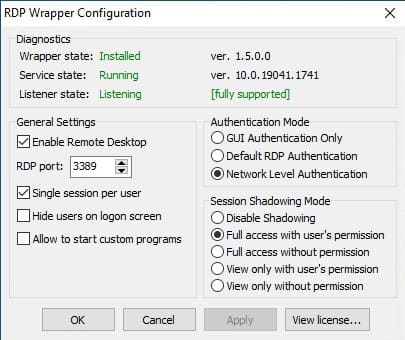
Copy the RDPWinst.exe, RDPConf.exe, RDPCheck.exe, and autoupdate.bat files to the C:\Program Files\RDP Wrapper\ directory and run autoupdate.bat. After that, RDPConfig.exe should indicate that everything is working correctly.
Updating Group Policy Settings
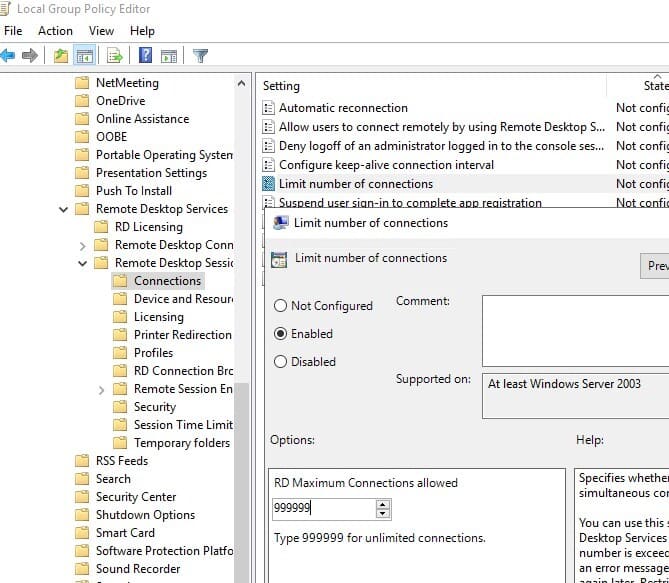
The number of connections to the computer may be limited by group policy rules. In this case, you can use the Local Group Policy Editor (gpedit.msc) to enable the policy “Limit number of connections” in the section Computer Configuration -> Administrative Templates -> Windows Components -> Remote Desktop Services -> Remote Desktop Session Host -> Connections -> Limit number of connections. Change the value to 999999.
Modifying Termsrv.dll
The second method is to modify the termsrv.dll file. This method is more labor-intensive and requires stopping the Remote Desktop Services (TermService), as well as making changes to the file using a hex editor (for example, WinHex).
First, stop the TermService:
Net stop TermService
To change the file owner from TrustedInstaller to the local Administrators group, execute the command:
takeown /F c:\Windows\System32\termsrv.dll /A
Now grant the local Administrators group full control permissions over the termsrv.dll file using icacls.exe:
icacls c:\Windows\System32\termsrv.dll /grant Администраторы:F
Open the termsrv.dll file using any hex editor (for example, WinHex). Depending on your Windows build, you need to find and replace the string according to the table below:
| Windows version | Search bar |
|---|---|
| Windows 11 RTM (21H2 – 22000.258) | 39 81 3C 06 00 00 0F 84 4F 68 01 00 |
| Windows 10 x64 22H2 - 19045.2604 | 39 81 3C 06 00 00 0F 84 85 45 01 00 |
| Windows 10 x64 22H2 - 19045.2486 | 39 81 3C 06 00 00 0F 84 DB 61 01 00 |
| Windows 10 x64 21H2 | 39 81 3C 06 00 00 0F 84 85 45 01 00 |
| Windows 10 x64 21H1 | 39 81 3C 06 00 00 0F 84 2B 5F 01 00 |
| Windows 10 x64 20H2 | 39 81 3C 06 00 00 0F 84 21 68 01 00 |
| Windows 10 x64 2004 | 39 81 3C 06 00 00 0F 84 D9 51 01 00 |
| Windows 10 x64 1909 | 39 81 3C 06 00 00 0F 84 5D 61 01 00 |
| Windows 10 x64 1903 | 39 81 3C 06 00 00 0F 84 5D 61 01 00 |
| Windows 10 x64 1809 | 39 81 3C 06 00 00 0F 84 3B 2B 01 00 |
| Windows 10 x64 1803 | 8B 99 3C 06 00 00 8B B9 38 06 00 00 |
| Windows 10 x64 1709 | 39 81 3C 06 00 00 0F 84 B1 7D 02 00 |
Replacement string:
B8 00 01 00 00 89 81 38 06 00 00 90
You can find this table on the internet. If the specified sequence is not found in your file, try searching for the beginning part of the sequence: 39 81 3C 06 00 00 0F 84, the last 4 bytes may differ.
In our case, we found the sequence 39 81 3C 06 00 00 0F 84 73 55 01 00
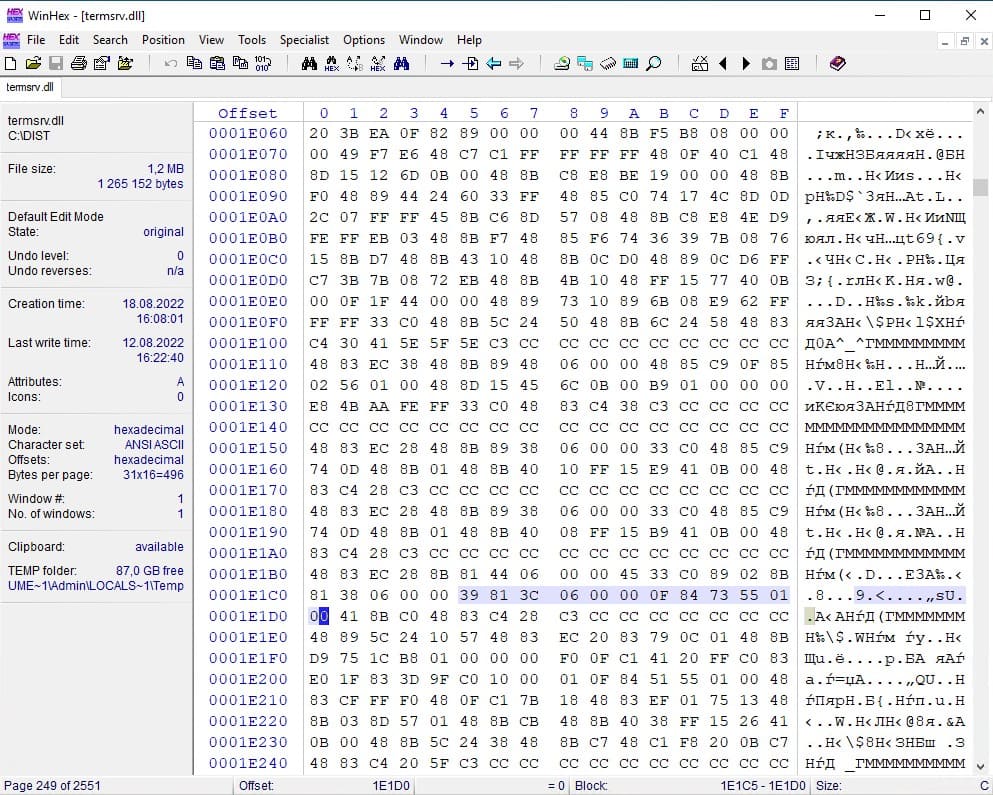
Replace with B8 00 01 00 00 89 81 38 06 00 00 90
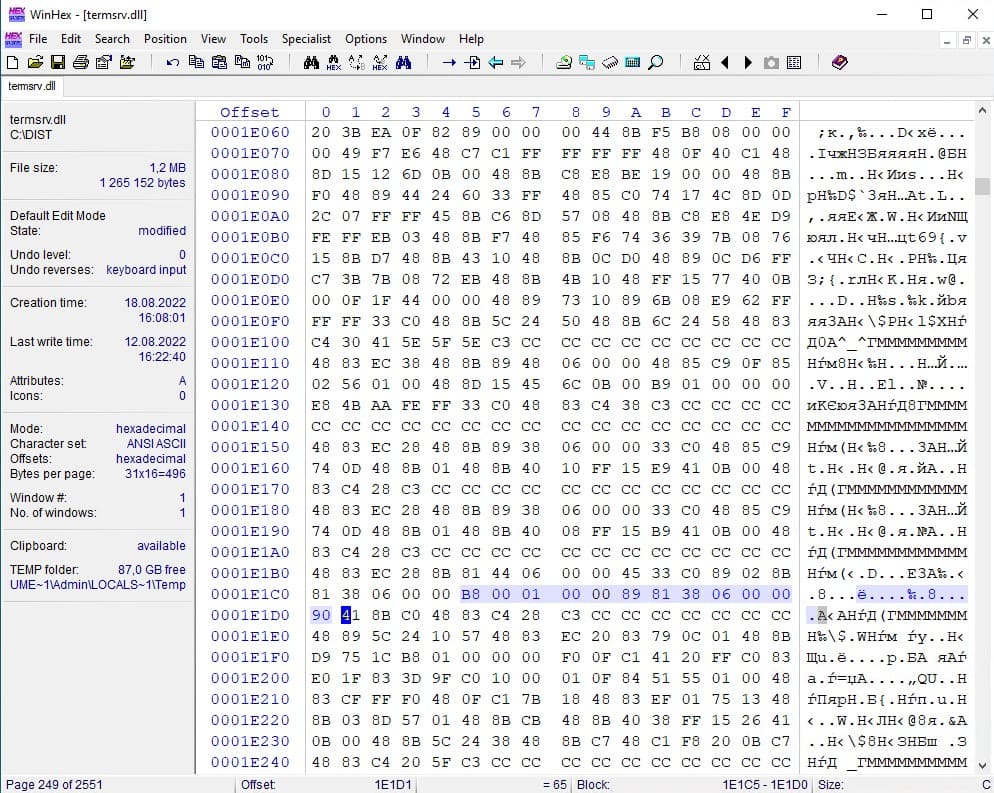
After making the changes, save the modified file and start the TermService service:
Net start TermService
Download the modified termsrv.dll file for your specific Windows 10 version from our website:
Download termsrv.dll for version – Windows 10 x64 22H2 build 19045.2486 and 19045.2604
Download termsrv.dll for version – Windows 10 x64 22H2 build 19045.3086
Save the modified file and start the TermService service. If something goes wrong, stop the service and replace the modified termsrv.dll file with the original version. In my case, modifying the file helped enable multiple RDP sessions.
Advantages and Disadvantages of the Methods
The advantage of the method with replacing termsrv.dll is that antivirus programs do not react to this file, unlike RDPWrapper, which is detected as malware by many antivirus programs. The main disadvantage is the need to manually edit the file with each Windows build update.
The method with RDP Wrapper is easier to use and does not require changing system files, but may also require configuration updates with each Windows update.

