In this article, we’ll walk through several methods to determine which version of Windows is installed on your computer. This guide applies to all versions of Windows, including Windows 7, 8 / 8.1, 10, and beyond. You can also find out the architecture of your Windows installation. This information might be needed, for example, when selecting a product key for your system.
This method is one of the simplest and is suitable for all versions of Windows. Here’s how:
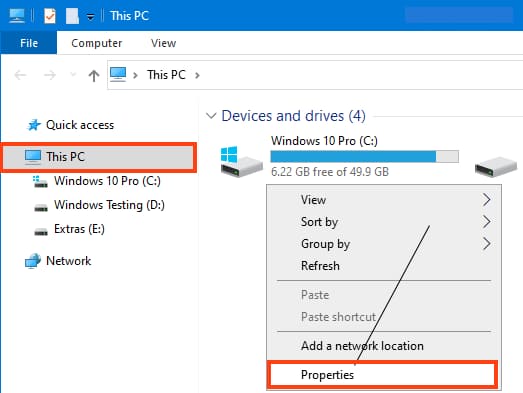
Open any folder => Look for “This PC” on the left side => Right-click on it => Properties
![]()
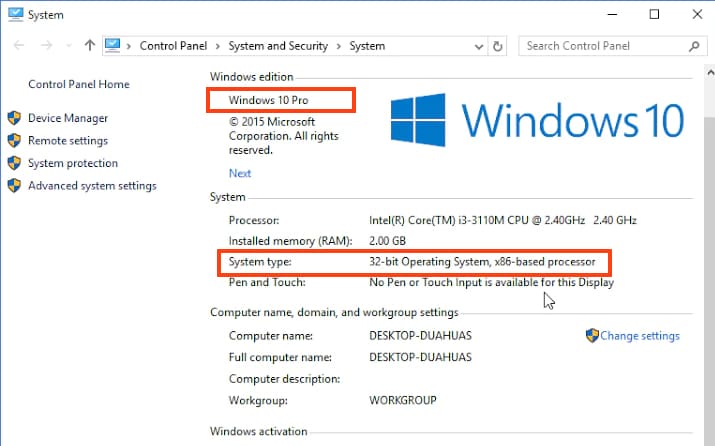
In the “System” window, you can find out the version (release) of your Windows and the system architecture.
This method is applicable for Windows 10.
Go to the Start menu => Settings

In the “Settings” window, go to “System”.

In the next window, go to “About” on the left, and you can find out the system architecture and version of Windows.

This method is suitable for all versions of Windows:
Press Win + R keys => In the “Run” window, type winver => OK
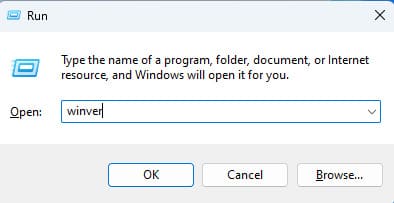
In the “About Windows” window, you can see your Windows version.
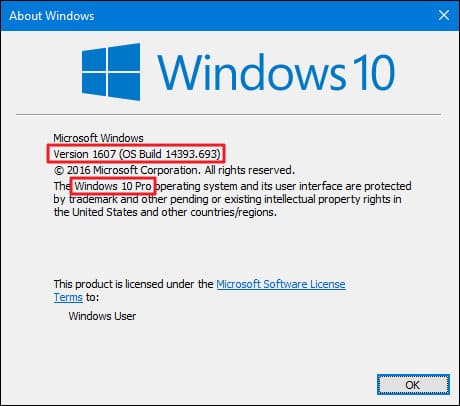
This method shows advanced parameters and is suitable for all versions of Windows.
Press Win + R keys => In the “Run” window, type CMD
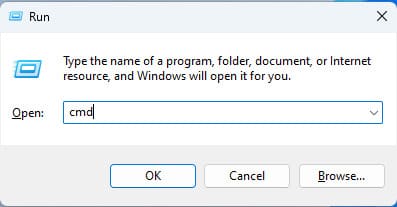
Next, the Command Prompt (terminal) will open. Type systeminfo in the input field.
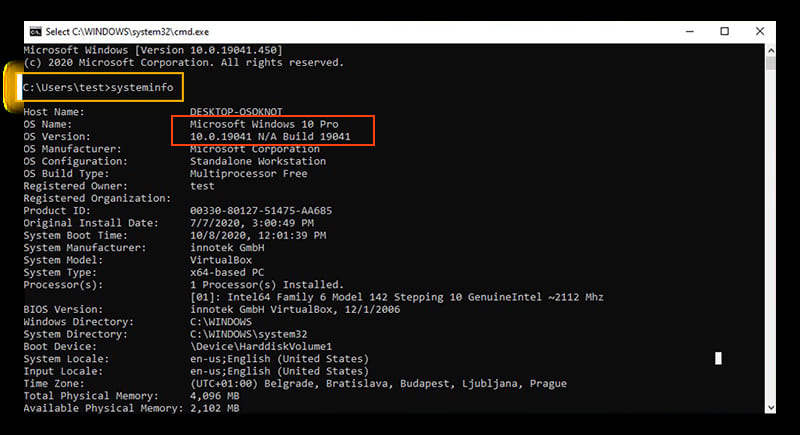
Now, in the Command Prompt window, you can see various parameters of your system, including the version of Windows.


