The iSCSI protocol (Internet Small Computer System Interface) is an implementation of the SCSI protocol over IP, allowing servers to connect to storage systems via a standard TCP/IP network without using Fibre Channel. In this article, we will discuss setting up iSCSI storage on Windows Server 2019 and using it on other servers (the setup process is similar for Windows Server 2016 and 2012 R2). Example use case: a file server requires additional storage, and we connect a virtual disk from another storage server via iSCSI over the network.
Creating and Configuring an iSCSI Target
The first step is to create an iSCSI target (server). To do this, you need to enable the iSCSI Target Server role on the server where the storage will be hosted. This can be done via the GUI or a PowerShell command.
1. Activate the iSCSI Target Server Role
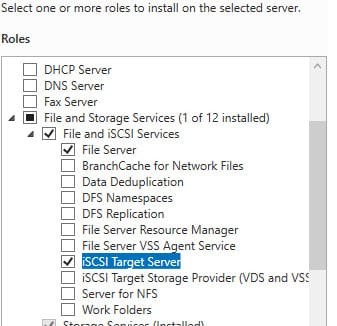
– Open Server Manager -> File and Storage Services -> File and iSCSI Services and install the iSCSI role.
– Alternatively, install it via PowerShell using the command:
Install-WindowsFeature -Name FS-iSCSITarget-Server
2. Creating an iSCSI Virtual Disk
– In Server Manager, select File and Storage Services -> iSCSI and launch the New iSCSI Virtual Disk Wizard.

– Choose the physical disk where the virtual iSCSI disk will be created, specify its name, and select the type (Fixed Size, Dynamically expanding, or Differencing).
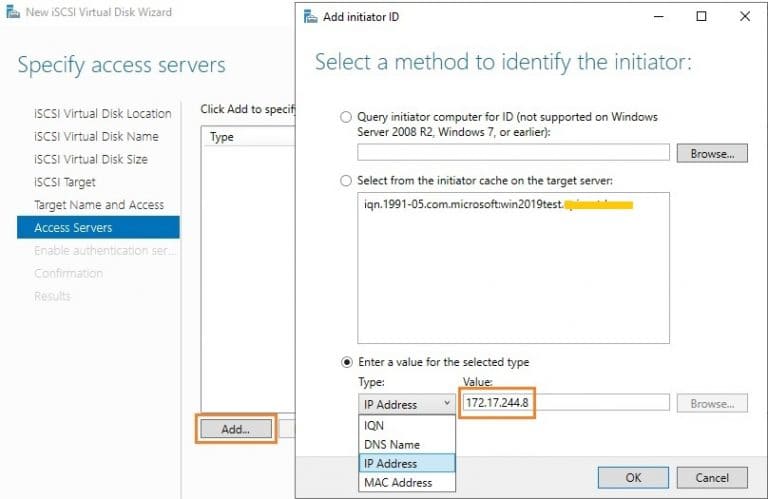
– When selecting initiators (servers connecting to the target), choose one of the identification methods: IP address, IQN, DNS Name, or MAC Address. We will use the IP address option.
– If needed, configure authentication via CHAP: enter a username and a password (at least 12 characters).
3. Example of Creating an iSCSI Disk via PowerShell
– Create a virtual disk with a size of 200 GB:
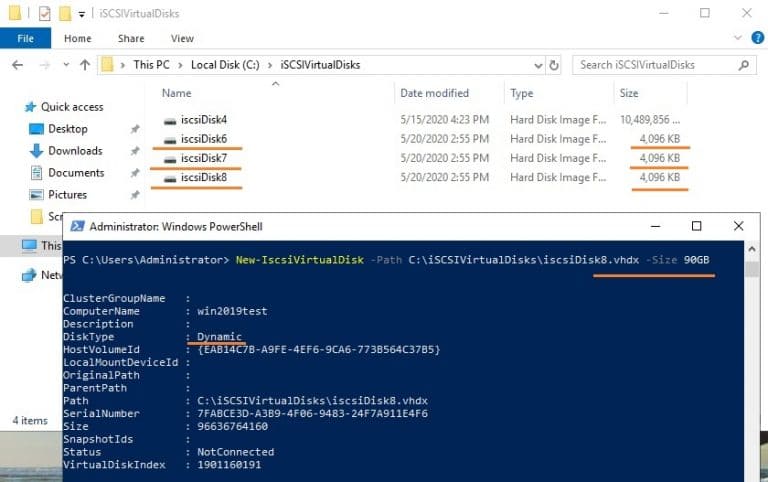
New-IscsiVirtualDisk -Path C:\iSCSIVirtualDisks\iscsiDisk2.vhdx -Size 200GB
By default, a dynamically expanding disk with a block size of 4,096 KB is created, regardless of the size specified in the Size parameter. The dynamic disk will expand as needed.
– To create a fixed-size disk:
New-IscsiVirtualDisk -Path C:\iSCSIVirtualDisks\iscsiDisk2.vhdx -Size 200GB -UseFixed
4. Configuring the Target and Granting Access
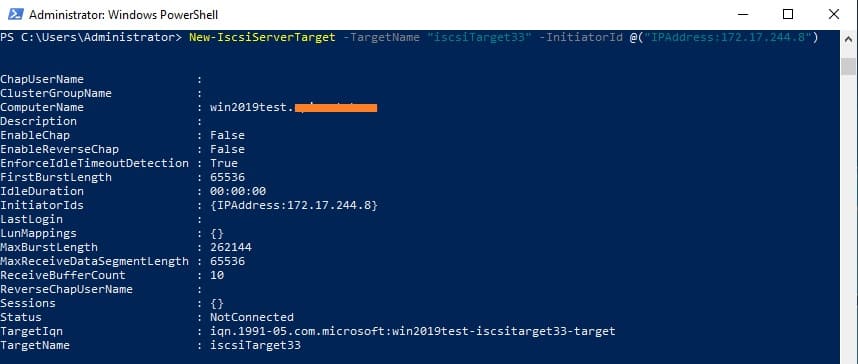
– Assign a name to the target and allow access from a specific IP address:
New-IscsiServerTarget -TargetName "iscsiTarget33" -InitiatorId @("IPAddress:172.17.244.8")
– Alternatively, use an IQN name for connection:
New-IscsiServerTarget -TargetName iscsiTarget33 -InitiatorIds "IQN: 1991-05.com.microsoft:win2019test.ddd.com"
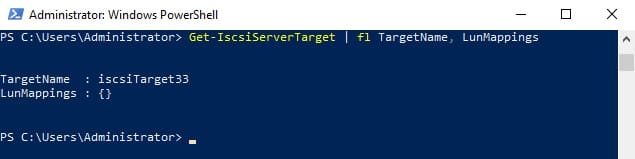
5. Verifying the Result
– Retrieve the list of targets and LUN mappings:
Get-IscsiServerTarget | fl TargetName, LunMappings
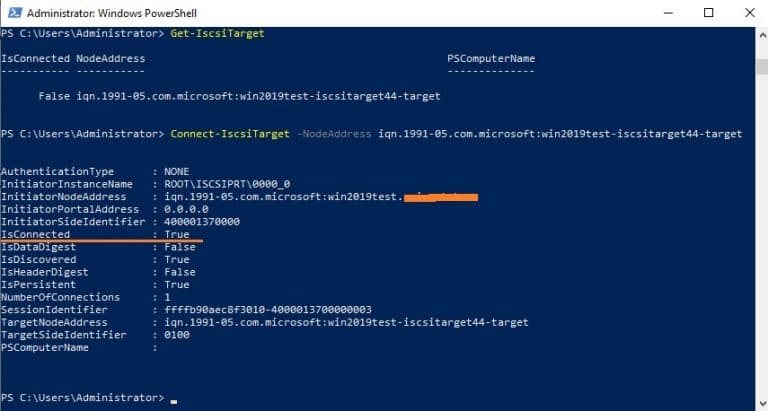
– Obtain the full target name using the command:
Get-IscsiTarget
– Connect to the target:
Connect-IscsiTarget -NodeAddress iqn.1991-05.com.microsoft:win2019test-iscsitarget33-target
Configuring the iSCSI Initiator on Windows Server
The next step is to connect to the created iSCSI disk from a second server acting as the initiator.
1. Launching the iSCSI Initiator
– Open Control Panel -> iSCSI Initiator or run the command iscsicpl.exe.
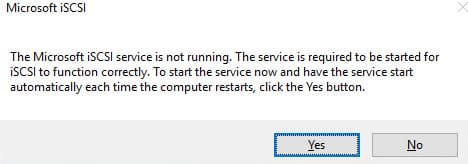
– Ensure the Microsoft iSCSI Initiator Service is set to automatic startup:
Set-Service -Name MSiSCSI -StartupType Automatic
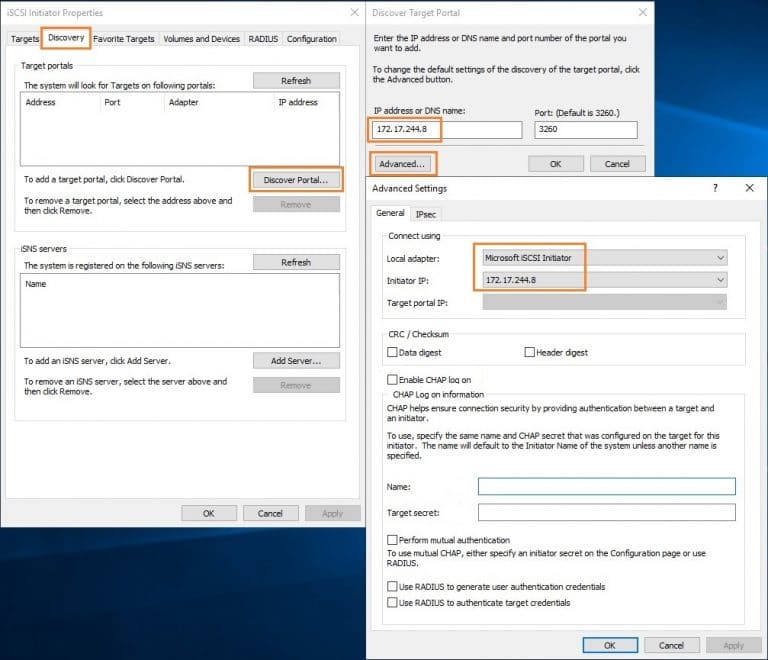
2. Configuring the Connection
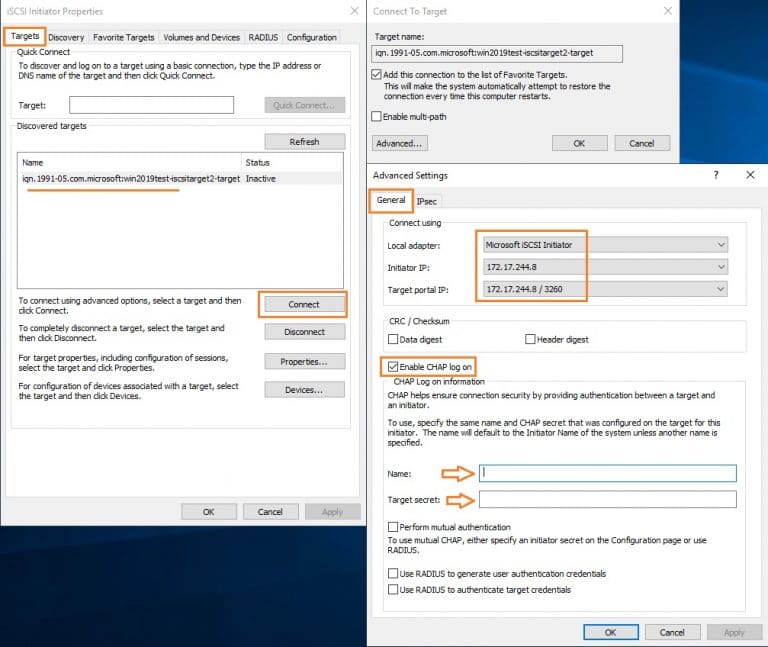
– Go to the Discovery tab, click Discover Portal, and enter the IP address of the iSCSI target.
– Click Advanced and modify the default values in the dropdown menus: Local Adapter -> Microsoft iSCSI Initiator, Initiator IP -> 172.17.244.8.
– To connect to the iSCSI storage, open ports 860 and 3260 in Windows Firewall.
3. Connecting to the Target
– Go to the Targets tab, where a new connection will appear. To enable it, click Connect -> Advanced, select values from the dropdown fields, check the Enable CHAP log on box, and enter the username and a 12-character password.
4. Initializing the iSCSI Disk
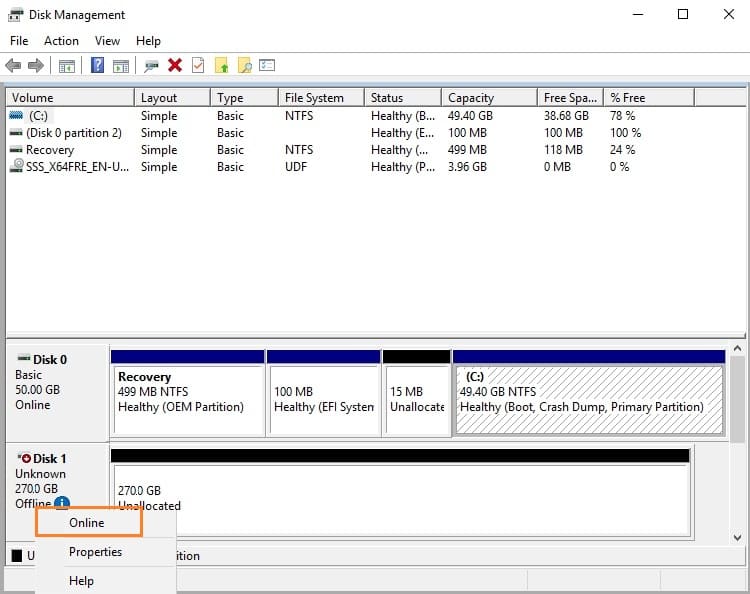
– After connecting, the disk will be in an Offline state. Open the Disk Management console, select the new disk, set it to Online, and then perform Initialize Disk.
– Create partitions on the disk and format it in NTFS.
For quick initialization and formatting of the new disk, use the following one-line PowerShell command:
Get-Disk | Where-Object PartitionStyle -eq 'RAW' | Initialize-Disk -PartitionStyle MBR -PassThru | New-Partition -AssignDriveLetter -UseMaximumSize | Format-Volume -FileSystem NTFS -Confirm:$false
Important: iSCSI disks do not support the ReFS file system.
Now, this virtual disk, connected from another server via the iSCSI protocol, can be used as a locally attached disk.
5. Connecting an iSCSI Disk via PowerShell
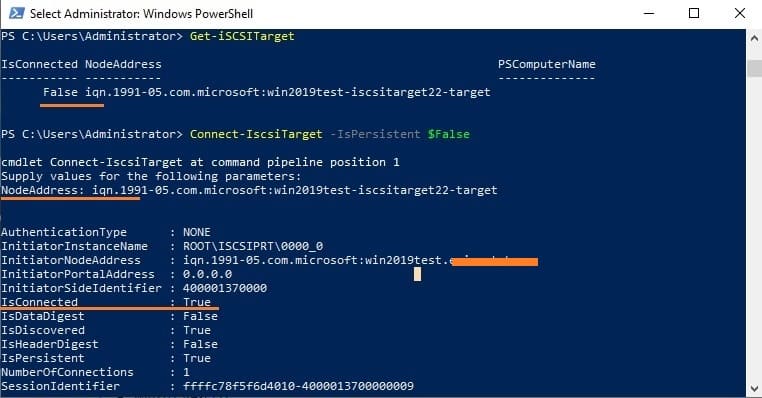
You can also connect an iSCSI disk on the initiator using PowerShell. To retrieve the IQN of the target, run:
Get-iSCSITarget
To connect, use the command:
Connect-IscsiTarget –IsPersistent $False
If CHAP authentication is used, the connection command will be:
Get-iScsiTarget | Connect-iScsitarget –AuthenticationType ONEWAYCHAP –ChapUserName-ChapSecret
For high availability and load balancing, you can configure multiple redundant network components (network adapters, switches) and use the MPIO (Multipath I/O) module.
Configuring and connecting iSCSI disks in Windows Server is a simple and flexible solution for expanding storage or creating fault-tolerant clusters. Using iSCSI, you can connect disks over the network as local storage or network resources, enabling efficient data management.